And another Sewalong draws to a close...
But don't forget that you could be in with a chance of winning this totally rad Janome overlocker! You have until next Friday, 16th May to finish your Flora's and submit them to us - either email your pics (nice and high res please!) to help@byhandlondon.com, or share on our Facebook page. We will also be scouring our various social media portals for the hashtags #florasewalong and #floracomp. We'll then gather them all up and put up a great big (hopefully!) album on Facebook for y'all to vote on.

But for now, let's get back to the matter at hand and finish this bad boy.
Today we will be:
- Closing the back seam of a full lining (optional)
- Hemming
- Hand stitching the bodice lining (tank bodice Variation 2 only)
- Making bra stays
*To be taken to all the posts in the Flora Dress Sewalong, please click here*
Closing the back seam of a full lining (optional)
If you've opted for a full lining (as opposed to just the given bodice lining) as we've done with our floral tank bodice baby, you'll need to close the back seam of the skirt lining now that you've inserted the zipper and closed the back seam of your shell, as we did in the last post.
Turn your dress inside out, so you have clear access to the lining. Now with right sides together, pin the lining at the waistline and again at the notch (which indicates more or less where the zipper ends). It is from that notched point and down to the hem that you need to stitch in order to close the skirt lining's back seam, but still leaving enough space open below the waistline to enable you to get in and out of your dress.

Once that's all stitched (5/8" or 15mm seam allowance of course!), finish the excess and press open. You're now ready to hem.
Hemming your Flora
The very first thing to consider before you hem your Flora Dress, is the fact that we're dealing with a curved hem here. Seeing as some of the fabric fibres have been cut on the straight and some on the bias, they will "drop" differently, possibly resulting in a wonky hemline. In order to prevent this, all you need to do is just give the skirt a little time to do it's thing naturally - leave your unhemmed dress on a mannequin or hanger overnight and trust gravity to take care of the rest.

If you've ever made a circle skirt, you'll know that it can be kind of a pain to hem a curve. That's basically just because you have a longer curve to ease in as you press the raw edge up into the skirt. There are, of course, ways around this, and we've compiled a little tutorial outlining and demonstrating our favourite techniques for hemming a curve. If you have made the dipped hem skirt variation (with no skirt lining), you'll need to bear in mind that the wrong side of your fabric at the back of your skirt will be on show, so when it comes to hems - think pretty! The tape hem is our go-to for any hem that might be subject to inspection.
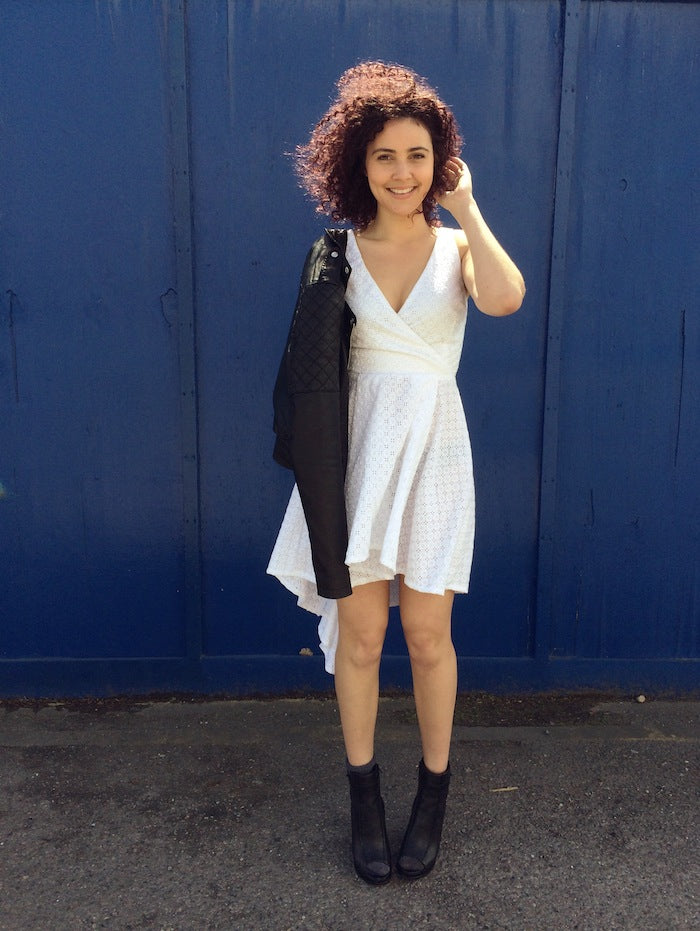
To hem the skirt lining, and the skirt of our white broderie faux-wrap Flora, we went for the lightning quick, RTW-stylee hem du jour - overlocked/serged and pressed up just the once and stitched into place. The overlocker is a great friend to the curved hem as it gently eases in that curve, making it much easier to press up and stitch.

For our floral tank bodice Flora, that buttery soft beauty that is this sewalong's pièce de résistance - not that we play favourites here or anything - we agreed that she deserved a perfect, nay - a flawless hem. One so effortless that it seemed as though it had never had a raw edge in the first place. The only way to achieve this, is with the invisible blind slip stitch. YUM. For the perfect hand stitched hem, we first run a line of basting stitches (just a medium-wide straight machine stitch) 1/4" from the raw edge:

We're going to use that line of stitching as our guide, pressing first along that stitched line, then in again and pinning the hem into place:

Now thread up a hand sewing needle and make yourself comfortable - turn the telly on, pour yourself a glass of something - this is going to take a while. For the impatient among you, just see this as a form of meditation! For a more in depth demonstration of the blind slip stitch, head to our tutorial here.

If you're making the faux-wrap Flora Variation 1, you should be all done! Now take your new dress out for a drink, or keep scrolling down for how to add bra stays to your bodice...

Finishing the lining of your tank bodice
Variation 2ers, you should now have something that is excitingly close to being finished! All that remains to be done is to neatly secure your lining to the shell along the waistline and down each length of zipper tape.
If you've fully lined your dress, as we've done, there's no need to secure your lining at the waistline, you'll just be hand stitching your lining to the zipper tape.
Press the seam allowance at the centre back and waistline of your lining in, and pin it to the shell. Make sure you don't get too close to the zipper teeth or else your zipper will end up getting stuck on the hand stitches.


Now stitch into place by hand with the same blind slip stitch technique that we used for the hem.
And there you have it! Robert is indeed your father's brother. You could very happily call it a day at this point, and we wouldn't blame you if you did. Orrr, you could read on...
Making bra stays
One of the things that I love about beautifully handmade vintage dresses is the extra surprise details - and I'm not talking embellishments or fussy trims, I'm talking the practical little wonders that transform the actual wearing experience. It's no good wearing a dress that looks delightful if you're constantly yanking down the hem, rearranging your bosom or pulling up the shoulders. The wearing of a beautiful dress should be as effortless and graceful as the dress itself.
Probably my favourite practical surprise detail is the bra stay. So little, so discreet, so effective, so ladylike. There's a time and a place for bra straps on show, and this particular Flora Dress is not one of them.
You will need:
- The narrowest twill tape you can find - half a metre will be more than enough
- Some teeny tiny sew-in poppers
- Needle & thread

We're going to make four little bra stays - one for each end of your shoulder straps, or if you've made the faux-wrap Flora you'll be placing your stays each side of your bodice front and back, just before the shoulder straps become armholes. We basically just need to place the stays strategically so that they will hold your bra straps securely against the inside of your dress and out of sight.
Step 1
Start by cutting four lengths of your twill tape, each 1 1/2" long.
Take one length, fold on end in by 1/4" and hand sew one half of your popper to the folded end.

Step 2
Sew the other half of your popper to the base of your strap on the inside of your dress, being careful not to let your stitches show through to the right side.

Step 4
Pop the popper shut so that the twill tape is lying horizontally across the strap, then fold the loose end of the tape in and pin into place ready to be stitched (infuriatingly, I accidentally deleted the picture of this step... Arrrrgggg!).
Step 5
With a couple of discreet little hand stitches, sew the loose end of the tape to the strap like so:

So that when you close it - trapping your bra strap inside - it looks like this:

Step 6
Repeat this for the remaining three bra stays.
And that's it! All finished. Finito. Terminado. Afgewerkt. Your Flora Dress is complete!


-
Elisalex de Castro Peake

Comments on this post (13)
Hi Emily, sounds like a dream dress you’ve got cooking up there! A waist stay is very simple – take a length of petersham or grosgrain ribbon and hand sew it to the inside of your dress’ waistline at key points – side seams, side front and side back etc and then hand sew either a hook and eye or snap fastening to close it around your dress, thereby taking pressure off the zip and helping to hold up a heavier skirt. I hope this helps! ~Elisalex
— Elisalex - By Hand London
Hello ladies,
I’m very late to the party here, but I’m mashing together a Kim bodice onto a Flora skirt, and just wondering if you had any tips/instructions for waistline stays? It was mentioned at the start of this sewalong and I’m sewing with a lovely but slightly heavy crepe and think waist stays might be good to stop the skirt dragging things too much, but couldn’t see any further reference to them?
Thanks!
— Emily
Hi, I’ve just got the lining hem to do, and I was going to use your tip ribbon technique. I can’t figure out whether I should do it so the ribbon ends up on the outside or the inside of the lining?
— Gracey
Hi Emma, glad to hear you found the sewalong helpful! You might struggle to lengthen the Flora skirt as it’s a full circle and anything longer than the given pattern probably won’t fit on your fabric… You could always add on any other type of skirt to the bodice however, for example a gathered skirt, pleated skirt or longer half circle skirt. Hope this helps! ~Elisalex
— Elisalex - By Hand London
Hello, I’ve just finished the flora wrap version, it’s the first dress I’ve ever made and it’s turned out really well, I found the sewalongs very helpful, thank you! I’m planing on making it again but this time daring to use nicer material, I would like the skirt to be a bit longer, do I just lengthen it on the patter? That’s probably a silly question! Cheers.
— emma Lawson
I am little confused on where the stays go on the faux wrap version. Is there a photo. Thanks!
— Dia
Just read through the whole of the sewalong and I can’t wait to get started. I love the idea of the bra stays and may even hand stitch the hem. I think it’s the attention to detail that makes this dress. Thank you.
— Karen
Ah!!!! “making bra stays” : brilliant!
— Za
Hi Amy – not cheeky at all! The white eyelet lace is from A1 fabrics on Goldhawk Road in London x
— Elisalex - By Hand London
I love the white eyelet fabric you used here. I would love to make my flora out of it, can I be cheeky and ask where you got it from?
Thanks
Xx
— Amy
glad to hear it :D I was feeling stupid for missing something :P
— Anja
Hi Anja, Thanks!! The next part of the playsuit is coming very soon… Watch this space ;)
— Elisalex - By Hand London
Amazing Flora dresses ladies! I’m terribly behind on my version (my non-sewist life caught up with me) but I was wondering… where’s the Flora playsuit in all this? I’ve seen the part where you make a Flora skirt, but did I miss the wrap-top?
Hopefully I can start sewing away at my Flora soon (thank goodness I didn’t want to participate in the competition anyways) but I would love to see how you’d make a Flora top out of the faux-wrap bodice :D
lots of love
— Anja