
If you're anything like me, you'll have more on your seasonal to-sew list than humanly achievable (without somehow manipulating the space-time continuum) so it's nice to know that every now and then you can take a short cut - or three! - to help speed the production line along.
Ever since we released our Sarah Shirt pattern, I've been planning to make a swishy dress hack variation* for the Summer. But with less than a week to go until the summer holidays, and so much to get done before then, I simply didn't have the time (or the will, if I'm honest) to commit myself to all the hand-finished collars, gathered cuffs and buttonhole fiddliness that inevitably come with making a shirt. So I cheated! Here are my top three hacks to simplify shirtmaking... (you're welcome!)

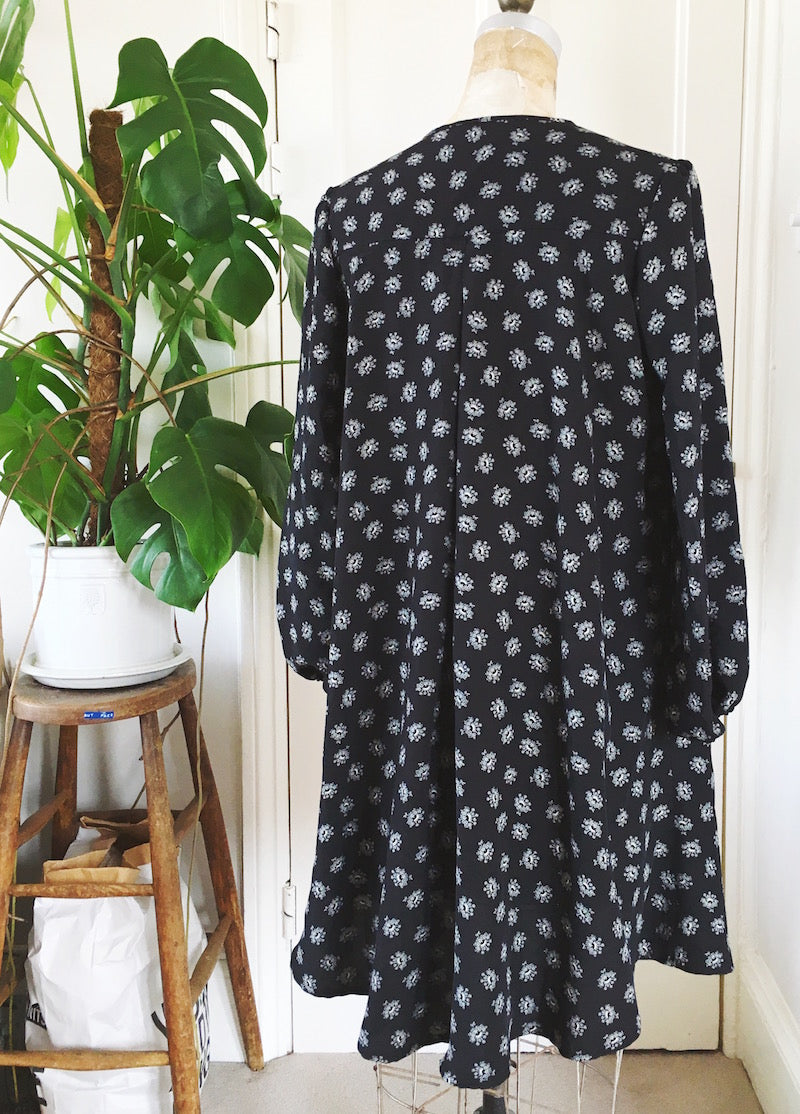
1. Ditch the collar and opt for a bias bound tie neckline instead

Assemble your Sarah Shirt as normal (remember, you can access our Sarah Shirt sewalong for all time) until all that's left to do is finish the neckline and plackets. At this point you'll want to trim away the seam allowance all along the neckline - we won't be needing that anymore seeing as the whole thing will be finished with bias binding.
Assemble your plackets as normal and stitch into place. Cut or make yourself a length of bias binding that is long enough to bind the neckline and continue into ties - 60" should be plenty.
Pin the open binding - right side of binding facing wrong side of shirt - along the neckline and stitch into place with 1/4" or 6mm seam allowance. Press the binding out to the right side and pin into place along the neckline, and continue pinning the folded lengths of the binding beyond the plackets. Topstitch from the centre back around one side of the neckline and down into the bias strip, and then again from the centre back around and down the other side.

You could tie a little knot at the end of the binding ties to finish, or even thread some beads or embellishment of some kind at the ends for extra schwiiiing!
2. Elasticate the cuffs

For a much quicker, and more casual finish to your billowy sleeves, leave out the cuff and elasticate the sleeve's hem instead! Just make sure that you do not cut the along wrist slash line, and simply create a narrow casing for the elastic by pressing the hemline in first by 1/4" and then again by 1/2" (or overlocking/serging the raw edge and pressing it in once like I did), stitching all the way around leaving a little opening through which to feed the elastic, and stitching that shut when you're done. I like to use lingerie elastic for this as it's very stretchy, very narrow and doesn't dig in.

What I love about this finish is that without the cuff, you end up with a shorter, chicer, bracelet length sleeve.

3. Avoid the dreaded buttonholes and construct a faux placket instead

Full disclosure - I pretty much do this trick every single time I make something with a button down placket (that doesn't really need to open all the way)...! The idea is to assemble the plackets as normal and mark out the placement of your buttons down the righthand placket. Then, carefully pin your righthand placket onto the other placket, all nice and aligned as if it were finished and buttoned into place. Sew your buttons on, sewing through both plackets to anchor them together forever more - not a single buttonhole in sight! Just make sure that you leave enough of an opening at the neckline to get your head through, and that you sew a couple of decorative "unbuttoned" buttons at the opening to keep it looking legit. Oooops! Looking at the picture now, I've noticed that I sewed the "unbuttoned" buttons at the neckline opening to the wrong placket! Whateverrrr... ¯\_(ツ)_/¯

*Lengthening your Sarah Shirt to make a dress couldn't be easier - simply cut a horizontal line across the shirt front and back pieces and slip a piece of paper underneath - dot and cross paper or baking paper are both ideal - allowing you to open up and lengthen your pattern pieces by however much you want. Just make sure that your centre front and centre back lines remain flush and that you've lengthened both pieces by exactly the same amount before taping it all down and redrawing the side seam.

-
Elisalex de Castro Peake

Comments on this post (3)
This is so brilliant! I’m currently wondering why didn’t I think of that about 300 buttonholes ago?!? Thanks from the USA!
— Beverly
An option to the tie is a loop-to-button at the neckline. It can be made of fabric or contrasting thread/cotton yarn.
— Cheryl
Thank you so much, this is a great post!! What a super way to make it easy and get a more relaxed fit, your dress looks lovely and summery and I’m loving the whole festival/boho look.
— Lynsey Jane