
Things are hotting up, Sewalongers! Today we'll be cutting and interfacing, and facing the first juicy milestone in the making of the Rumana coat - sewing the welt pockets.
You will need:
- Your Rumana coat pattern
- Your main and lining fabrics
- Lightweight woven fusible interfacing
- Fabric scissors or a rotary cutter
- Pins or pattern weights
- Thread and a hand sewing needle (if you wish to mark your pattern with tailor's tacks)
- Tailor's chalk / fabric pen (if you're not into tailor's tacks)
Cutting
The cutting out of your Rumana coat pieces is pretty straightforward, especially if you follow the layplans in the instructions. Here are some tips and things to bear in mind:
- If you're struggling with handling and cutting the slippery lining fabric, read this post!
- If your main fabric has a directional pile or nap - basically if it has a sort of fluffy hairiness that is smooth to stroke in one particular direction - make sure it is facing down towards the hem when you cut your pattern pieces out. That way your coat will feel extra nice when people stroke your arm or back in admiration!
- If you're working with a wool tweed, or fabric that is especially prone to fraying, mark notches with little outward facing triangles as opposed to cutting snips into the pattern which would otherwise just get lost among the fraying fibres:

- When you've got all your pattern pieces cut out, keep the pattern paper pinned in place until you come to sew / prep each piece to avoid mix ups / losing the smaller pieces.

- Mark darts with a water erasable fabric pen on the wrong side of your fabric or tailor's tacks

Dart marked with water erasable pen

Dart marked with tailor's tack
Interfacing
With all your pattern pieces cut, you're ready to interface. You will need to apply the interfacing to all pattern pieces that say "& fuse" on the pattern paper. There are also some pattern pieces that require only partial interfacing, namely the vent on the centre back pieces, and the cuffs on both sleeve pieces. Interfacing is only applied to the main fabric; lining pieces do not need any interfacing at all!
For pieces that call for the whole piece to be interfaced, we like to lay a large, uncut piece of interfacing over the pattern piece in question, wrong side of the main fabric facing the adhesive side of the interfacing. Press the interfacing carefully so that it evenly fuses to your fabric. Different types of interfacing will react slightly differently, so like anything you're doing for the first time, always have a little play with some scraps first. Try out different heat and steam settings until you find a flow that works for you and your chosen fabrics. Always literally "press" your interfacing into place - don't sweep your iron back and forth as you would do when ironing a shirt as this could distort the application of the interfacing.
At this point, we like to label the upper and under collar pieces so they don't get confused! Also, if your fabric is quite thick or substantial, it is not essential to interface both collar stand pieces. If you want to interface just one, make sure the interfaced one is stitched to the upper collar (we like to make a little note of this too ;)


Once your pieces have been interfaced, cut them out and remember to re-snip all your notches.
For the pattern pieces that call for partial interfacing, use the relevant pattern pieces to cut the interfacing directly, ready to be applied to your main fabric. Here's what your vent should look like:

And your sleeves:

Applying interfacing will help to stabilise areas that will need to withstand a bit of a battering during wear and give structure where it's needed, like at the collar.
Sewing the pockets
Finally we get to do some sewing! Start by taking your Side Front piece (A) and the corresponding pocket piece (the one that matches the diagonal slant).

Flip the pocket piece up and over and pin the pocket to the side front, right sides together, at the diagonal.

Stitch this seam with a smaller than usual 3/8" or 10mm seam allowance. Press the seam open and repeat for the Side Front on the other side.
Next take the bottom portion of your Side Front (C), and its corresponding Welt piece, matching the diagonal and with the arrow facing upwards or toward the centre front.

Flip the welt over and down and pin into place along the diagonal.

Stitch with 3/8" or 10mm seam allowance, grade the seam to reduce bulk by trimming one layer of seam allowance and not the other. Press the seam downwards.

Flip this welted piece over so that the right side is facing you.

Now take your pocket lining piece, and with right sides together, pin the diagonal edge of the pocket lining to the other, unstitched edge of the welt.

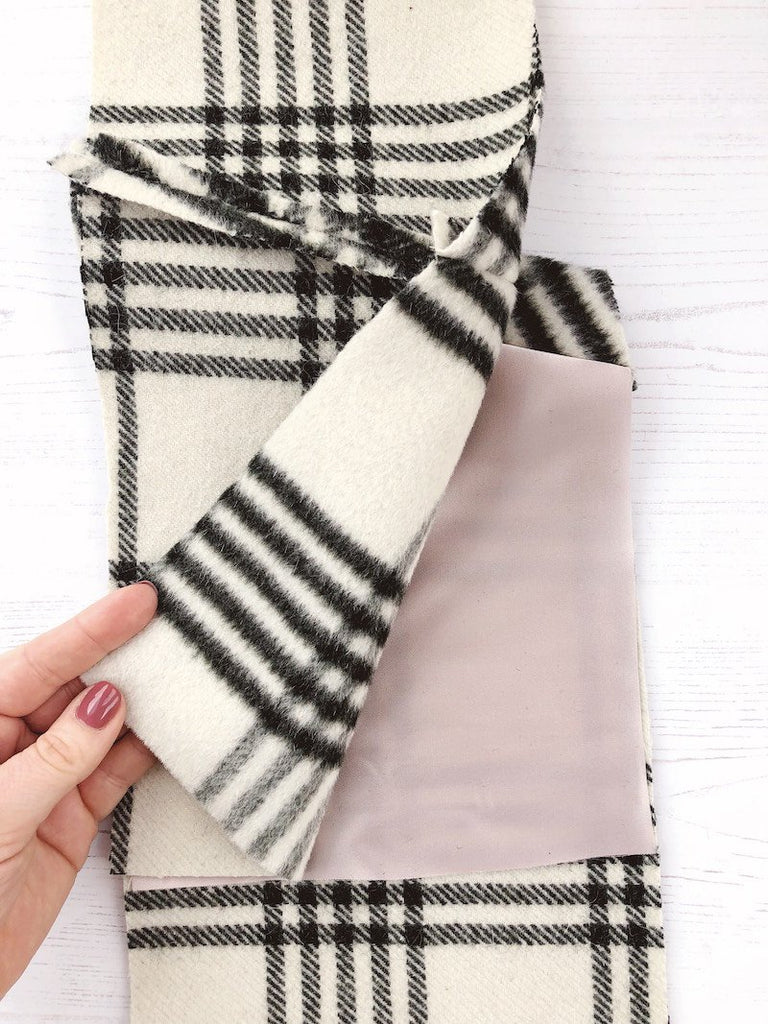
Stitch with 3/8" or 10mm seam allowance and press the seam towards the pocket. Then fold the welt in half lengthways along the diagonal and press. From the wrong side it should be looking like this:

And from the right side:

With the pocket lining facing you, lay over the top portion of the coat's Side Front, aligning the pocket to the pocket lining.

Pin the pocket and pocket lining layers together around the three outer edges.

You'll notice that the main fabric pocket is a little longer than the pocket lining - that's normal. Stitch the two pocket pieces together with 5/8" or 15mm seam allowance. You'll find it's easier if you sew with the pocket lining facing you, and start your stitching at the pressed crease of the pocket welt, stitching all the way around and stopping at the pressed crease of the welt on the other side. Here's a picture of the pocket sewn in the linen version we're making as the stitching and press line shows better :)

If your pocket lining is very lightweight or prone to fraying, you can reinforce it by stitching a second line across the bottom:

Carefully trim the excess seam allowance down - this is so that the pockets do not get trapped when we come to sewing the princess panels together. Repeat all the above for the other side.

And we're done for today!
Next up: We get to recoup with some simple seaming as our coats start taking shape! We'll be assembling the coat panels and stitching the darts, talking seam finishes and topstitching.
-
Elisalex de Castro Peake

Comments on this post (2)
Could you clarify how you align the upper and lower side fronts to join the pocket and pocket lining? Are the two welt seams supposed to be matched, with one directly on top of the other? You say to align the pocket and lining edges, but then you note that the main pocket piece is longer. If you have aligned the edges, they would be the same length. I looked for matching notches on the vertical seams but didn’t find any. Obviously, if I get these pocket pieces attached incorrectly, the entire side front will not match the center front, so I want to be sure to get it right.
Thanks so much for your help!
Carol
— Carol Fresia
This sew along is 👌🏻
— Dana Hashem