
Aloha Sewalongers, and welcome to your second instalment of the Kim Dress Sewalong! Yesterday we were talking inspiration and fabric. Today things start to get technical...
*To be taken to all the posts in the Kim Dress Sewalong, please click here!*
Today we will be:
- Measuring ourselves
- Finding our size
- Deciding whether or not we'll need to make any adjustments to the pattern
- Tracing and cutting the pattern

Measuring your body
Step one on the path to sewing clothes that fit well and look smokin' hot is becoming acutely aware of your own figure. Scary, yes, but enlightening, trust me. With a good understanding of your own unique shape comes not only the insight to choose designs and fabrics that will enhance your best bits and gloss over the rest, but the tools to tweak paper patterns to best fit your body.
You'll need to grab yourself a flexible tape measure, a piece of paper and a pen. Measuring carefully, and using this post as a guide, make a note of your high bust, full bust, waist & hip measurements, using the handy table in your instruction booklet to keep a record of your findings.

You can now cross reference these measurements with our sizing chart on the back of the Kim Dress folder. Pay extra attention to the "finished measurements" as this will give you a better idea as to how the garment will fit when made up.

If your measurements are falling into the same size group, or very close to, then you likely won't need to make any alterations to the pattern (lucky you!). There are, however, some fitting issues that aren't detectable on standard body measurements alone, like narrow shoulders and long/short torsos, so even if you're coming up bang on our sizing chart, we still highly recommend making up a toile/muslin before you begin cutting into your loverly fabric.
If your full bust, waist and hip measurements are falling into wildly different size groups, your full bust is more than 2" larger/smaller than your high bust, or you often find that you have to alter a paper pattern to fit, you will most likely need to make some simple adjustments. In the following posts we will be delving deep into the world of pattern alteration, covering:
- Full Bust Adjustments & Small Bust Adjustments (FBA & SBA)
- How to fix a gapey back & how to fix a tight back
- Lengthening & shortening the bodice for longer/shorter torso's
- Swayback adjustments
- Full tummy alteration
- Full butt alteration
- Grading between sizes for wide or narrow hips
But how will you know which, if any, alterations to make??
You'll be needing an FBA if...
- Your full bust is more than 2" bigger than your high bust measurement
- Your full bust measurement falls into a larger size group than your waist measurement
- You find that your waistlines often ride up
You'll be needing an SBA if...
- Your full bust is less than 2" bigger than your high bust measurement
- Your full bust measurement falls into a smaller size group than your waist measurement
- You find that clothes often fit too loosely around your bust
You'll be needing to fix a gapey back if...
- You have particularly slim, narrow or sloping shoulders
- You typically find that dresses gape at the back neckline or leave vertical creases down the back
- Armholes tend to stick out or slip off
You'll be needing to fix a tight back if...
- You have particularly broad shoulders or back
- You find that you have very little room to move your arms about due to the tightness at a garment's back
You'll be needing to lengthen or shorten your bodice if...
- You are particularly tall/short
- Your torso is particularly long/short
- You often find that waistlines fall higher/lower than your natural waistline
You'll be needing a swayback adjustment if...
- Your lower back curves in dramatically
- You often find that fabric pools or creases around your waistline at the lower back
You'll be needing a full tummy alteration if...
- You have a full tummy or "pot belly"
You'll be needing a full butt adjustment if...
- You often find that fitted skirts to be too tight on the butt, or you have a big, muscular or round butt (we like big butts)
With that all figured out, now comes the tedious bit... Tracing. We don't like this part anymore than you do, but in order to preserve the pattern tissue for future makes (consider making for friends and/or weight gain/loss), plus ease of alteration, you will not regret tracing off your pattern pieces. That's a promise.
You'll need a large, smooth, empty table or a large, smooth, clean slice of floor to work on. Carefully open out your pattern tissue and use a brightly coloured, thin nibbed pen to highlight the size you'll be tracing off.
* If your pattern needs alteration, trace off the size as dictated by your waistline measurement, which will later be altered*

Lay over a large piece of tracing paper/dot & cross paper/Swedish tracing paper and secure with pattern weights or anything heavy to keep it in place.
Trace off all the pattern pieces that you'll need, remembering to annotate each piece with the following information:
- Name of pattern
- Variation
- Size
- Pattern piece eg. "Bodice Front"
- Cutting instructions eg. "Cut 1 on fold"
- Grainline/fold line
- Notches
- Darts/pleats


Now carefully cut out your traced pattern pieces and you are ready to go! Those of you who don't have any alterations to make, homework for next week is to whip up a quick toile to double check the fit, and keep a close eye on the alterations tutorials - just in case! Those of you definitely altering-along, hang tight and make sure you've got those rulers, pens, paper and sellotape at the ready for next time...
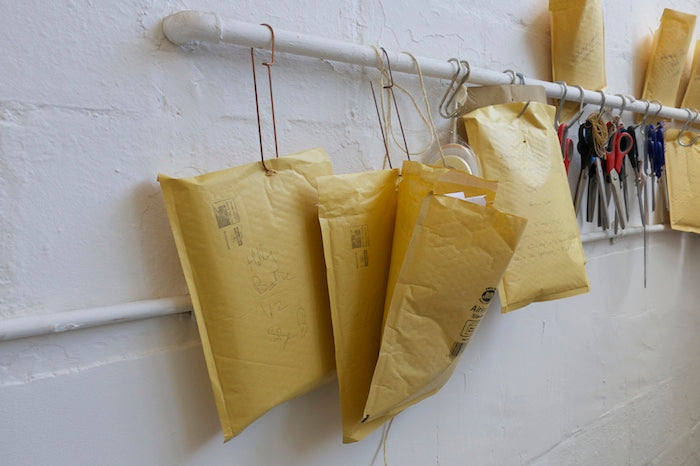
PS. Have you ever wondered about storing your traced and cut paper patterns in a neat and organised fashion...? Well, here at BHL Studios we are everything but neat and organised! But we do, obviously, have lots of paper patterns we need to preserve and keep handy. We like to keep our patterns in old unused envelopes (labelled with pattern name, size and any alterations that have been made) hanging on S-hooks from a lovely pipe in the sewing area... Maybe not the neatest, but it works for us!
-
Elisalex de Castro Peake

Comments on this post (1)
thank you for this detailed and generous explanation! Because I liked this post so much I will buy the pattern and give it a try!
— Michelle