We've got a pretty picture-heavy post for all of you sewing up the button-down bodice of the Holly Jumpsuit today! But don't let that (or the scary title about buttonholes...) put you off - while there's no denying that buttonholes can be pretty fiddly and tedious, hopefully our cheerful step-by-step instructions will make the process that much more digestible.
*To be taken to all the posts in the Holly Jumpsuit Sewalong, please click here!*
Today we will be:
- Assembling the placket
- Positioning & marking the buttons and buttonholes
- Stitching the buttonholes
- Basting the centre front
- Hand sewing the buttons
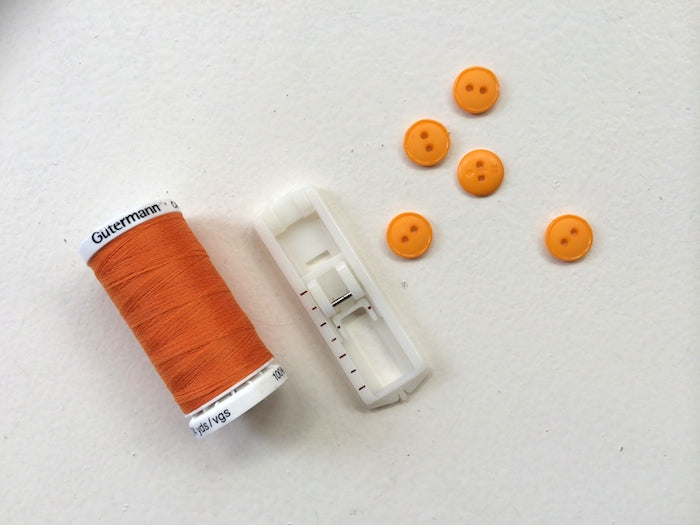
And you will need:
- Your Holly Jumpsuit bodice, Variation 1
- A buttonhole foot attachment for your sewing machine
- A seam ripper
- Approx. 8 small buttons
- Your usual dressmaking tools and supplies
Assembling the placket
Looking at your bodice's centre front opening from the wrong side, you'll notice four notches along the neckline, and the same four notches at the waistline. These will dictate where to fold and press the placket:
- From the wrong side, fold and press in the centre front at the first notch from the raw edge.

- Fold and press your placket in again so that the already folded and pressed edge now meets the fourth notch (the one closest to the end of the facing). The end of your neckline facing should be just covered by the placket. When we come to stitching the placket into place, the neckline facing will be securely trapped.

- Pin your placket ready for stitching.

- Getting as close as you can to the fold, and being careful to stitch in a straight line parallel to the edge, stitch your placket from the wrong side.

- Repeat for the placket on the other side.

Now that the plackets have been stitched, but before we start positioning the buttons and buttonholes, we need to quickly mark out the seam line at the waist - this is where the bodice will be joined to the trousers/shorts, so no buttons beyond this line!
Remember - our standard seam allowance is 5/8" or 15mm.

Positioning your buttons
Using a ruler to help you (you could also use a flexible tape measure, but we do find that they can be a bit more annoying for this sorta thing as they're so bendy), evenly space out your buttons down the left hand placket (left hand as if you were wearing the garment, not as seen form above).
You'll want no more than an inch gap between the bottom of one button and the top of the next.

When you're happy with the placement of your buttons, mark out their positions with an air erasable fabric pen, as shown below:

Also mark out the placement of the buttons down the right hand placket - this will indicate the centre of the buttonholes.

Buttonhole length = button diameter + button thickness
To figure out how long your buttonholes need to be, measure the diameter of your button and add to that the button's thickness.

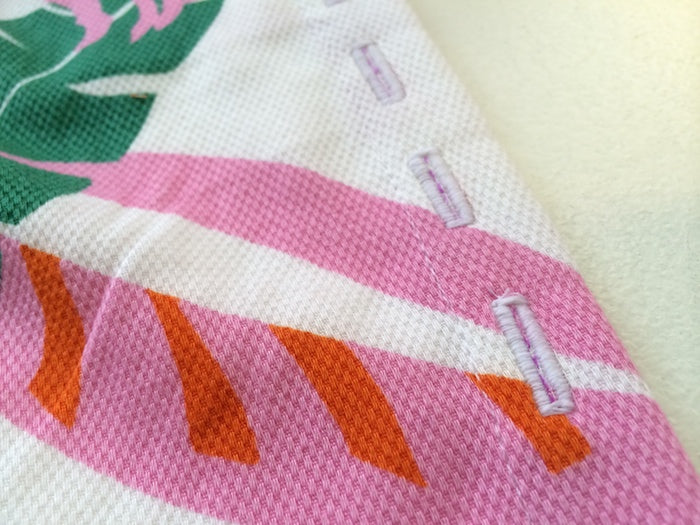
Using the buttonhole length you calculated above, mark out the buttonholes vertically down the right hand placket centred over the button placement marks you made before.

Sewing the buttonholes!

*Before you begin: have a little practice on a piece of scrap fabric first, before diving right in to the Real Thing!*

Most sewing machines will have a basic buttonhole setting. This, along with the help of a buttonhole foot attachment, will allow you to stitch a straight rectangular buttonhole with maximum ease.
To begin, set your stitch selection wheel to the 1st buttonhole setting and your stitch length to the smallest possible. Attach your buttonhole foot to the shank.

Most basic buttonhole feet will look a bit like the one shown in these pictures. You want to align the little notch on the part right by the needle with the first notch on the main body of the foot when you lower the shank. As you sew, that little part that clips on right behind your needle will stay right behind your needle, while the main body of the foot gets pushed back along with the fabric by the feed dogs.
If, however, you have one of those amazingly fancy buttonhole feet that you stick the button in the back and it measures it all for you, chances are you really don't even need to be reading this post!
Start sewing the first side of your buttonhole at the start of where you marked it on the fabric, and just to the left of your placement line.

Stop sewing when you get to the end of your marked out buttonhole, and your needle is up and to the left:

Change the setting on your sewing machine to the 2nd/4th buttonhole icon.

This setting will allow you to stitch the end of the buttonhole - only a few back and forths are needed here. End when your needle is up and to the right:

Select the 3rd buttonhole setting on your machine.

Stitch back on yourself until you get back to where you started.

Go back and select the 2nd/4th setting on your machine.

Close your buttonhole with a few back and forths.

Phew! All done with the first buttonhole! Now to stitch the remaining fifty-three-thousand....
To open up your buttonholes, a lot of places will try to sell you a buttonhole cutter, which is basically something that looks like a metal file with a sharp, squared blade on the end. They're great, yes, but the trouble is that you'd have to have one buttonhole cutter for every single size buttonhole you ever plan to make. Pointless waste of hard earned cash, we say! Instead, grab your trusty seam ripper and a pin and let us enlighten you...
Place the pin at one end of the buttonhole, just inside and essentially protecting the end stitches.

Use your seam ripper to carefully cut the buttonhole open between the stitches, stopping when you hit the pin.


The buttons
Thread up a handsewing needle with thread to match the buttonholes and knot the ends together so that your thread is doubled up. Sew each button in place by hand and tie off the loose threads with a double knot on the wrong side of your bodice to securely finish your button.

And finally on the agenda for today, we need to baste the waistline at the centre front - right hand placket over the left, central notches matching. Stitch into place 3/8" or 10mm from the raw edge to secure.

Okey doke folks! I think we've covered more than enough for today, remember to keep an eye out tomorrow for an exciting Holly pattern hack from a lovely sewing pal of ours...
-
Elisalex de Castro Peake

Comments on this post (4)
perfect pictures! thank you!
— Amy
Yes that makes sense, thanks. I’ve just sewn a load of horizontal buttonholes on a skirt so had forgotten they go the other way around sometimes!
— Mary
Hi Mary, good question! Generally speaking, horizontal buttonholes are more suited to jackets and coats, whereas vertical buttonholes are typical of finer blouses and bodices such as this. A placket would have to be fairly wide to accommodate a horizontal buttonhole so vertical buttonholes work best for a narrow placket such as this. I hope this helps!
— Elisalex - By Hand London
Is there a particular reason why you sew the buttonholes vertically and not horizontally?
— Mary