
Yoo hoo Sewalongers, we're baaack! Apologies for the radio silence since our last post - we had a bit of an internet related technical glitch at the end of last week that left us slightly stumped... There may even have been a Zoolander moment. All fixed now though, back online and ready to hit you with a fresh instalment of your Holly Jumpsuit Sewalong! We're still ploughing through the Variation 1 button-down bodice, and today we tackle the sleeves...
*To be taken to all the posts in the Holly Jumpsuit Sewalong, please click here!*
Today we will be:
- Assembling the sleeves
- Attaching the cuffs
- Setting the sleeves into the armholes
The Sleeves
Start by taking your two sleeve pieces, all nicely stay stitched from this post.

Fold your sleeve in half, right sides together, and stitch the underarm seam.

Press the seam open and finish the excess.
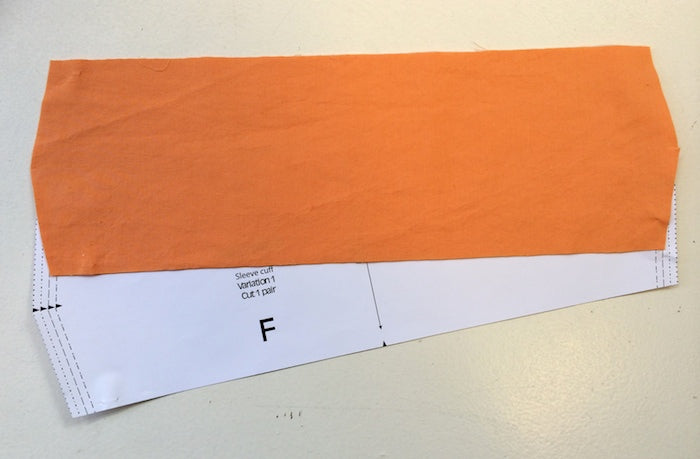
The cuffs
You should have a pair of cuff pieces, all notched and looking shockingly like this:
Fold your cuffs in half, right sides together, and stitch the slightly-chevron-shaped end with the usual 5/8" or 15mm seam allowance.

To make turning your cuff to the right side easier, and to avoid any puckering, snip a little notch at the point of the chevron. Be careful not to get too close to your stitches! Press the seam open.

Turn your cuffs out to the right side, fold in half lengthways (so that the seam is hidden inside) and press.

Matching the cuff seam to the underarm seam of your sleeve, pin the cuff to the wrong side of the sleeve's opening, raw edges together as shown below:

Stitch the cuff to the sleeve, finish the excess and turn the cuff out and up to the right side of the sleeve and press.

To keep your cuff securely up, you could tack it down at the underarm seam either with a couple of invisible handstitches, or with a little machine bar-tack as we've done.

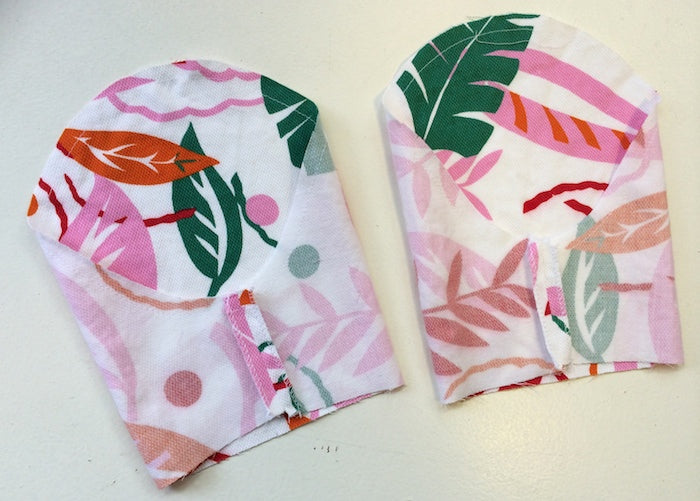
And here's how your sleeve should be looking all done and ready to be set in to the bodice!

Setting in the sleeves

With your bodice inside out and the sleeve right side out, feed the sleeve into the bodice and through the armhole so that you can start pinning the sleeve head to the armhole, right sides together. Be sure to match the underarm seams and notches, as this will help you when easing in the slight fullness at the sleeve head and ensure a well proportioned sleeve.
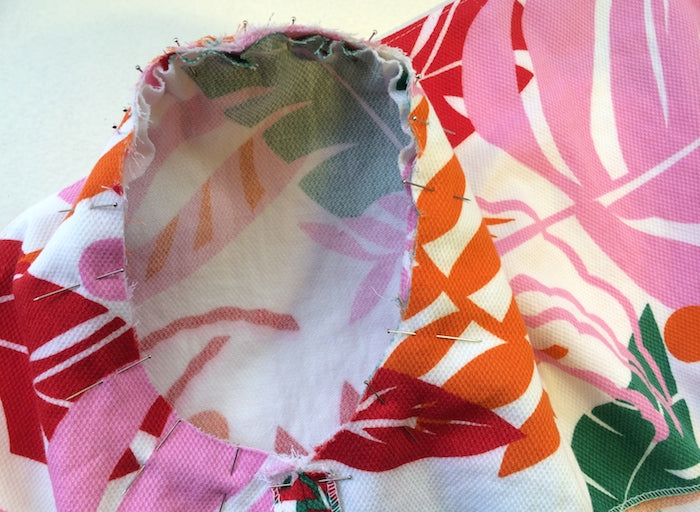
As you can see from the image below, the sleeve head appears not to fit exactly into the armhole. When you're pinning, distribute that fullness as evenly as possible between the notches.
Remember - it's not the raw edge of the sleeve head that you're trying to match to the raw edge of the armhole, rather the seam lines 5/8" or 15mm in from the raw edge that need to match.
If you're still having trouble easing in the fullness, you could use your stay stitches to gently gather the sleeve head to make it easier to set in.

Start your stitching at the underarm seam and be sure to go nice and slow around the shoulder, using your fingers to manipulate the fabric and ease in the fullness as you go.
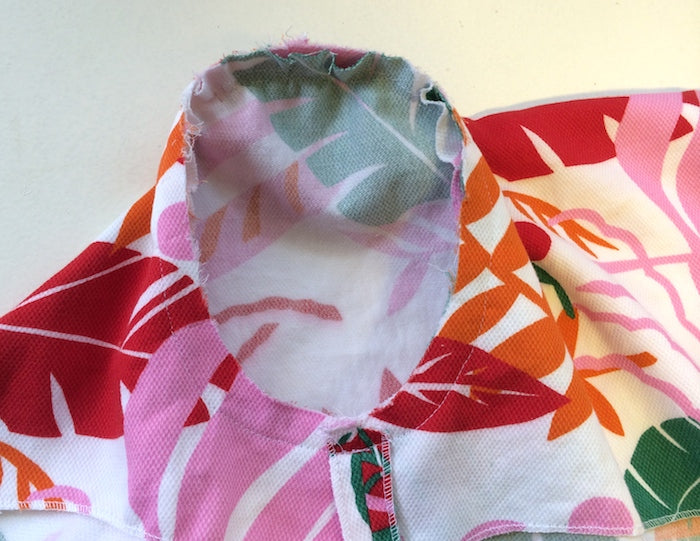
Turn your bodice to the right side and admire your sleeve! Aaaaand now good luck getting the second sleeve to match... Just joking! The second sleeve should be even easier to set in now that you've done the first one.


The tricky part is almost over guys - we'll be tackling the buttonholes in the next post and then we have a super fun surprise guest post coming after that...! Watch this space!
-
Elisalex de Castro Peake

Comments on this post (1)
The tip about matching the seam lines and not the edge of the fabric when sewing curves is such a good tip! Thank you!
— Karen