Hellooooo and welcome to Alterations Week for the Holly Jumpsuit Sewalong! During Alterations Week we will be going through as many pattern alteration tutorials as we can physically crush in, making this our most comprehensive Sewalong yet! The extra great news is that a lot of these tutorials will be applicable not only to the Holly Jumpsuit, but to a huge amount of other patterns too as we tackle most of the common issues surrounding pattern fitting.
*To be taken to all the posts in the Holly Jumpsuit Sewalong, please click here!*
Today we tackle the crotch! A quick and easy alteration to make, and one that will transform the way you approach sewing trousers. Gone will be the days of saggy crotches, and worse, the dreaded camel toe...

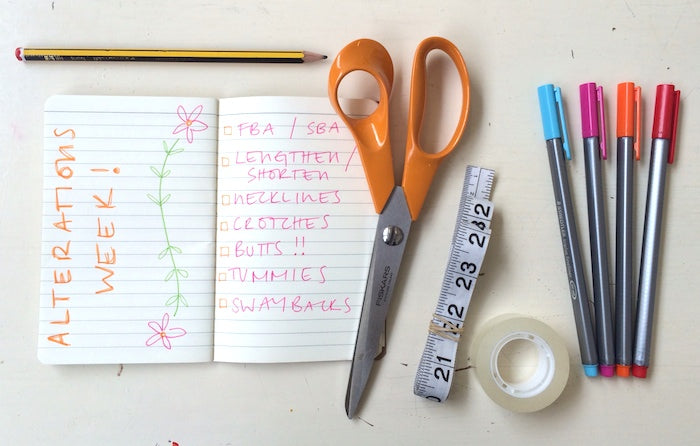
What you'll need:
- Your traced (but not cut) trouser pieces (front and back) of the Holly Jumpsuit, plus the original trouser tissue pattern pieces. Make sure you trace the pattern pieces according to your waistline measurement
- Tape measure
- Pens
- Paper scissors (not the fabric shears!)
- Extra paper
- Tape
Please note: We are using itty bitty replica's of the pattern pieces to illustrate the alterations as simply and clearly as possible - please make sure that you alter your real-life pattern pieces, complete with notches, pattern info and grainlines!
How do I know if I need to lengthen or shorten the crotch?
I have two words for you my friends: Camel toe. No one likes a camel toe. Or a saggy crotch for that matter! If you have a slightly longer or shorter torso than the "standard" that this pattern dictates, you'll probably be needing to alter the crotch length.
However, your camel toe or saggy crotch could also be a symptom of a bigger fitting issue - like a full or flat butt adjustment. If you have a particularly juicy or petite derrière, I would avoid the temptation to lengthen or shorten the crotch until you've tried the butt adjustment first (coming soon).
If your butt is somewhere in the middle between MakeItClapVille and Teeny Town, but you're still getting camel toe or a saggy crotch, keep reading...
Step 1
First things first, and we need to determine by how much we need to alter the length of our crotch.
Take your tissue pattern (the one supplied in your Holly Jumpsuit pattern folder) and identify the Trousers front and back pieces. Now take a brightly coloured pen and a tape measure and mark out the seam line at the crotch - 15mm or 5/8" in from the raw edge.

As you can see from the image below, I've also stopped my red seam line 15mm from the waistline and the inseam. This is so that I can measure the length of the crotch seam as it will be once the trousers are all sewn up.
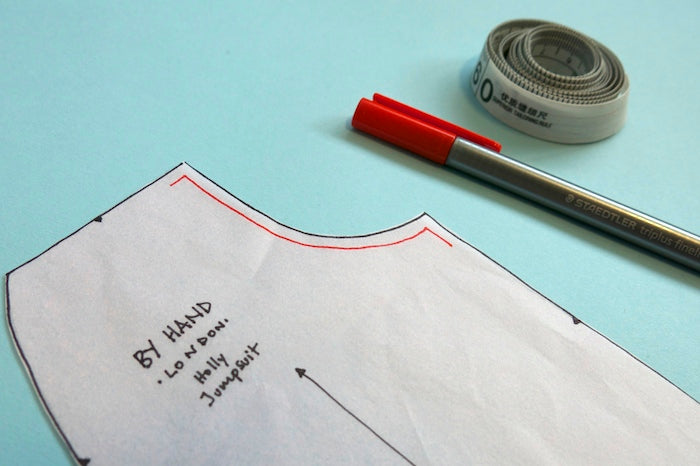
Using a flexible tape measure, measure the length of the crotch seam line on both front and back trouser pieces in order to calculate your total crotch length.
Now we need to measure our own crotch to compare it with the trouser's crotch length.
The trousers of the Holly Jumpsuit are of the high-waisted variety, so the easiest and most accurate way to go about this is to tie a piece of string around your waist, where the waistline of the trousers will sit. Then it's simply a case of taking your tape measure and measuring from your belly-button down your tummy, through your legs and up the back of your butt, stopping when you get to your waistline string at your back. Make sure the measuring tape feels comfortable and isn't to snug or loose, as this is where the crotch seam will be.

Now you can cross reference your two crotch measurements and see by how much you'll need to increase or decrease your crotch length by.
For example, if the total crotch length of the trousers is 28", but your total crotch length is 30", you'll need to increase your crotch length by a total of 2". This amount will be divided between the front and back trouser pieces, meaning that you'll be adding 1" to each.
Step 2 - Lengthening the crotch
Take your traced trouser pattern piece (front or back), still uncut, and make sure that the grainline has been marked on.
Now draw a little line 1" (or by however much you're lengthening your crotch on each piece by) down and into the crotch from the waistline.

Now we need to overlay the corresponding tissue pattern piece, lining up the waistline of the tissue with the 1" down mark, and ensuring that the grainlines and the tops of the crotch match.

With your pen of contrasting colour, and keeping the tissue still and in place (you could secure it with masking tape), re-draw the crotch line, following that of the tissue paper.

Your crotch has now been extended without distorting the side seam or waistline! If your new crotch line extends past the inseam line, just use a ruler to smoothly join the end of the new crotch with the inseam. All that's left to do now is repeat this process for the other trouser piece.

Step 2 - Shortening the crotch
Take your traced trouser pattern piece (front or back), still uncut, and make sure that the grainline has been marked on.
Now draw a little line 1" (or by however much you're lengthening your crotch on each piece by) up from the waistline.

Now we need to overlay the corresponding tissue pattern piece, lining up the waistline of the tissue with the 1" up mark, and ensuring that the grainlines and the tops of the crotch match.

With your pen of contrasting colour, and keeping the tissue still and in place (you could secure it with masking tape), re-draw the crotch line, following that of the tissue paper.

Your crotch has now been shortened without distorting the side seam or waistline! If your new crotch line stops before the inseam line, just use a ruler to smoothly join the end of the new crotch with the inseam. All that's left to do now is repeat this process for the other trouser piece.
Tip from the top: Always check your adjustment by making another toile to check the fit. Once you're happy with your newly adjusted pattern, copy it out onto some card for extra safe-keeping! Although this is an easy adjustment to make, no one wants to have to do it twice...
-
Elisalex de Castro Peake

Comments on this post (6)
Hi Janice – No, the crotch length is the same for both trousers and jumpsuit on this pattern.
— Jessica - By Hand London
Hi Linda – We now have a bodice fitting companion that can step you through this process. Hope this helps!
— Jessica - By Hand London
Is the crotch length different for a jumpsuit?
— Janice Jepsen
I need to lengthen the crotch, but also make a sway back adjustment. How would I approach the back piece,
— Linda Oliver
Hi Sandra – the looseness/tightness of the crotch is really up to you… As long as you don’t have a camel toe or an MC Hammer-style drop crotch, then you’ve got it right! Hope this helps!
— Elisalex - By Hand London
I’m not too sure where exactly the crotch on this pant is meant to sit – obviously not as snug as a pair of jeans but how low should it be given that these pants are a loose fit wide leg? The crotch isn’t so low that it feels weird, so maybe it is as it should be?
— Sandra-Stitch