
Firstly, we'd like to say a massive and resounding THANK YOU to everyone for all the love following the release of our latest free downloadable PDF sewing pattern, the Polly Top. We are, as ever, overwhelmed by all your messages, tweets, posts, likes and downloads. It's just so incredibly awesome to see that you're all as excited about this new pattern as we are! But back to the matter at hand, and some serious stitching this week - the Anna Dress Sewalong!
We’ve got a hefty post here, and by the end of it there’ll be bodices aplenty! So regardless of whether you’re making the slash or V-neck variation, have decided to have a stab at the ¾ sleeve option, or fancy Frenching the hell out of your Anna, read on…
Today we will be:
- Stitching the back darts and bust pleats
- Closing the shoulder seams
- Attaching the neckline facing OR joining a full lining
- Finishing the armholes
- Closing the side seams
- Showing you how to apply French seams to your Anna Dress
*To be taken to all the posts in the Anna Dress Sewalong, please click here*
Stitching the back darts
- Take your bodice back pieces and lay them out, wrong way up, so you can clearly see the dart you marked out in last weeks post.
- Pinch a dart carefully between your fingers so that it is folded down the centre of the dart, matching the notches at the waistline.
- Pin to secure, then stitch into place, using the marked line as a your stitching guide. Remember to backstitch at the beginning and end of each line of stitching!

- Press the dart towards the centre back.

Stitching the bust pleats
- Lay out your bodice front piece, wrong side facing you, pleat markings and notches clearly visible.
- Take a pin and, using the image as a guide, insert it into the top of one side of a pleat and out the top of the other marked side to ensure that each side of the pleat matches up.

- Take another pin and secure the pleat at the waistline, matching notches. Check on either side of the pleat that the marked lines are matching up.

- Stitch the pleat from the waistline up.

- Repeat this process for the three remaining pleats.
- When it comes to pressing the pleats, gently flatten the excess so that it is centered over the line of stitching. Press the pleat and continue pressing for about an inch or so above and beyond where the stitching stops. This will give you a sort of blossoming flower look as the pleats open up under the bust.


*If you are planning to use French seams throughout the making of your Anna Dress, skip down to the bottom of this post for how-to…*
Closing the shoulder seams
- Lay out your bodice front piece, right side facing you, and then place your bodice back pieces on top so that right sides are together.
- Pin along the shoulder seam – and this applies to both the regular sleeve variations and the ¾ sleeve variation.

- Stitch into place, press seam open and finish off the excess seam allowance using your preferred method.


If you’re fully lining your Anna Dress, repeat the above steps for your lining fabric pieces.
*A note on seam finishes – finishing off your excess seam allowance is functional as well as beautiful! Especially if your fabric is prone to fraying, finishing will leave you with a dress that is easier to care for, lasts longer and feels a hell of a lot better to wear with no infinite stream of tickly threads to keep yanking out… We like to overlock/serge most of our seams, but check out this post for more seam finishing techniques*
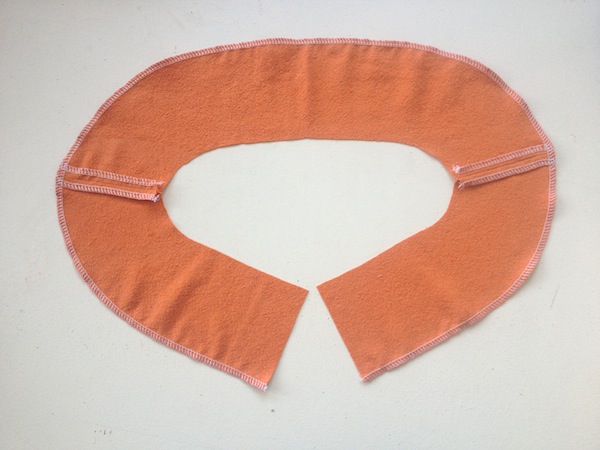
Assembling and attaching the neckline facing – for both slash and V-neck variations
The neckline facing is essentially a partial lining that neatly and seamlessly finishes off the raw edge of the neckline, without the need for hemming or binding.
To assemble the facing:
- Lay out your front neckline facing piece, right side facing you.
- Place the back neckline facing pieces over the top so that right sides are together.
- Pin at the shoulders, stitch into place, press open and finish.

- It's a good idea to finish the outer edge of your facing now either by overlocking/serging or pinking.
To attach the facing:
- With right sides together, place the facing onto the bodice and pin together all along the neckline. Take care when matching the shoulder seams, centre front and centre back openings.

- Stitch into place, going slow around the curves, and remembering to pivot at the point of the V (if you’re making the V-neck Anna).
- Now clip into the seam allowance at the curves and centre front, getting as close as possible to the stitching without running the risk of snipping it too far and undoing all your hard work! Clipping the curves will help to release the tension as you turn the facing to the inside, ensuring a perfectly flat neckline with no puckering!

- Turn facing to the inside and give the whole neckline a good press.


- At this point, you could topstitch ¼” or 5mm from the edge to secure the facing further or if done in a thread of contrasting colour could add to the look of your Anna Dress.
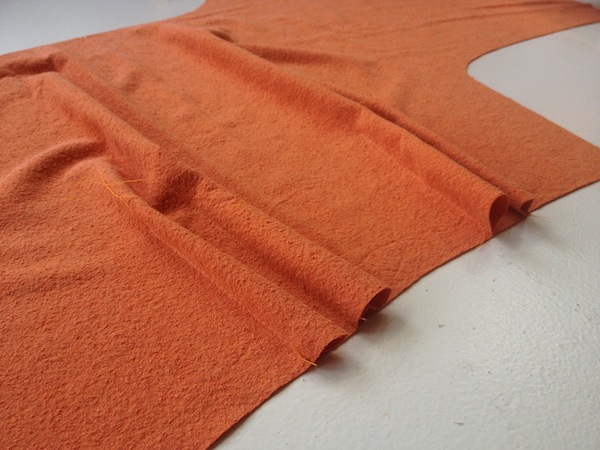
Finishing the armholes
This applies to the main short sleeved variations only. If you’re making an Anna with ¾ length sleeves, skip straight to Closing the side seams.
- Lay out your bodice, wrong side facing you and press the armhole edge in by ¼”. Press in again by another ¼” and pin into place.

- Either machine stitch into place, or finish by hand using a blind slipstitch as we have done.

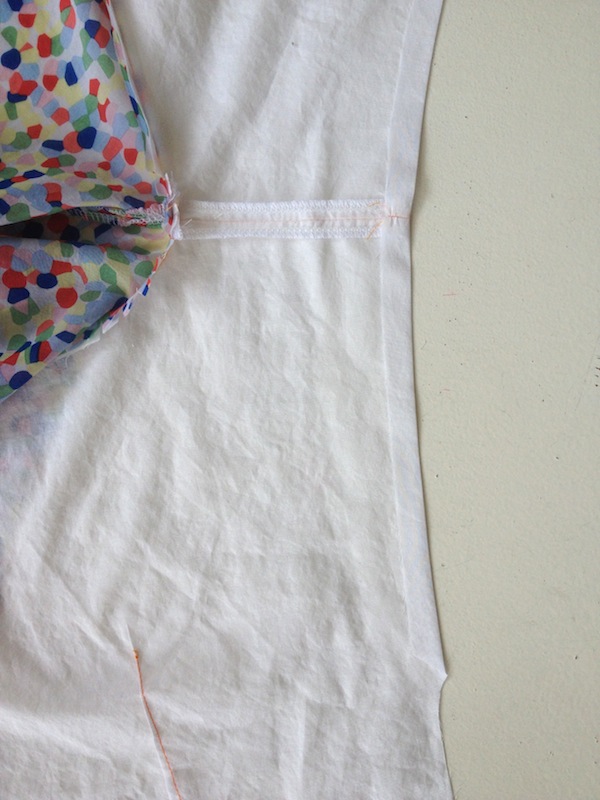
Closing the side seams - all variations
- Simply place your bodice back pieces onto your bodice front, right sides together, and pin into place at the side seams.

- Stitch into place, being extra careful to match up the already stitched armhole at the underarm.
- Press seam open, clipping into the curve to release the tension. Finish the excess seam allowance.
 To finish the cuffs on a ¾ length sleeve:
Simply press the cuff in twice by however much to achieve your desired sleeve length, pin into place and stitch.

***
If you’re fully lining your Anna Dress
If you’ve decided to fully line your Anna Dress, by now you will (hopefully!) have two bodices – one in your main fabric, one in your lining fabric – both with their darts and pleats stitched and shoulders seamed. You should have no neckline facing pieces.
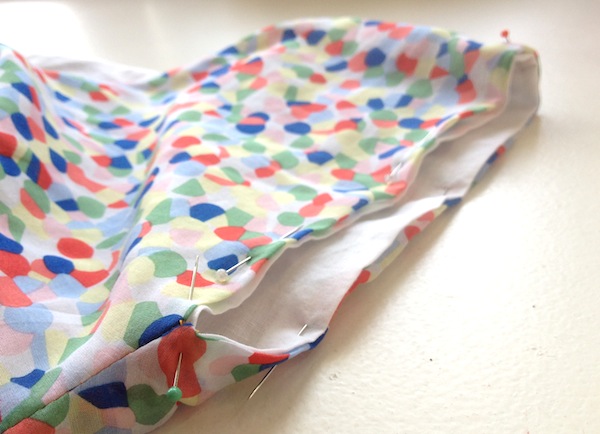
Joining the bodice to the lining:
- Pin your two bodices with right sides together, all along the neckline, matching centre back openings, shoulder seams and centre front.

- Stitch into place and clip into the seam allowance at the curves and centre front.

- Now turn your lining inside your bodice and press the neckline.


Finishing the armholes:
- Press the raw armhole edges of both your bodice and lining pieces in by ½”.
- Close the side seams as outlined above.

- Pin the bodice and lining armholes together and close by hand with a blind slip stitch.


***
How to apply French seams to your Anna Dress
If you're using a delicate sheer fabric for your Anna Dress, such as silk or voile, I think we can unanimously agree that it would be an insult to the elegance of your delicious fabric to have overlocked or pinked seams showing through... Totalment disgraceful, non? French seams essentially hide the excess seam allowance by closing it in on itself. A very easy and straightforward technique, with unbeatably flawless results.
French seams can be applied to the shoulder and side seams, as well as when it comes to joining all the skirt panels (but not the thigh high split! We'll be covering that in the next post...)
To stitch a French seam:
- Starting with the shoulders: place your bodice front and back pieces, wrong sides together, and pin at the shoulder seams.

- Stitch into place, but with ¼” or 5mm seam allowance as opposed to the usual 5/8" or 15mm.
- Turn the bodice out so that you have right sides together and press the shoulder seam.

- Now stitch the shoulder seam again, this time 3/8" or 10mm from the edge, thus perfectly ensconcing the raw excess seam allowance inside.

- Turn to the right side and press.
- Repeat this process for the side seams, clipping the curve at the underarm after the first line of stitching.

And now we're done with the bodice and pretty much halfway there! Darts and pleats should be stitched and pressed, shoulder and side seams closed, necklines and armholes finished off beautifully.

Now would be a great time to try your bodice on to check the fit, and if you can , ask someone to help you pin up the back so you get a better idea of how your bodice will sit on you. If you find that the back neckline is a little gapey, don't panic! We have a last minute cheaters trick to sort that out when we come to inserting the zipper...
-
Elisalex de Castro Peake

Comments on this post (6)
Hi Juanita,
If it were a Summer dress and you were planning to go without tights, cotton lawn would be ideal, but seeing as you will be wearing tights, you will indeed need something more slippery to prevent the lining from riding up. We’d recommend a cupro lining – polyester can get a bit static, which we hate!
Hope this helps!
Elisalex
— Elisalex - By Hand London
Hi there, I am making an Anna Dress in tweed for the winter. I am making the midi skirt version. I have lined the bodice in a cotton lawn, can I also use Lawn to line the skirt? Or will it just get stuck on my tights?
Do I need a silkier lining for the skirt?
Thanks. x
— Juanita
Hi Elizabeth – that sounds like it’s going to be one dreamy Anna dress! We do recommend handstitching a full lining to the inside of the zipper tape – check out this post in our sewalong that show you how – http://byhandlondon.com/blogs/sew-alongs/11628841-anna-dress-sewalong-6-zipper-finishing-touches
Hope this helps, and looking forward to seeing your finished Anna!
— Elisalex - By Hand London
Hello,
I’m about to embark on an Anna dress using a lovely white voile I have with a vertical blue pattern. I will be lining it with a light weight blue batiste as the white voile is very sheer. How would I insert the zip so the lining and the top fabric are enclosing the zip? I am presuming that I sew it in as per normal onto the top fabric and then hand sew the lining into place? Is there a way to sew the lining by machine at all? (Not that hand sewing is a problem for me but just wanted know if there was a short cut at all).
Many thanks
Elizabeth
— Elizabeth
Hi Siobhan – yes exactly! If you look closely at our overlocked side seam you’ll see that that’s just what we did. x
— Elisalex - By Hand London
Hi ladies.
Ace sewalong as per. 1 little question. I’m zigzagging my seams (no overlocker – yet). What do I do about the clipped underarm section? Having pressed (and so the clipped bits having spread a little) do I zigzag over anyway (creating a little bridge of thread between the clipped bits) or do I stop my zigzagging before I get to the clipped section? Or is there another (probably obvious) solution?
Many thanks :-)
— Siobhan