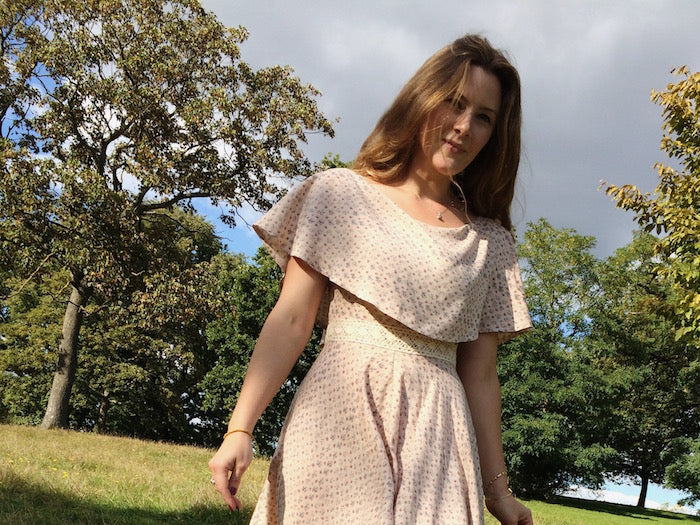
For the most part, sewing my own clothes is not a trend-led activity. I know what I like and I don't fall for the fads. But every now and then, something comes around that gets me thinking outside the closet, and allows me to evolve and explore the limitations of my own personal style. When Boho first popped up on my radar circa 2007 - think Sienna Miller in a peasant dress with hip-slung studded belt and Vivienne Westwood pirate boots - I kinda liked it, I may have dabbled a little, but it was all a bit too Pirates of the Caribbean for my taste. Not quite polished enough for my liking. Fast forward to 2015 and Boho comes back, hot on the heels of the 70s trend and I'm sold! If you ask me, it's a fashion union made in heaven - the grown up glamour of the disco days underpinned by the soft, romantic drapery of peasant-chic. This latest pattern hack sums it up pretty well I think, highlighted perfectly by some seriously dreamy fabric from The Cloth Shop. With the simplest addition of a drapey neckline capelet I have updated my go-to 50s silhouette into a demure floaty frock, that just so happens to be bang on trend.
You will need:
- The Elisalex Dress sewing pattern, plus fabric - go for a lightweight cotton or viscose rayon with body and drape
- Extra fabric for the capelet - a metre or so should be plenty
- Our circle skirt calculator app, or the tutorial post if you'd like to get behind the nitty gritty equations yourself ;)
- Your usual dressmaking tool and supplies

Step 1
Firstly, the good news - we don't need a lining! Hooray! The bad news - we're going to be facing the neckline and armholes with bias binding (I can hear you moaning guys, but stay with me, it's totally worth it I promise), so we need to trim the seam allowance down from 5/8" to just 1/4" at the neckline and armholes only. You could go about this either by re-tracing the pattern and applying the change to your new paper pattern, or you could go down the renegade road and just trim away the excess fabric after you've cut out your bodice pieces...!
Go about the assembly of your sleeveless Elisalex Dress bodice as normal, stitching the princess seams, shoulder seams and side seams, and giving it all a good press.

Step 2
Just to get it out of the way, and to prevent the raw edges from fraying or stretching, we're going to finish the armholes now before we go any further. If you're unfamiliar with how to finish an armhole or neckline using bias binding, take a look at this post we did on hacking the Holly Jumpsuit into a top - ignore the beginning and skip down to Step 4 - we're doing it in exactly the same way for this dress.

Step 3
Now for the capelet! And here's the simple secret - it's just a circle! By cutting a full circle using the neckline of the dress as our circumference, and keeping the length of the circle the same all around, we end up with a beautifully cascading flounce effect as the neckline dips at the front and back.
Measure the neckline of your bodice, and use that measurement as your 'waistline' when using our circle skirt app. Make sure you select the 'full circle' option for this, and don't worry about the length part.
Take your fabric and fold it in half widthways and mark out your circle using the diagrams below as a guide:


Cut out your circle, including the vertical centre back opening and baste the shorter, inner raw edge to the neckline of your bodice.

So pretty already, no?? I love it when each step in the making of a garment brings its own little victory or squeal of excitement!
Step 4
Now we can hem the capelet so that's out of the way also. Fold and press the hemline and open centre backs in and stitch into place. I went for ease and speed so I overlocked the raw edges first and then pressed them in once and stitched, but if you don't like the look of an overlocked hem peeking through (and it will peek through due to the high-low nature of the capelet), then I'd fold and press the hem in twice and then stitch.

Step 5
At this point, we need to get on with the rest of the dress as normal - attach your skirt (I opted for a full circle skirt to complement the capelet) and insert your invisible zipper.

Step 6
Final step and all that's left to do is finish the neckline! We're going to face the neckline with bias binding, just as we did with the armholes. But, seeing as the neckline - unlike the armholes - is not a continuous seam, we need to leave a little bit of the binding, about 1/2", poking out beyond the centre back:

Stitch the binding with your 1/4" neckline seam allowance, and press it in to the inside of your dress, folding and pressing in the ends of the binding resulting in a neat finish at the centre back. Carefully snip the seam allowance at the curves if you find it puckering or refusing to lie flat. You could also understitch the binding to the seam allowance about 2mm from the neckline's edge at this point (I did, see detail below). Finally stitch the loose folded edge of the binding into place, but only to the bodice and not the fabric of the capelet!


And you're done!


I put one final finishing touch to keep the centre back neckline looking flawless and stitched a hook and eye to keep it all in place. I think I'm finally getting over my aversion to hooks & eyes...

And finally, I'd just like to thank my good friends Toni and Emily, who very sweetly and enthusiastically humoured me by taking these pictures at the park before picking our kids up from school!


-
Elisalex de Castro Peake

Comments on this post (9)
Lovely
— emenike
Amazing job! So jealous :)
— Lola
Doable and Beautiful!!
— Mary
Oh wow!!! Gorgeous! Just gorgeous! X
— Karen
Great look, definitely grown-up glamour! Love it. Great tutorial too.
— elise//honigdesign
Love it!
— Christine
Such a beautiful design – can’t wait to try it!
— Fiona
I love this!
— Meg White
I’ve been crushing on this look, and this is a genius idea! It looks infinitely customizable, too. Thanks for the inspiration :)
— Dani