This is it, sewalongers, the final step in the making of your Rumana Coat! We sincerely hope you have enjoyed the process, and feel proud and satisfied for having tackled such a meaty project. And we hope that you enjoy wearing your Rumana for years to come! But before we start counting our chickens, let's finish this baby off...
You can find all the posts in the Rumana Coat Sewalong here
So far, you should have your coat shell assembled, and your lining assembled. All that's left to do is join the two together. But before we dive straight in, we need to prep the hem and sleeve cuffs to make the lining insertion process smoother.
We will be using the bagging method to join the lining to the shell. This means that we'll be sewing the lining to the coat at the raw edges of the facing, along the hem, and around the sleeve cuffs, leaving a small opening at the vent through which to turn the whole coat out to the right side. This method ensures a neat and long lasting finish with minimal hand sewing... but before you shout Hooray! let me just burst your bubble a little bit and remind you that minimal hand sewing doesn't mean no hand sewing...! We will still need to catch stitch the cuffs and hem in place (to keep the lining tucked out of view), and slip stitch the opening at the vent closed too. I'm personally quite partial to a bit of hand sewing at the end of a project - I like the way it forces me to slow down and not rush the final steps.
To prep the hem and sleeves for catch stitching, we need to press them in by 4cm. You don't need to get out your tape measure for this; simply fold at the notch which indicates the halfway point of the interfacing.


And press the hem up in the same way:

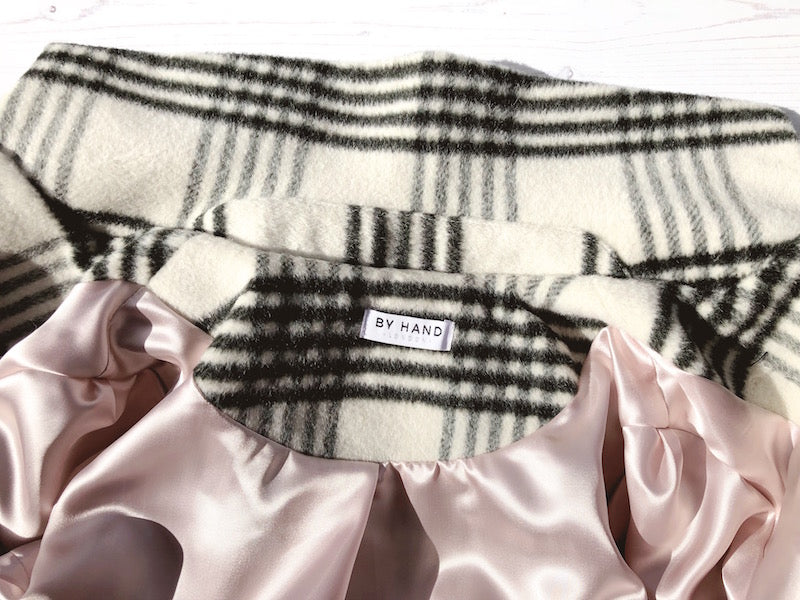
If you'd like to add a label, or hanging loop to the back neck facing, now's the time, before the lining goes in.

We LOVE our new BHL sew in labels from Dutch Label Shop!
Inserting the lining
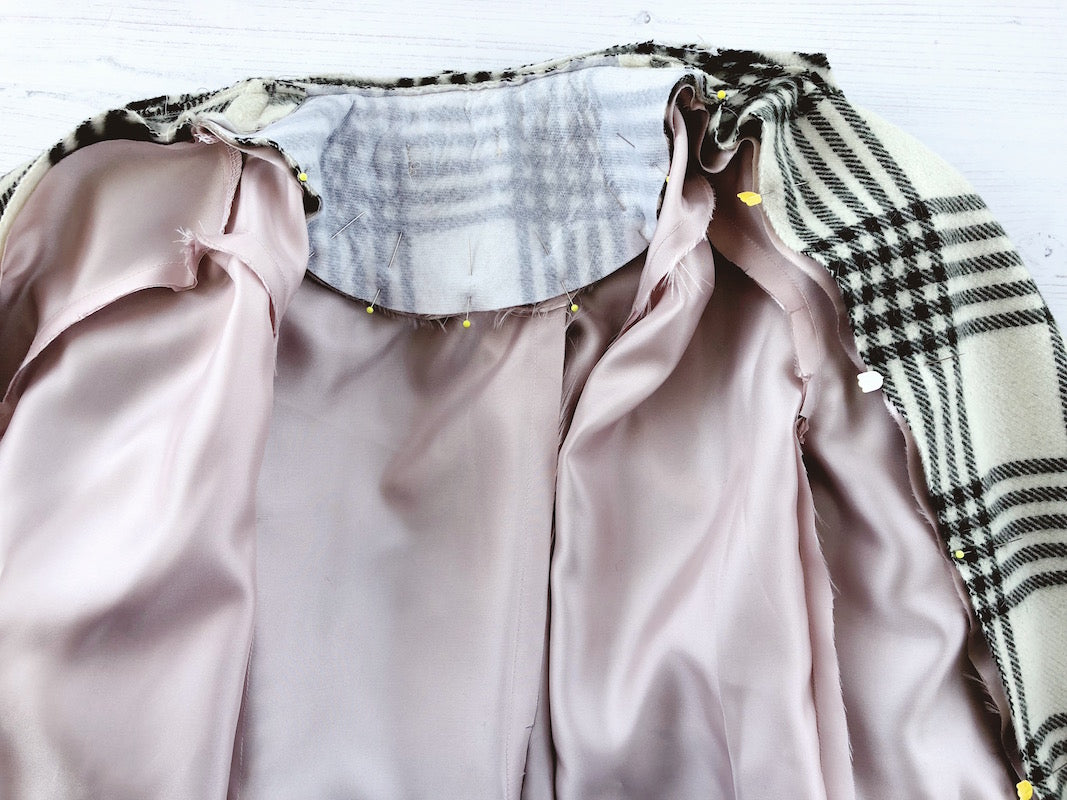
With your coat shell and lining both inside out, and right side of the lining facing the right side of the facing, pin the lining to the coat's facing all along the neckline and down each side matching notches.

Stitch with 3/8" or 10mm seam allowance and start your sewing at the centre back neckline and sew down each side down to the hem one by one so as to prevent the fabrics from shifting and travelling as you sew.
Don't turn your coat out to the right side yet!
To sew the hem, lay out your coat, lining facing you, so that you can see the hem clearly. On the lefthand side of the vent, you'll see that the hemline of the lining appears too short to fit the hemline of the coat. This is normal! What you need to do is pull the lining over to the vent, and pin the lining to the shell at the vertical edge of the vent.

Stitch that vertical vent line from the hem up to the top with 3/8" or 10mm seam allowance.

Now lay out your coat again as before. With that vertical vent seam sewn, you'll see that you can now pin that lefthand hemline smoothly thanks to the couple of inches of that vent that will now fold back to the inside of the coat.

Pin the coat shell to the facing at the hem, continuing to pin the lining to the shell along the rest of the hemline. You may have wondered why the lining pieces curve up slightly at the hem - this is so that the lining stays tucked out of the way and does not sag down beyond the hem once sewn.
Pin the hemline of the righthand side in the same way, although this one you'll see fits together perfectly from the centre front to the vent.

Stitch the hem with 5/8" or 15mm seam allowance. For the righthand side, stitch until you get to the vent, at which point pivot and sew up the last remaining vertical vent edge for about an inch. The rest needs to stay open so that you can turn the coat out to the right side.

Clip corners to reduce bulk when we come to turning the coat out to the right side:

Don't turn your coat out to the right side yet!
Now we need to sew the lining to the shell at the sleeves.
This part is quite tricky to explain, but actually very straightforward when you've done it once. With everything still inside out, you want to take one main fabric sleeve, and its corresponding lining fabric sleeve, and bring them together so they meet at the cuffs - it kind of looks like they're hugging the side of the coat...

With your main fabric cuff pressed in, you'll see that you can slip the cuff lining over the pressed cuff. Being very careful not to twist either sleeve, pin the cuffs together, matching seams.

Getting the pinned cuff through the sewing machine is a little fiddly, so go slow and take care not to catch the underneath as you sew!

Repeat for the sleeve on the other side.
One final thing to do before we turn our coats out to the right side!
In order to keep the cuffs and hem up in place, we need to catchstitch them at the pressed folds while we still have access to the inside of the coat.
Thread up a hand sewing needle and catchstitch the folded hem and cuffs into place, making sure that the lining is not caught in your stitches. If you need help with the catchstitch, please head to this post.

Ok, now we can turn the coat out to the right side!! And if you haven't listened to the episode of the Love to Sew podcast where Jasika refers to turning out a bagged out coat as "birthing", do that now!!
Carefully birth your coat through the opening at the vent. Push the sleeves out so that the lining slips inside them. Give the whole coat a seriously good press, and as you do, also press in that vent opening and pin together, ready to close by hand.

This will be sealed with a blind slip stitch.

Your finished coat, from the inside, should be looking more or less something like this....

If you are adding a button (or more) to your coat, that will be the finishing touch. Using the suggested button placement indicators on the pattern, try on your coat and decide if that placement is right for you; if not, play around with button position on yourself and pop a pin in at the point(s) you feel comfortable with a fastening.
Use the buttonhole feature on your machine to create horizontal buttonhole(s) on the righthand side of your coat (as if you're wearing it) and hand sew your buttons on the other side. If you're feeling particularly patient and wanting to achieve a more couture finish, you could also consider making a hand worked buttonhole (we love this tutorial at By Gum By Golly) or bound buttonholes (check this tutorial by The Little Tailoress).
For this coat, I wanted something resembling more of a snuggly trench coat, so I left out the buttons and made a long waistband to tie around my waist instead. I also slightly exaggerated the width of the coat front pieces (and corresponding front facing pieces) to allow the coat to wrap one side over the other more - we will be putting together another post soon outlining some simple pattern hacks you can do to make myriad coats and jackets from this pattern.

That's it guys! One Rumana Coat done and dusted. We hope this sewalong has helped clarify the trickier aspects of sewing Rumana, and that you enjoy wearing your new coats as much as we do!

Please feel free to tag and share your Rumana Coats with us and the world on social media using the hashtags #RumanaCoat, #BHLRumana and #byhandlondon. We can't shout it loudly enough how much seeing your creations using our patterns is what makes our world go around!

PS. Keen eyed pattern matching perfectionists among you will notice that I’ve well and truly thrown caution to the pattern matching winds on this one, so let me reassure you that this time, it was intentional. Coating fabric don’t come cheap, and in order to match a chunky check as this I would have needed considerably more fabric, and would have ended up with a lot more waste. So in order to be kind to my bank balance AND (in a small way) to the planet, pattern matching had to take a back seat. The more I look at it, the more I love the end result, and think that the haphazard plaid placement actually draws the eye all around, making it more flattering on the figure than it would have been if you had been able to follow the lines around the body without interruption.


-
Elisalex de Castro Peake

Comments on this post (6)
Thank you so so much for all your work in putting this sew-along together! Without it I wouldn’t have had the guts to try such a challenging sew! But because of the step-by-step sew-along, I thought I’d give it a go, and I am so delighted with the results!
Looks like a proper fancy coat! So super pleased, and can’t wait to try more of your patterns!
Thank you, Thank you!
— Tracey
Jennifer, I’ve got a recommendation for printing patterns Stateside: PDF Plotting
http://www.pdfplotting.com/product/bw-pattern-printing/
I saw they were recommended by another sewing blogger, so I gave them a try. To print two coat patterns (this one and another), plus shipping, it was only $15. If you get your order in by 2pm, they ship the same day. I got mine two days after I ordered, and was very happy with the results. The paper was a decent thickness, and they rolled it up to ship, rather than folding it.
(Also, I have no affiliations with the company.)
— Vanessa
Hi Jennifer, thank you so much for leaping to our defence! We really, really appreciate the vote of confidence :)
We will have a tutorial coming showing you how to make the coat wrap for more of a trench-y vibe, but in the meantime, it is actually as simply as extending the coat centre front piece (and corresponding facing piece) to make them wider… If you do this all down the centre front, it will also make the lapel stick out wider, so if you want to keep the lapel as it is, you would just need to increase the width gradually as you come down the CF from the corner of the lapel – I hope I’m making sense?! If not, please feel free to drop me a line at help@byhandlondon.com and I can send you a little sketch.
Regarding the Stateside copyshops, I’m afraid I don’t have any recommendations for you right now, but we are looking into it. We use netprinter.com which are UK based, but worth checking them out to see if they might ship to the US as their prices are so low that even with shipping costs it may work out cheaper than what you’ve been quoted.
All the best!
Elisalex
— Elisalex - By Hand London
Hi Anneke, the non-matching of the plaid was intentional – not for design reasons, but for economical reasons. The fabric was quite expensive, and for a project like this, it would have been unaffordable for me to buy the extra I would have needed in order to have enough to play with to get the plaids to match up across all the panels. Plus, there would have been a huge amount of leftover wasted fabric, so I made a judgement call and decided that this time I would be happy with mismatched plaid if it meant less money spent and less fabric wasted – and actually I really like the end result!
— Elisalex - By Hand London
Oh my gosh, Anneke! I hope that’s a joke and in truth, you’re friends with the gals; ALL OF THEM ARE EXTREMELY TALENTED seamstresses/women!!!
Plaid matching isn’t a necessity and can be quite difficult with multiple lines, lots of adjustments, etc. I have some couture that doesn’t have matching plaid (yes, it’s real. I bought it at Neiman Marcus.) Matter of fact, it appears to be a design detail. My old Gap (amongst others) maternity clothes have perfectly matching plaids. Go figure!
I can’t wait to get started on a short trench version of this. I hope you do a tute on how to make it wraparound. If I’m making mine short—like right past my butt—perhaps I should omit the vent?
Lastly, do you know of any copy shops online or otherwise Stateside to print Rumana? Our major chain wants over $50!
— Jennifer Sandoval
I can see what you did with the plaid matching along the side seam, but what is up with that back? Such a shame!
— Anneke Caramin