Soooo, hopefully our last post on bust adjustments didn't send you running straight to the nearest Forever 21... No? Still with us? Excellent. But don't worry, we threw you in at the deep end and got the worst of it out of the way with all those FBA's & SBA's. Today's post on fixing gapey/tight backs is a whole lot simpler, and tomorrow's post on lengthening/shortening the bodice will be even easier still.
What you'll need:
- Your traced Bodice Back piece of the Flora Dress (Variation 1 or 2, cut out in the size dictated by your waistline measurement)
- Ruler
- Pen
- Paper scissors (not the fabric shears!)
- Extra paper
- Tape
*To be taken to all the posts in the Flora Dress Sewalong, please click here*
Fixing a gapey back
This is a very common alteration, and one that many of us will have to do at some point on our dressmaking journey. If you have even a slightly narrow back, typically find that you have unwanted excess fabric at the back, and low cut back necklines don't sit snug on your body, then this alteration is probably for you.
Step 1
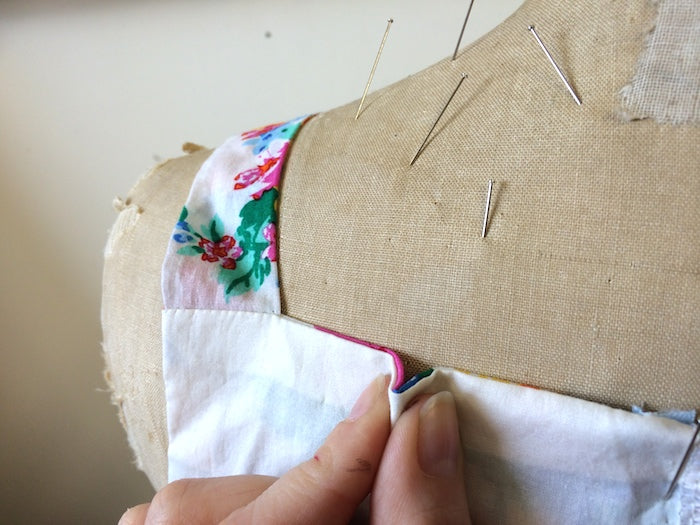
First things first, we need to figure out how much we need to reduce the bodice back by. This is where making up a toile comes in super handy - you will literally be able to pinch out the excess equally on either side of your centre back seam and then figure out by how much you'll need to reduce the back neckline by (and it really helps to either have a friend to help you with this part!).
Let's imagine that we pinched out an inch on either side of the centre back. That'll be a total reduction of the back neckline of 2".
Step 2
Take your traced and cut Bodice Back piece and mark out an inch along the neckline, to the right of the dart.

Step 3
Doing exactly what we did on the toile itself, we are now going to pinch out that unwanted inch on the bodice back pattern piece. Starting at the neckline, fold and tuck between the marks and vanish it out vertically before hitting the waistline. We want the excess gone around the neckline and middle back, but we want to keep the waistline the same.

Step 4
Tape the fold down, and true out the neckline to recreate the perfect curve.


Fixing a tight back
Another easy alteration for taller or broader girls, especially swimmers - this one's for you if your bodices tend to feel way too snug at the back (but fine on the bust), resulting in restricted movement of your arms.
Step 1
Again, we first need to figure out by how much we need to increase the ease in the back by, and this is made possible by making up a toile (and it really helps to either have a friend to help you with this part!). If your back is too tight, you'll notice that you'll struggle to pin the centre back seam together at the required 5/8" or 15mm seam allowance without distorting the shape of the bodice and especially the armhole. Make a note of how much more fabric you'd need at that centre back seam in order to get it to meet at the seam line. This is how much extra ease you'll need to add into your bodice back.
Step 2
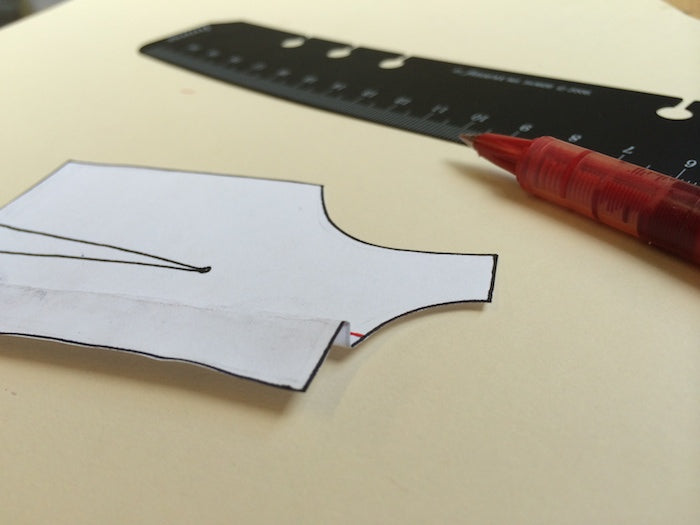
Take your Bodice Back piece and using a ruler and the image below as a guide, draw a reverse 'L' shape from the neckline out to the side seam, just under the armhole. Make sure that the horizontal line doesn't intersect with the dart.

Step 3
Cut along these lines so you have something like this:

Step 4
Place your bodice back pieces onto a spare piece of paper and tape down the bottom part of the bodice (the part with the dart). Now you can carefully and accurately position the top part slightly to the left, thereby opening up the vertical slash line by however much you need to increase the ease in your bodice back. Tape it all down.

Step 5
Finally, re-draw the side seam and the curve of the neckline and cut out your new bodice back piece. You're all done!

*As with any pattern alteration, it is always a good plan to make another toile to check that the fit has been perfected*
That's it from me on this sunny Sunday morning, I'm off to get stuck into some serious extra curricular sewing... Until tomorrow - over and out homies.
-
Elisalex de Castro Peake

Comments on this post (2)
Hi Melissa, do you mean the tank bodice front or the wrap bodice front? For the tank bodice, you could indeed fix a little gape with this technique. For the wrap, you’d have to take out a little dart-shaped slither to get it to sit more snug-ly, or stabilise the bias cut wrap with twill tape right at the start to prevent it from stretching out while you’re stitching it up.
Hope this helps!
— Elisalex - By Hand London
Hi there I have just made the Flora, however, the front bodice piece is slightly gapey . Could the alteration for a gapey back be used on the front bodice ?
— Melissa