
Being pregnant doesn't have to put a stop to your sewing exploits, we promise! We're going to be exploring a few BHL top and dress hacks on the blog over the next couple months which we hope will get all you mamas-to-be and mamas-to-be-again excited about making easy, flattering and comfortable maternity wear.
As someone who traditionally just loves that 50s nipped in waist dress look and prefers sewing in relatively rigid wovens (hardly ever able to resist the siren call of African wax fabric), I'd figured sewing and me and a baby bump wasn't going to work out. So I've hardly made anything these past few months. But, now that I make old man 'oooofffff' noises when I bend down or have to get out of a chair and a waist is something I think of wistfully from time to time, I decided I missed it and I was going to make my hobby work for my new body! Let's be honest, it's not like I'm going to snap back to fit into my old clothes anytime soon after the little monster is born, so I may need this different sized and shaped handmade wardrobe for a while still.
Therefore, so you don't have to, I'll be cutting into my stash and lightly hacking up some By Hand London sewing patterns to suit my new TT&A (that's Tits, Tummy & Ass to you).

Up first for some pattern hacking is our Anna Dress bodice:
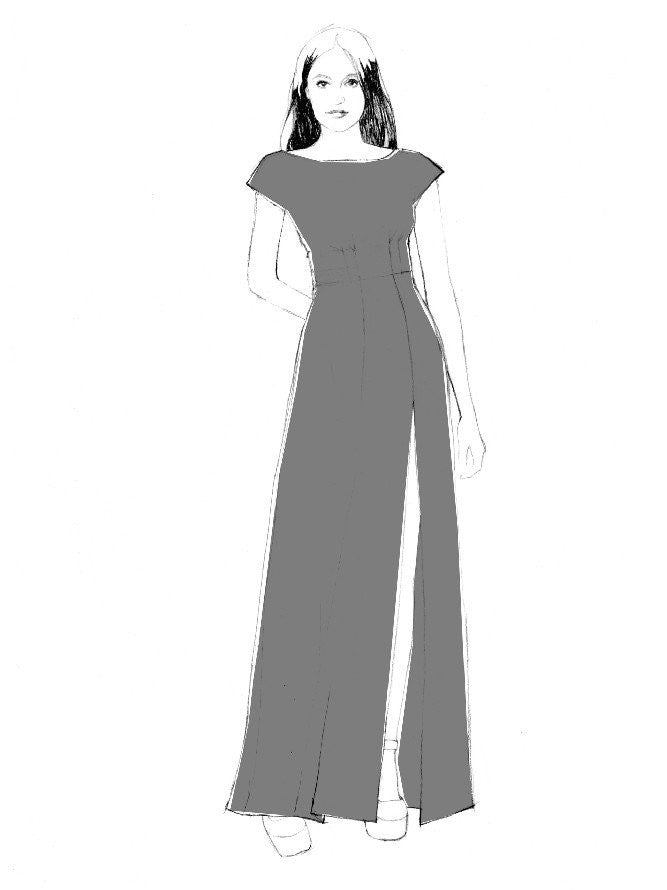
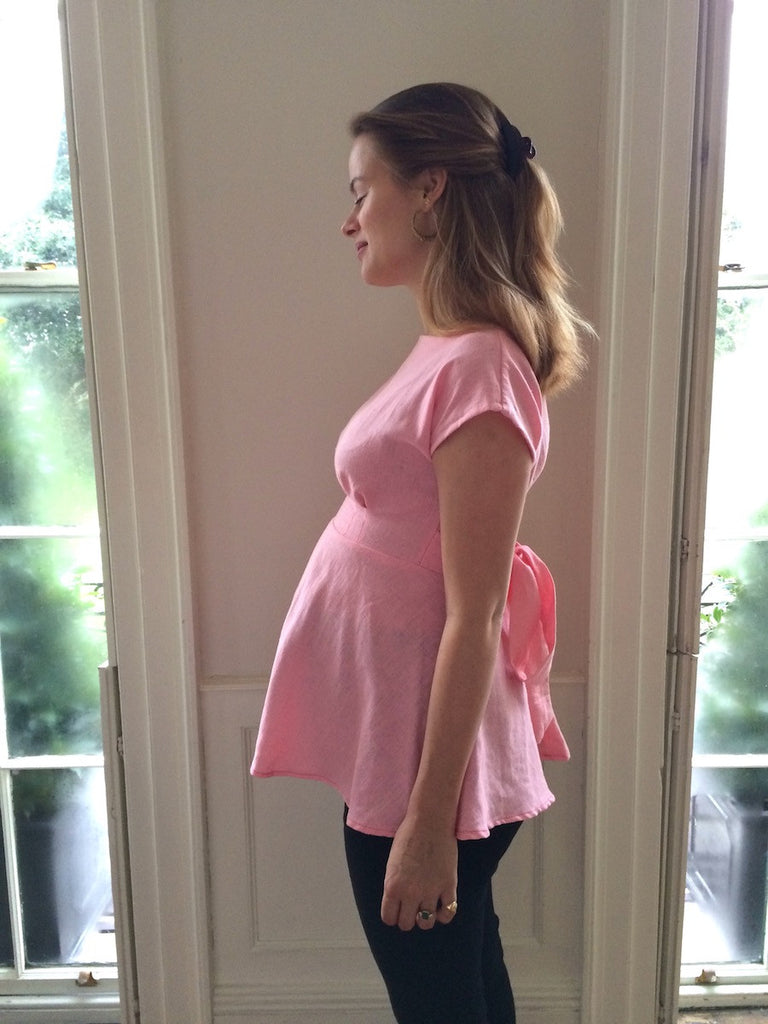
In a nutshell, we're going to shorten the Anna Dress bodice to create the preggo-flattering empire waistline effect and add on a short, flouncy half circle skirt to gently drape over your bump. It's super simple and involves only the most minor of adjustments. I've made it as a top here, but you can of course lengthen your circle skirt and turn it into a dress as well. Oh yes, and I added waist seam ties as well - just because they're prettyyyyyyy.
*Pssssst! As this hack involves tinkering with the original pattern, we advise you trace it first if you are working off one of our paper patterns, rather than a reprintable PDF! This seems obvious, but I am a naturally lazy sewist so this caveat goes out mainly to my like-minded sewing pals out there...*
1. Measure yourself!
Don't make the mistake I did and assume that because we won't be extending the bodice over your stomach that you're still the same size bodice as before.... It seems extra boobies + extra ribcage chub meant I actually needed to size up. NB for choosing my size I just went with my bust measurement as the guide.
2. Trimming the bodice down to empire line length
To start with, we need to draw a cutting line on our original pattern pieces in order to trim it to our new empire-line silhouette.
The finished top I created has 1.5 inches or 3.8 cms of bust pleat visible. We do of course need to add on the 5/8 inches or 15mm seam allowance as well.
This means that, including seam allowance, on your bodice pattern piece you need to measure 2 1/8 inches or 5.3 cms down from the top of your bust pleats.
Because your waistline edge is not a straight line, we need to now measure the distance from the waistline edge of your bodice piece up to those marks you just made on one of your bust pleats. Following your bodice waistline all the way along, use that measurement to create a dotted cutting line.
Taking the same measurement between the waistline edge and the mark you made on your bust pleats, create a matching dotted cutting line on your back bodice piece.
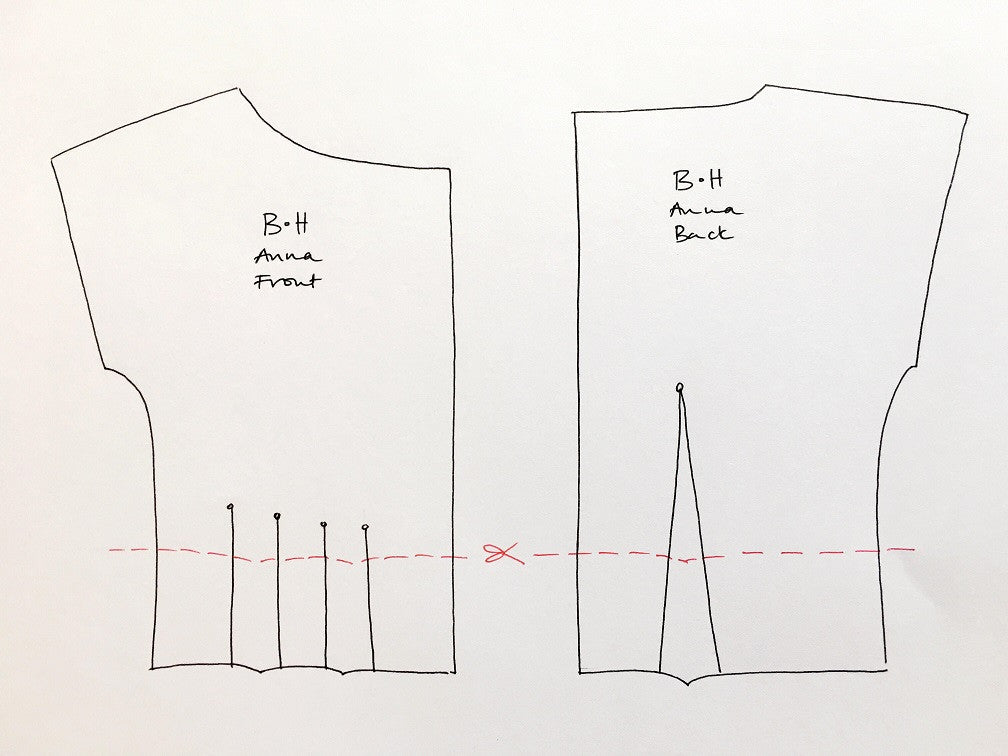
Cut along your dotted lines and ta-daaaaaaa! You've created your new maternity top bodice pieces.
Now you just need to construct the bodice the normal way, making sure to leave the side seams unsewn for now, if you would like to add the side seams ties.
3. Creating your side seam ties
I bloody love the effect of side seam ties! I'm planning to add them in to all new makes I possible can in the upcoming spring and summer months. The drapey effect of them at the back is a great kinda old-fashioned feminine and then they also do a nice little job of just pulling you in a teeny bit for extra curve-effect.

Right! Let's get started. Grab a new piece of pattern paper, or if you're feeling brave, just draw straight onto your fabric with tailor's chalk. My waist ties have a finished width of 2 inches or 5 cms and a length of 35 inches or 89 cms.
If we add on seam allowance at the width and length, this means you need to cut out four tie pieces which are 3 2/8 inches or 8.25 cms wide and 36 2/8 inches or 92 cms long.
To give them a little extra elegance, try giving the ends a little flare or add a triangular point - instead of a straight edge.
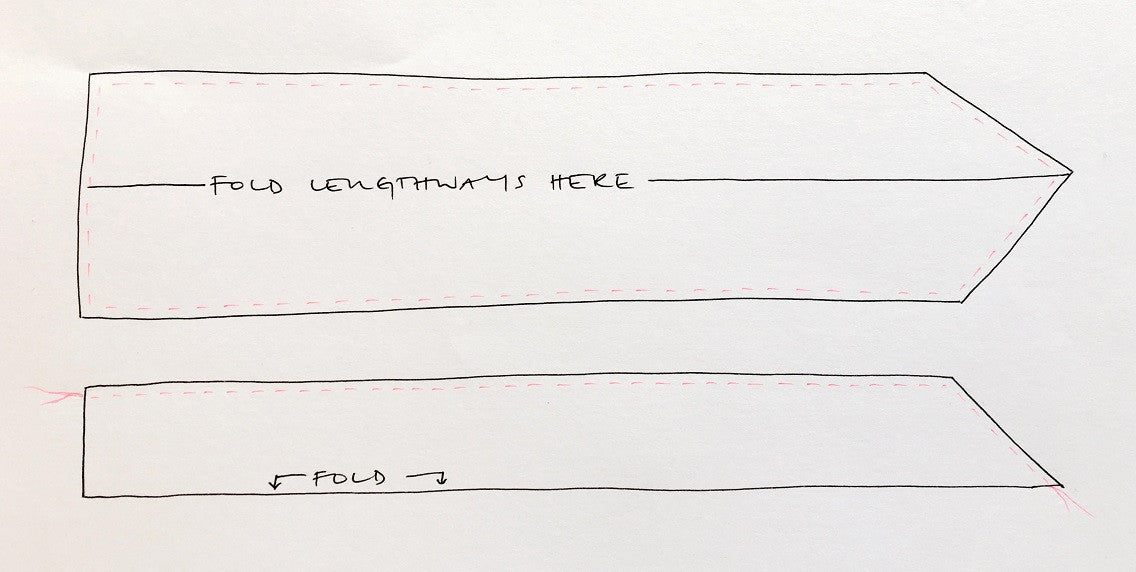
Once you have sewn these together the usual way, right sides together, with 5/8 or 1.5cm seam allowance, trim the seam allowance, turn the right way out and press.
Now you are ready to pin them to your Anna Dress bodice and sew them up into your side seams!
First, just measure 5/8 inch or 1.5 cm up from your waistline raw edge, to make sure your ties don't disappear into your seam allowance. Mark that point with your tailor's chalk and position your ties so that the bottom edge sits on that point. Pin into place on the right side of your fabric and just sew up those side seams as normal!
4. Adding your circle skirt
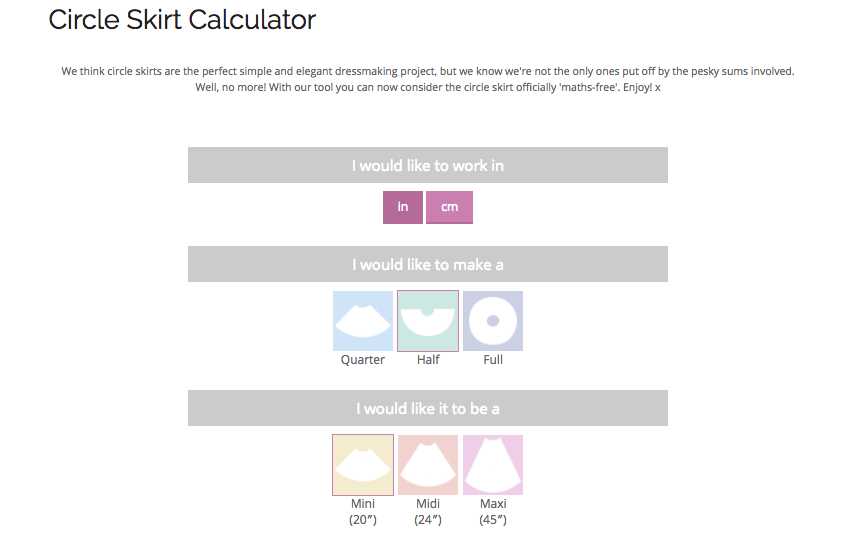
Take your tape measure and go along the raw bodice waistline, take off two lots of seam allowance at the centre back (where your zipper will go) and that is your 'waist' measurement to plug into our Circle Skirt Calculator.
Because you'll only need a short length of fabric compared to when you would normally be making a skirt, just go for mini length. FYI my Anna maternity top hack finished length was 13.5 inches or 34 cms. Remember to add about 1.5 inches or 3.8 cms onto your finished length to make sure you leave enough fabric for the waistline seam and for hemming.
For my top I went for a half circle skirt because I was then 5ish months pregnant with a small bump. Wearing it now at 7ish months, I'm thinking maybe for my next one I might make it a full circle skirt!
5. Insert your invisble zipper
Remember that because this is a top and not a dress, you will only need a 16 inch zipper, as you will only be needing to go from the top of your bodice down to just past your waistline.
We will forever love the chic finish an invisible zipper gives, so we heartily recommend going with that! If you need a little help with inserting yours, head over to our step-by-step blog tutorial for some guidance.
6. Hemming your maternity top
For your circular hem you have three choices for hemming - folded hem, tape hem, overlocked hem - just check them out and follow the step-by-step guides on our easy blog tutorial.
And there you have it! The finished article should now look a little like this:

PS This picturesque fireplace, aged wooden floorboards and artful pile of penguin classics is sadly not my own home! Same goes for the giant Georgian windows you can see in the other photos. It's from our room (Room 1) at the brilliant Reading Rooms in Margate, UK. Very highly recommended!
All done and ready to be worn and show off your beauteous bump :)))))

xxx
Charlotte
Comments on this post (4)
First do you take orders? Would you sew a shirt for me? Ha!
Secondly my hubby built my house with the above floor. It is a bear to keep clean. Everything goes in the cracks. I spend hours vacuum the cracks. It’s a lot of work. So your not missing out. All these rustic designs are cleaning extras.
I love your sewing hacks. Now to go buy fabric! Thank you for sharing your creativity!
— Tabitha
Very elegant. So tough to produce such stunning maternity wear but you have well and truly cracked it with this. Great job.
— DTG Printing
Wow, this is beautiful! Wish you would have posted this a year earlier ;)
And congrats to you, you look great!
— Roxane