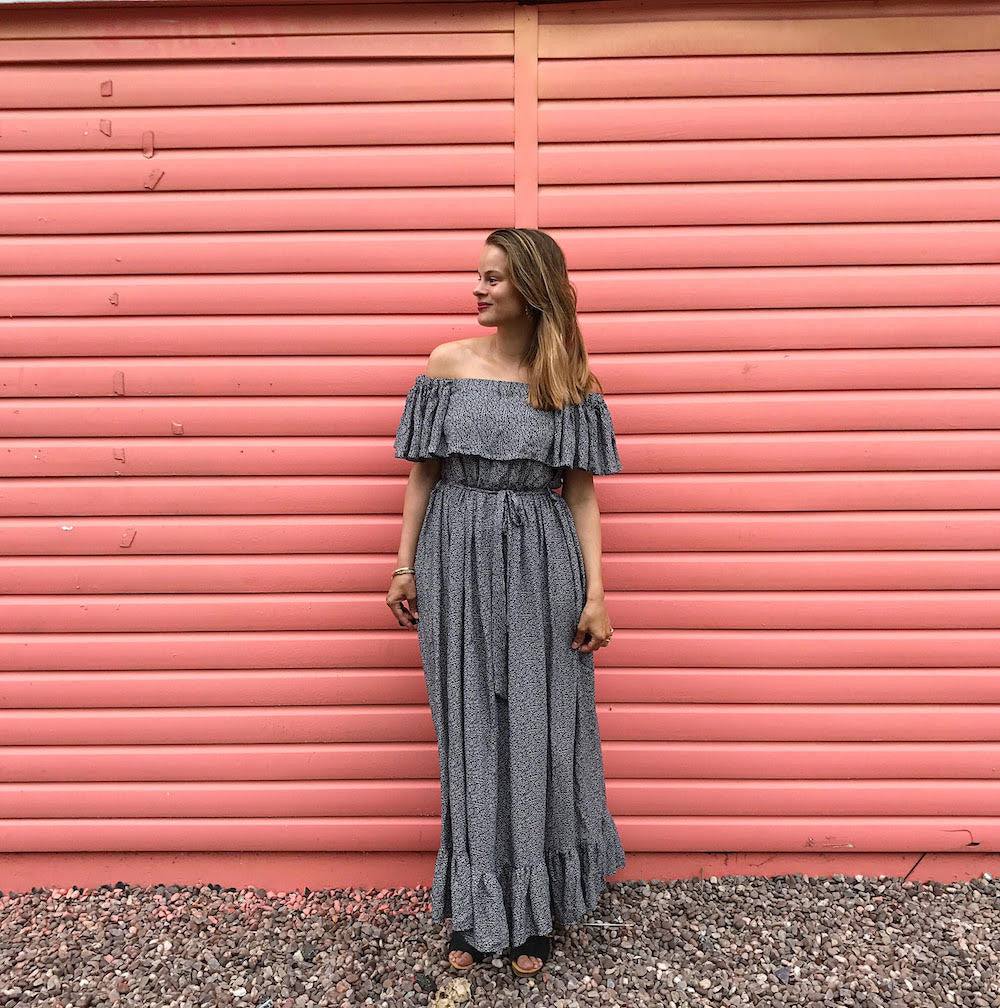

Oh I know it's been popular for a while now, but I still just cannot get enough of the off-the-shoulder trend! Because it draws focus to the neck, back and collarbone it's just so universally flattering and elegant, plus coupled with a drapey fabric the effect is especially chic.
For a recent wedding outfit I decided to go one step further and mash up two of my favourite trends into one pattern-free DIY maxi dress: the tiered, gathered skirt + the off-the-shoulder top. And best of all, there are no fastenings!

I was actually trying to copy this dress below from La Double J, which I love, but just don't have a spare £500 odd lying about for. And anyway, that's what's great about having our sewing superpower riiiiight? You see something you like in a magazine and think, 'ohhhhh, I can make that!'

As you can hopefully see, the maxi dress - both my DIY and the original dress above - doesn't rely on an elasticated waist, but rather on the belt pulling the super roomy bodice waistline in tight. This is great because it gives the dress some longevity in your wardrobe, since it isn't made to fit a particular waist measurement. And, for me, as someone who had a baby a few months ago (and is therefore distinctly lacking a waist right now) this is v. v. important!

I used a fantastic, light and drapey viscose from Stoff and Stil (using just under 4m / 4.4yds in total and I believe it was 120cm / 47in or 130cm / 51in wide.) Below is a little insta-vid of Elisalex and I mainly just messing about, but hopefully also showing off the drapey-ness of the fabric!
1. Create your off-the-shoulder bodice
I followed our popular off-the-shoulder ruffled sundress tutorial to make my bodice.
Lengthwise I cut it to approximately my waist measurement plus seam allowance. Then, I sewed up the top until just an inch below the armholes, leaving the rest of the side seams open - ready to insert the waistline belt loops.
2. Create your belt loops
To create your belt loops, simply cut two rectangles that measure 4" x 1" / 10cm x 3cm.
Assemble them by first pressing them in half lengthways, wrong sides together. Then, press the raw-edge lengths in to meet the central fold from either side. Fold them lengthways down your first crease and pin the pressed lengths together. Finally, topstitch as close and neatly to the edge as you can.

3. Finish your bodice and attach your belt loops
With the side seams pinned closed all the way down, try on your off the shoulder bodice and mark with a pin where you would like the waistline to be. Then, mark on 5/8in / 1cm seam allowance below and cut away any excess fabric there.
Then, baste the loops (folded as shown in the illustration below) to the right side of your bodice front at the side seam, just above your waistline pin. Then lay over the gown back piece and stitch your side seams as normal, sandwiching the loops between the front and back.

4. Create your belt
Cut two long lengths of fabric 2" x 70" / 5cm x 180cm (or longer if you prefer), cutting the ends diagonally. Assemble by placing both lengths together, right sides facing, and sewing all around with 3/8" or 1cm seam allowance, leaving a gap of about 1 1/2" or 4cm through which to turn your belt out to the right side. Once you've turned your belt out to the right side and pressed it, you just need to secure that last little bit with a blind slip stitch

5. Create your tiered gathered skirt
For this skirt I used the principles from this two-tiered gathered skirt tutorial of ours:
The skirt's top tier - your waistline measurement x 2.5 wide
The skirt's bottom frill tier - top tier x 1.5 wide
NB your waistline in this case is not your actual waist measurement, but the width of your finished off-the-shoulder bodice.
And the length for both of your tiers is really just up to your personal taste and how much fabric you have available.
*Top tip*
Gathering this much drapey fabric requires a lot of patience, which I generally lack. Every time I have to gather anything I turn to this excellent sewing hack which makes it super fast and only requires a zigzag stitch plus dental floss / twine / embroidery floss.
6. Final touches
Now you simply spread and pin your tiered gathered skirt along your bodice waistband as you usually would, with right sides together. Then sew them together with your standard 5/8in or 1cm seam allowance. Go slow at the side seams, ensuring you don't trap the belt loops!
And that's IT! A pattern-free maxi dress which is truly sewable by confident beginners upwards and just perfect for those summer nights.

x
Charlotte
Comments on this post (3)
Oh wow! The dress looks really nice. I feel like trying my own now))
— Asumpta
This is such a fantastic tutorial, thank you so much!
— Anna
Thanks for sharing this pattern-free dress! I love seeing clothes and knowing how to recreate them myself, because I too do not have a chunk of money lying around :) This dress is lovely!
— Kelsey