As you delve into the wild and wonderful world of dressmaking, you'll quickly learn that things aren't quite as simple as cutting out some fabric, sewing it up and hey presto, a dress! No, in fact, a whole lot of pressing, trimming, clipping, understitching and finishing goes on behind those seams... Sewing patterns and sewalongs can sometimes throw around phrases like, "clip SA at curves", or, "press open", or, "grade and understitch seam allowance" as if it were as self explanatory as say, "brush your teeth", or, "pour me a glass of wine". But all too often when you're starting out, it's those seemingly simple instructions that can flummox, and even stop a beginner sewist in her/his tracks.
Hopefully, we can help to clear things up! Today we'll be talking about trimming and grading seam allowances, all in a bid to reduce bulk and prevent your seam allowances from causing unsightly ridges that show through to the right side of your garments.
Trimming your seams
What & why? Trimming your seams, or finishing your seams, simply refers to the neatening of your raw seam allowances after a seam has been sewn. Think side seams, some princess seams, anywhere a seam is required to be pressed open. Neatening raw seam allowances prevents your fabric from fraying and results in a garment that will last longer.
How? Press your seam open, and trim away the excess with pinking shears, or for a really professional finish, an overlocker/serger.

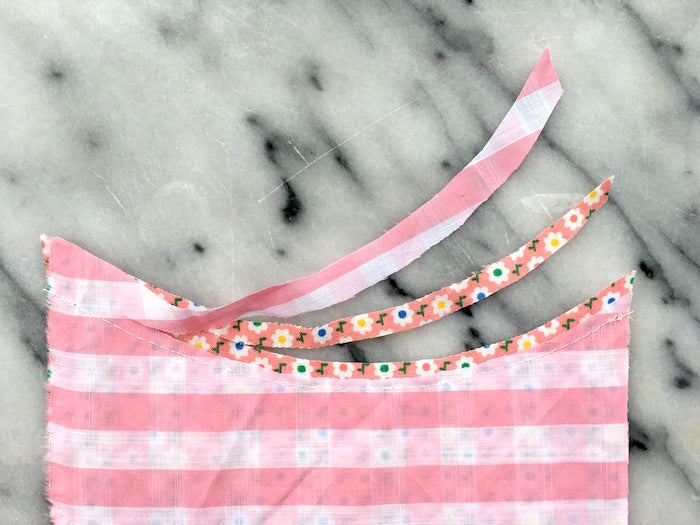
If your seam is curved, a princess seam for example, you will need to notch your seam allowance in order to reduce bulk, or clip to release the tension when pressing. See this post for all you need to know about clipping and notching.
Grading your seams
What & why? Grading your seams means trimming your raw seam allowances to different widths. This is applied to seams where your seam allowance will be enclosed - necklines, collars, side seams where inseam pockets are present, seams with more than two layers - basically anyplace where you want to avoid a bulky ridge of sandwiched seam allowances showing through to the right side.
How? Start with the lining. Using regular fabric scissors, trim the seam allowance way down to about 1/8". Then trim the next layer of seam allowance down to 1/4". If your seam has another layer, trim that one down to 1/2", and so on. The idea is to stagger the widths of the seam allowances in order to end up with as smooth a transition as possible from the widest seam allowance to the narrowest. Bear in mind that the widest seam allowance should be the one that will sit alongside the main fabric of your garment, ie. closest to the outside.

If your seam is curved, at a neckline for example, I like to grade before I clip/notch. I find it much faster and neater.

If you were to clip first and then grade, you would end up with a whole load of messy little snippets like this:

Grading and trimming corner seams
What & why? A combination of both trimming and grading is needed at corner seams in order to efficiently reduce bulk and make for a sharp and crispy corner when turned to the right side and pressed.
How? First of all, snip diagonally across the corner, getting as close to your line of stitching as you can without compromising your stitches. Then grade the seam allowances either side of the corner.

Next - and this always reminds me of making paper airplanes for some reason - trim away the 'wings' - that is, trim away long triangles diagonally along the seam allowances towards the corner:

Reducing bulk at a multiseam intersection
What & why? When assembling multiple pattern pieces, we often come across seam intersections. At a waistline seam for example, where the side seams cross, or at an armscye, where the underarm of your sleeve meets the side seam of your bodice. This can result in a hefty up-to-six layer seam!
How? Using a dress' waistline seam as an example - if the seam is to be pressed open, and after the waistline has all been sewn, snip away little triangles at the ends of the vertical side seam allowances, using the image below as a guide.

If this seam is to be pressed all in one direction however, I would recommend grading that waistline seam allowance as well.
Well, I hope this post has shed some light on trimming, grading and minimising potentially bulky seam allowances! For more posts like this and our favourite nerdy sewing tips, click here to have a browse of our offerings!
As ever, please feel free to chime in in the comments below with any of your tried and tested tricks of the trade, plus any tricky techniques you'd like explained in more detail...
-
Elisalex de Castro Peake

Comments on this post (8)
Looking for the best solution to joining seams of felted wool which will occasionally cross over at corners.
— Beryl Robinson
Hi Mary – Yes, this will work for that type of fabric. .
— Jessica - By Hand London
Will the seams work on light weight satin so they won’t show to the right side when pressed.please can they be trim this way need help .thank you
— Mary A.dkinson
Thank you so much. This is just what I needed. The information was straight to the point .
— Stephanie Muhammad
Hi there! I have been trimming my necklines and arm holes down to about 1/8 inch (no clipping except corners.) I suddenly have this sick feeling in my tummy that the dresses I have made this way wont hold up. ?
— Sara McIntosh
Hi Ginny, ideally if you’re making shorts or trousers out of a heavy fabric like denim, the best thing to do is flat fell the inseam. This not only makes for a strong and durable seam, but it also hides all the messy curve clipping within the seam (in a similar way to a French seam). Hope this helps! ~Elisalex
— Elisalex - By Hand London
Can you help with how to trim an inside trouser seam on a child’s shorts made in denim? The front to back seam allowance is really curved, and unless clipped stands proud of the seam when the garment is finished, which would distort the garment and be uncomfortable to wear. However, when I’ve clipped the seam allowance, it makes for a really messy seam, and the amount of wear it will get in that site means it will wear out and fray really quickly. I’ve tried to see how ready-made trousers manage it, but the seams are overlocked and much narrower seam allowance which doesn’t seem to have the same problem
— Ginny May
Thank you for the reminder! When in a rush I forget how important these little details are. x Allison www.thetallmamstyle.blogspot.com
— Allison @ The Tall Mama