In our last post, where we hacked the Elisalex Dress into a floaty boho dream of a dress complete with neckline capelet, we touched upon the subject of trends, and how I'm - generally speaking - rarely one for basing my season's sewing plans on the latest issue of Vogue. Don't get me wrong - I love looking at the pretty pictures, and I take a wealth of inspiration from a small handful of designers season in and season out, but when it comes to things like "five must-have looks for fall", I'm never usually sold. Until this season, apparently! 70s boho? Digging it. Debutante chic? Always. Velvet? Bring it on. And it's not just me - Victorian goth? Hello, Victoire! High-necked geek glam? Ummm, Charlotte!
So now that Autumn Winter 2015 has 100% infiltrated our sewing plans, we thought we may as well start a little series to document it, with some fun pattern hacks and DIY tutorials thrown in for good measure. First up, culottes.

Aaaaahhhh, culottes. When I used to picture (ok, wear) culottes, they were nothing more than floral mock-skirts that didn't fall quite as well or look quite as good as a skirt, because they weren't a skirt. They were, in fact, the boring sensible cousin of the skirt. Just look at how far the culotte has come... Not pretending to be anything it's not, instead unashamedly basking in its own softly tailored, wide-legged, ankle-grazing glory. Here's a little Pinterest candy that gets my point across nicely.

To make your Holly culottes, you will need:
- The Holly Jumpsuit pattern - trouser and waistband pieces only
- Our side slanted pockets tutorial, if you want to add pockets like we did
- Your fabric - wool crêpe, tweed or wool suiting are ideal, or go super luxe with Shantung silk or silk Marocain
- Extra pattern paper to alter the pattern, plus your usual drafting and sewing tools and supplies
Step 1 - Altering the pattern
Now, you could quite easily just hack 15" off the length of the existing Holly trousers and call it a day, but in order to really make the most out of this season's culottes trend, we wanted to throw in some menswear inspired details, namely pleats and slanted pockets (because you always look chicer when you have a pocket to lean into).
To draft the pleats, and at the same time increase the width of the trouser legs, draw a vertical line from the waistline notch to the hem for the trouser front, and through the centre of the dart to the hem for the trouser back.

Cut these vertical lines.

Place your spare pattern paper underneath and open up that vertical cut by 2" evenly all the way down, for both front and back pieces. Tape down to secure and re-draw the waistline.

For the trouser front, you'll want to mark three notches along the waistline to indicate the pleat - one either side of the 2" opening, and one slap bang in the centre (new notches shown in red). To create the box pleat we'll be bring the outer notches in to meet the central notch.

For the trouser back piece, the outer notches are the same notches as indicated by the dart we split in half, and the central notch is the halfway point between them.
Finally, slice off the bottom of the trouser legs to achieve your desired length of culotte. I opted for a final length of 28" waistline to hem. Don't forget your hemming allowance!

If you're adding side slanted pockets to your culottes, check out this post here.
Cut out your fabric and let's get sewing!
Step 2 - Assembling the culottes
First things first, get your pockets all sewn in to your trouser fronts (as outlined in our tutorial linked to above).
Assemble the inverted box pleats on all front and back trouser pieces by bringing the outermost notches in to meet the central notch. Pin into place and baste to secure.


Now go about the rest of the sewing of your Holly trousers as normal. Do check out our Holly Jumpsuit Sewalong for any guidance with sewing or altering the Holly trouser pattern.

I moved the zipper from the side seam to the centre back so that it wouldn't interfere with the pockets. If you choose to do the same, the only thing different in the order of the steps in assembling your trousers, is that you'll be sewing both side seams, followed by both inseams, then inserting the zipper at centre back, and finally sewing the crotch seam.


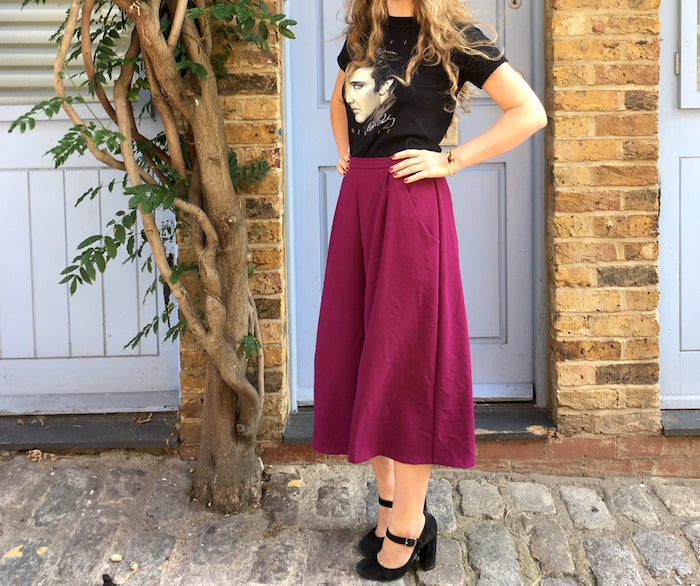
And there you have it! Made up in a soft and bouncy wool crêpe, I couldn't have been more comfortable running around town in these today. Comfy, and chic as hell, and bang on trend you guys!
-
Elisalex de Castro Peake

Comments on this post (13)
Looks fabulous! What fabric did you use? Do you think a beginner could do this? I have experience sewing bags and quilts, but I am new to sewing clothes.
— Jeske
Hi Charlie – yes indeed, pleats front and back!
— Elisalex - By Hand London
Do you put the pleats in the back as well as the front?
— charlie
thesame color to our uniform in college
— eva cuenca
Such a simple and great explanation, thanks!
— mary
Je trouve ce modèle de jupe culotte ravissant !
Je ne comprends pas comment le mettre à ma taille ? ( 46 ) Merci .
— Hélène
Love these! The colour is gorgeous. It’s a fantastic hack xxx
— Karen
That’s a really cute hack! I must confess I’m not usually a fan of culottes but I’m sorely tempted now…
— Niamh
Wow, great tute Elisalex. Thank you for this, I am going to give it a go for sure. I think its imprtant that cullottes fit through the backside. I love the shape of my Erins but I’m self conscious of ill fitting bum silhouette.
http://sewniptuck.com/2015/07/03/culottes-actual-garment-photos-incl/
I note at the end of that post I said I’d made enough culottes, but I reckon if I made a pair that fit better (i’m always hitching these up because they were huge in the waist despite taking them in10-12cm), I’m a happy camper in culottes. Breezy trews for a southern hemisphere summer!
— Lesley
Yay!! Thank you for this!! I have been wanting to try culottes but wasn’t sure which pattern to buy. Luckily, I already have the Holly so will definitely be trying this hack. Thanks again!
— Bianca
Very nice! Love the colour. How about the back view?
— Hélène
Those are really great! The color and texture especially. I may need to sew a pair!
— Helena@GrayAllDay
Ooh I love these! Haven’t even made my Holly jumpsuit yet and I’m already wanting to hack it! Even thinking about going super ’70s-boho and adding the capelet to the jumpsuit…
— Nina