To wrap up this month of June 2022, which we kicked off with the publication of a super special supplement in Love Sewing magazine celebrating our 10 year biz anniversary (!!!) which also came with our Lizz dress pattern for free, we thought it would be fitting 😉 for all of us in the studio to make new Lizz dresses and show you what a versatile and hackable pattern she really is! Huge thanks also go to our pals at New Craft House for supplying us with fabrics for these makes - we've been massive fans of NCH since day 1 and can regularly be found drooling over their mouth watering selection of designer deadstock fabrics!
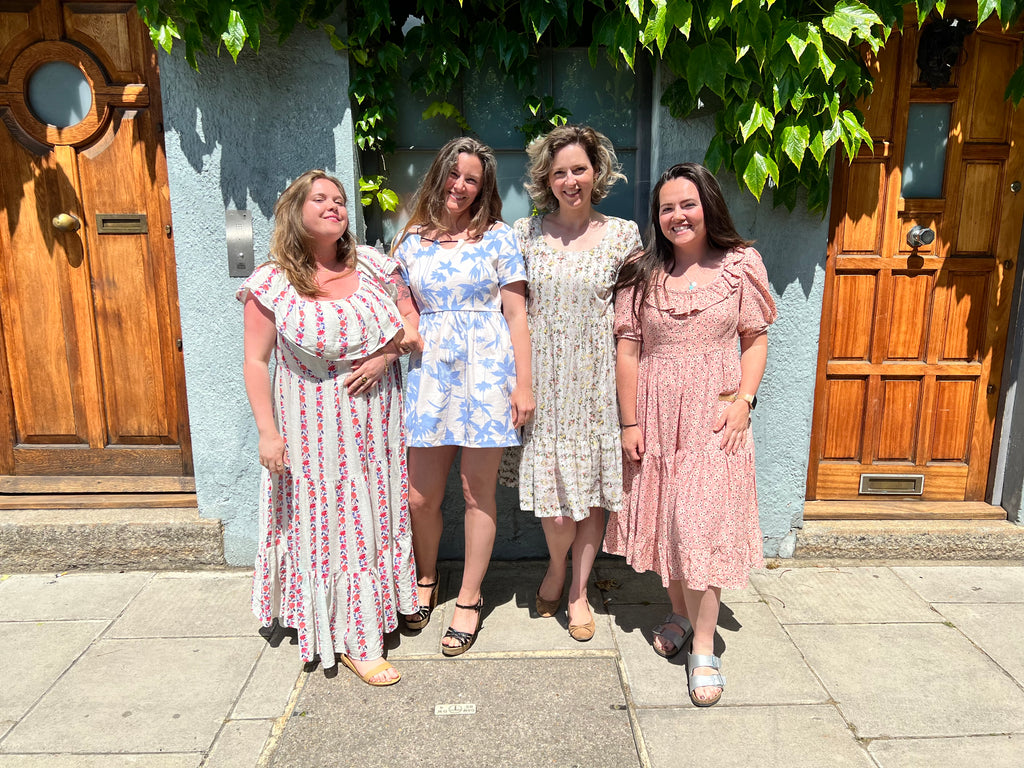
So here we are in our Lizz's - one pattern, four very different looks!
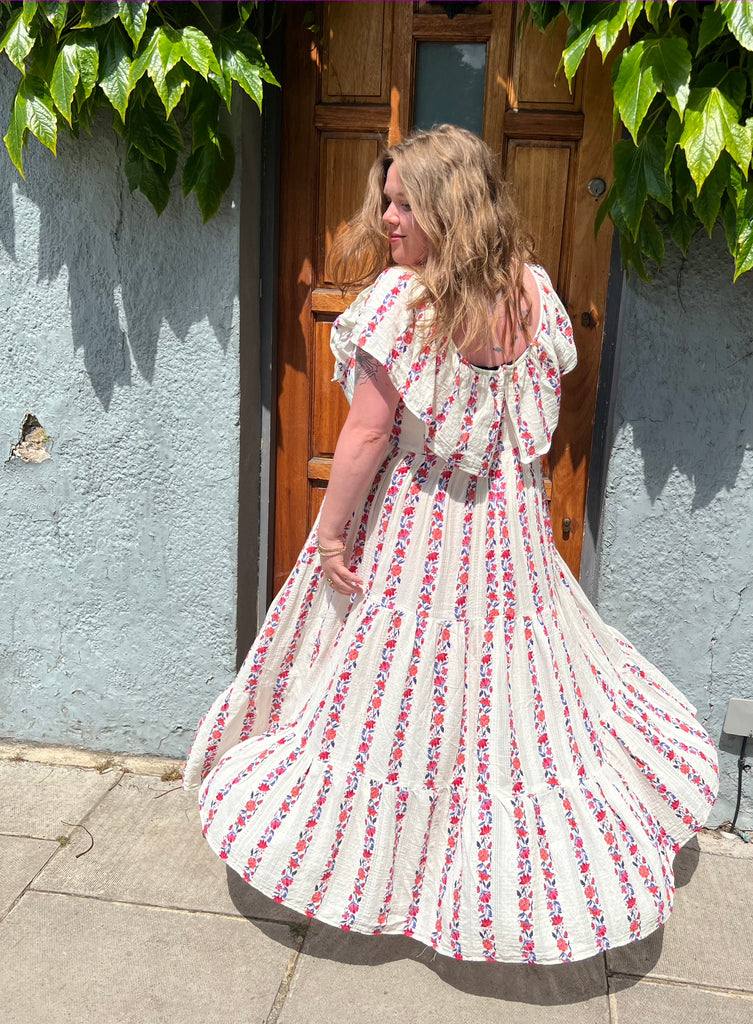
Elisalex
I was inspired by a neckline detail I spotted on a Cecilie Bahnsen dress, knowing immediately that our Lizz dress would be the perfect starting point for a fun pattern hacking session...

Essentially, the hack is just a reverse scallop neckline. The concave scallops are cut into the neckline, as opposed to a scallop hem where the curves are convex. I remembered to factor in 1cm seam allowance at the scallops, and lowered the back neckline as well.

I used a lightweight woven fusible interfacing from Vlieseline (gifted) to reinforce the scallops - this is so important as it helps to get a really crisp finish, and makes the sewing process easier too as it stabilises the fabric!

As I was sewing the neckline (main fabric to lining fabric), I left open gaps at the scallop ends, so that I'd be able to thread a rouleau drawstring through at the end to finish the neckline off.

I love the end result! I think that as a result of the fabrics I chose - the pale blue large scale leafy print twill from New Craft House and the contrasting black cupro drawstring - and the cutesy look of the high waistline and mini gathered skirt, the final look is more Miu Miu than Cecilie Bahnsen.... And I'm A-OK with that!


Jess
Heavily inspired by these two images I set about to make my own sheer gathered Lizz. The fabric I chose is Midsommer Cotton Voile from The New Craft House.
The first thing needed was to adjust the bust dart height and length and make a toile. I moved my bust darts down 1” and shortened them by 1/2” inch. Because I decided to omit the waist darts completely I did not have to make any other dart changes, but usually I would also have lowered the waist dart by 1” to make sure the apex was hitting the correct spot. After making the toile I added and additional 1cm to each side seam for an even loser fit and to allow the dress to go overhead without a zipper!
Next step was to lengthen the bodice by an inch, as the length was pretty good on the bodice toile without the skirt attached.
To create fullness and gathers in the sleeve I used the sash and spread method.
Slashing the pattern on either side of the centre notch at the sleeve head I added 1.5" on each side and an additional notch on the back sleeve head to create my gathering markings. I then spread the bottom of the sleeve out even further so the side seams of the sleeve were vertical creating additional fullness at the hem. Cropping the sleeve length to below my elbow and adding 1 1/4” hem allowance to allow for a double turn deep hem.
Once I was happy with the bodice and sleeves I calculated how many gathers and how much fabric I would require for my skirt.
Measure the finished waistline and multiply by 2. Measure the tier 1 skirt hem and multiply that by 2, voila! I have the lengths needed. To calculate the depth of the depth of each tier I just kind of eyeball it based on how long I want my finished dress to be, making tier 2 one third the depth of tier 1, or thereabouts, depending on how well it fits onto the fabric. This dress has a lovely 1” hem, double turned the same as the sleeves.

Once I think I know how much fabric I will need for my tiers I like to draw out a “length” of fabric in paper (usually a scale of 1:10 in cm) This way I can actually roughly draw my pattern onto the fabric to figure out how many lengths of fabric I’ll need to cut and if I actually have enough! Sometimes I have had to go back and recalculate my gathers to be 1.75x instead of 2x because there was not enough fabric.

After that it's all cutting and sewing and pretty floaty dress time!

Mattie
For my Lizz I wanted to make a dress that showed off the pattern's floaty summer qualities. Folkloric flamenco were the two words I had in mind, ruffles and drama but in a relaxed, easy to wear way. I loved the simple floral of this beautiful New Craft House Honeysuckle Cotton Jacquard (which really quickly sold out!), and all of the different textures made it feel a bit rustic. To modify the pattern, I lowered the front and back neckline, and narrowed the shoulders so that it could be sleeveless. I used our Kim pattern as a guide, but any sleeveless pattern you like will help! When I'm making adjustments on the fly like this, but don't want to sew a whole toile (since I've already made both patterns before), I cut and sew just the lining first. This way I can check the fit, and if I need to make any changes I haven't cut into my nice fabric!

I then recalculated the ruffle size I needed for the neckline. I measured my new neckline (I did this after sewing up the lining because I found it easier, but you can do it off pattern pieces). The original pattern has 3x gathers on the neckline, but because I was lengthening mine (and fabric constraints!) I decided to make mine 2x gathers. I multiplied my new neckline by 2x, and cut a piece of fabric that wide and 10 inches tall. I didn't adjust the pattern for height at all, I'm 5'1" and I wanted a true maxi, so the extra length on me helped. Aside from that I followed the pattern as normal, and I couldn't be happier with how it turned out.

Elle
I made my perfect spring Lizz dress using this gorgeous pale pink viscose with a floral print from Rainbow Fabrics. I decided to keep it quite true to the original pattern and made Variation 1 with the curved neck and ruffle. I did however decide to hack it slightly and use my own sleeve pattern as I wanted to have a puff sleeve (which is my go to style!). I used a tried and tested puff sleeve pattern that I had used for a previous dress and then cut a strip of fabric on the bias to create a narrow cuff for the sleeve as well.

I didn't have enough fabric to cut two pieces of fabric for the third tier so instead I just cut one of the third tier pattern pieces and then cut it in half lengthways so that I had two shallower pieces that I could sew together at the side seams. This resulted in a lovely smaller tier at the bottom which I thought was perfect for me as I am quite short and think the full length third tier may have swamped me slightly.

I also didn't have a 22" zip, so I had to get some advice from the rest of the team at how to overcome this slight obstacle! Elisalex said I should be fine using my 16" zip as long as I had at least 3" of zip below the waistline. So, that meant that I would be starting my zip at just above my bra strap; Mattie then had the great idea to make a feature out of this and create a keyhole just above the zip to the neckline of my dress, and I love it!

-
Elisalex de Castro Peake

Comments on this post (0)