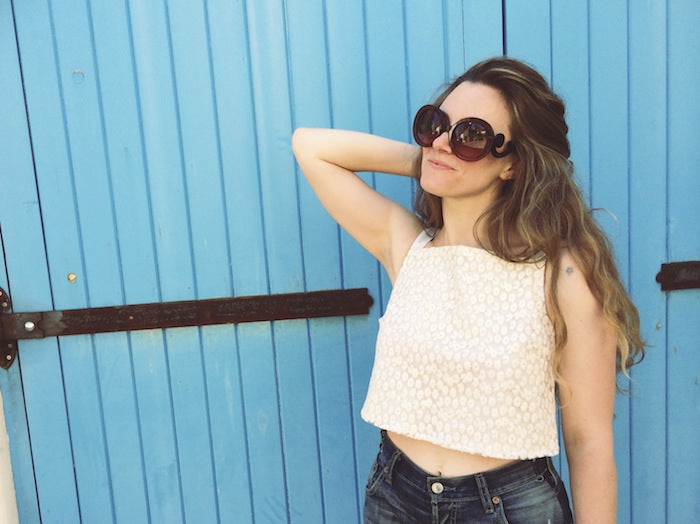
Pattern hacking time! With all this glorious weather and festivals galore, I've turned to my usual Summer uniform of a high-waisted something teamed with a crop top. Still sexy in the flash of upper midriff whilst hiding unruly tums (and post-baby stretch marks!), this has become somewhat of a go-to look for me. Up for a hacking today is the Flora Dress, which we'll be showing how to turn into a cheeky woven tank top...
You will need:
- The Flora Dress pattern - variation 2 tank bodice pieces and shoulder strap only
- Extra pattern paper for tracing and altering - baking paper or dot & cross paper is ideal
- A little button and button loop to fasten
- Your main fabric, lining and usual sewing supplies
Step 1 - Altering the pattern
To make the Flora Dress bodice suitable as a top, we first need to go about making a couple of minor changes. If you've never altered a paper pattern before - please don't let this put you off! This part is easy as pie and will hopefully illustrate how doable customising your existing patterns can be.
As the bodice stands now, we have darts at the bust and waist to give shape, and a zip up the centre back for entry. To make the Flora into a top, we want to make it less fitted, whilst keeping some shape so it still fits, and we want to eliminate the zipper and create a new opening at the neckline in order to be able to pull it over our heads.
So. To the bodice front, all we need to do is simply ignore the waistline darts and straighten out the waistline:

And to the bodice back:
- Ignore the dart
- Trim away the 5/8" or 15mm seam allowance at centre back and indicate that it is to be placed on the fold
- Draw a keyhole opening that starts 5/8" or 15mm down from the centre back neckline and ends before going past the bra strap point (note: the top of the keyhole opening will be cut on the fold as the rest of the centre back, with just the keyhole being cut out. We will snip the top of the opening after the lining has been stitched to the main fabric)

Once you have altered your bodice front and back, you can go ahead with cutting out your fabric and lining. And just to illustrate what the bodice back should now look like when it's all cut out, here's one we cut a little earlier!

Step 2 - Assembling your top
This next part is basically the same as we've shown in the instruction booklet of your Flora Dress - stitch the bust darts of both your main fabric and lining (no waistline darts remember!)...

...assemble and baste the shoulder straps to the bodice front...

...join the front lining...

...snip the seam allowance at the curves to enable you to turn it to the right side...


...and baste the loose ends of the straps to the bodice back.

Step 3 - The keyhole opening
Now's the part where things start to differ from the main instructions. Once the shoulder straps have been basted and before we join the back lining, we need to baste one of those little button loops to the right side of top of the centre back where the keyhole will open and be closed. We had a long strip of pre-made button loops - usually used for bridal - but you could easily make your own little loop using our rouleau strap tutorial or our bias binding tutorial.


Make sure that the loop is basted facing into the bodice, towards the armhole, so that once it's all turned out the loop will stick out.
Now join the bodice back lining, pinning and stitching around the armhole, the first half of the neckline, pivoting at centre back and stitching around the keyhole, the rest of the neckline and second armhole.

Either trim the excess seam allowance with pinking shears or snip into the curves. It is at this point that we can snip the opening of the keyhole.


Now turn it all out to the right side and press.


Almost done! And how pretty is the top of that keyhole looking - if I do say so myself!
Back to the main instructions now and time to close the side seams...

Hem your tank top as you would a normal hem - simply turn and press the raw hemlines of your main fabric and lining in twice by a 1/4" each time (or however much to achieve your desired top length), press and stitch.

And finally, hand sew your little button into place at the opening of your keyhole opposite the loop.

One Flora tank top, done!


-
Elisalex de Castro Peake

Comments on this post (3)
That takes us up to the next level. Great pontsig.
— Jesslyn
How many options from one pattern?! Love this version. On the home stretch of my first Flora and it’s already a big love affair.
— Karen
Oooooh this would look fab for my holidays!! Defo trying it. Thanks! :)
http://prettyflorals.co.uk
— Suz