We briefly interrupt the Flora Dress Sewalong to bring you another little light-shedder to add to our ever growing gallery of Nerdy Sewing Tips - today, the flat-fell seam.
So what exactly is a flat-fell seam?? Well, if you're wearing jeans right now, just take a peek at your crotch! The inner leg seam on a pair of jeans, and indeed the vast majority of RTW trousers, is a flat-fell seam. Technically speaking, a flat-fell seam is a very strong seam that has two lines of stitching visible from the right side, and no bulky excess seam allowance inside. Sounds complicated, right? Super wrong! Guys, I bring you excellent tidings - the flat-fell seam could not be easier to pull off...
Where-to, Why-to & How-to
This technique is ideally applied to the inseam of a pair of trousers or shorts. The seam itself provides super strength and durability, plus there's no pesky excess seam allowance on the inside to rub and irritate your skin. As an extra bonus, the flat-fell seam will not fray as the excess seam allowance is completely encased, rather like a French seam.
Step 1
Start by identifying the "right side" and "wrong side" of your fabric. The right side is the side you want to show from the outside.

Step 2
Pin your fabric, wrong sides together, along the raw edges to be seamed.

Step 3
Stitch with your usual seam allowance, as dictated by the pattern you're working from. This will probably be 5/8" or 15mm.

Step 4
We now need to trim the excess seam allowance to about 5-8mm from just one length. Press the seam allowance so that wider length covers the length you just trimmed.

Step 5
Fold and press the wider length over, so that it starts to encase the narrower length. Pin into place.


Step 6
To secure it all down and finish your flat-fell seam, topstitch as close to the pressed fold as possible, preferably 1-2mm from the fold.

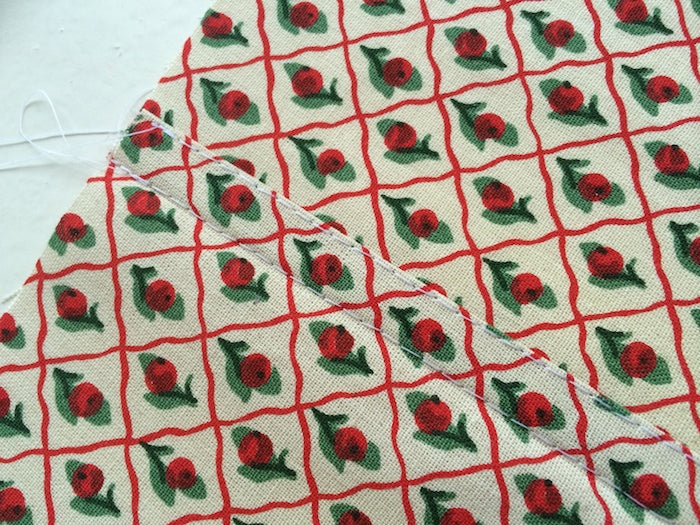
Give it one last press and you're done! It should look like this from the right side:

And like this from the wrong side:

-
Elisalex de Castro Peake

Comments on this post (4)
Excellent instruction. Some colonial clothing was made using this type of seam,
according to historical sources as used by reenactment groups, such as the Brigade of the American Revolution.
— Lois PALMER
HF:
The answer is that flat felled seams tend to be very sturdy, and so we often see them on seams that are likely to experience some stretching/stress – for example, the inseams/crotch on pants. Clothing intended to stand up to more wear and tear tends to have more seams reinforced by flat felling (for an extreme example of this, check out work pants from somewhere like Carhartt – most of their seams are flat felled and reinforced).
— Joshu
Thanks for the tutorial. BUT: if you look at vintage jeans from the 1950s they often have the inside leg seam and the outside leg seam flat felled. It’s natural that the idea was to have the flat felling as a feature visible on the outside of the leg. Why go to all that trouble and then hide it between your thighs? Now I can understand how to flat fell one seam of the leg or the other, but how on earth can you do both without impossible rucking of teh material on the machine?
HF
— Hazel Freeman
This changed the way I made most of my bags. Thank you <3 xx
— Nomad Design