
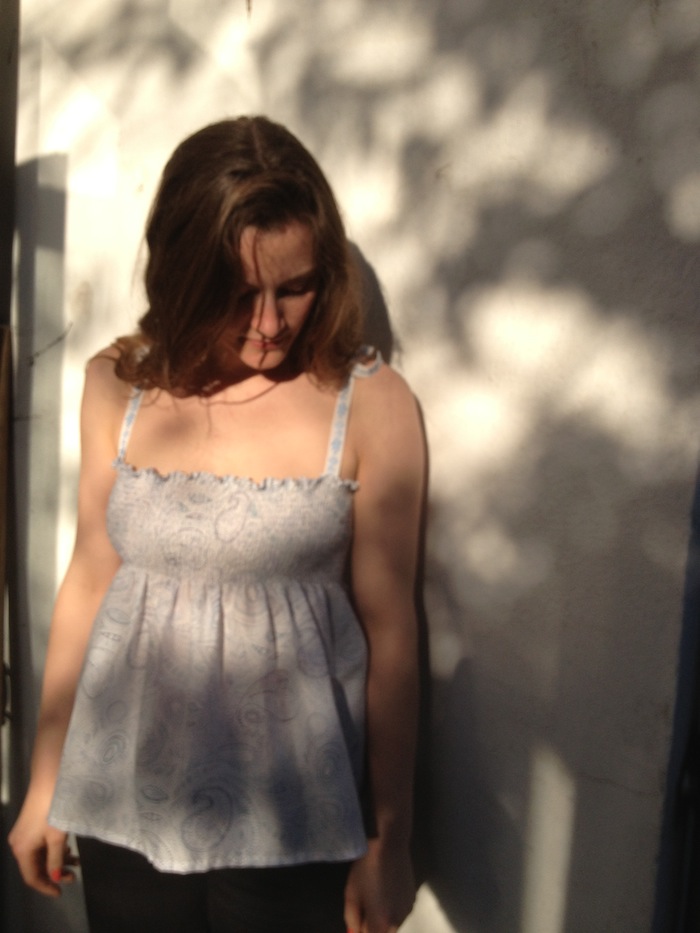
Of all the things we loved about The Great British Sewing Bee (and needless to say, we pretty much loved it all!), the one thing that stood out for us, funnily enough, was the little girl's shirred dress. Steeped in nostalgia, some of our fondest memories of girlhood involve shirred dresses. We see no reason why we can't relive those blissful days, but maybe make it a little more age appropriate (or not) by making it into a top and throwing in some jeans (and a nice cold beer too, go on then why not?!).
What you need:
- a length of lightweight woven pre-washed fabric (quilting cotton is ideal) approx. twice the width of your bust measurement and 20ish" long (or however long or short you want your top - remember to bear seam allowances in mind!)
- at least 3 bobbins full of good quality shirring elastic
- 4x lengths of a pretty embroidered tape, each approx. 14" long
- a spool of matching thread
- fabric scissors
- pins
- measuring tape
- sewing machine (while we're listing every little thing!)

Step 1:
Measure out your fabric as outlined above and give it a good press. Identify which length will be the hem and which will be the topline. Press the topline in by 1/2" and then again by 1/2". While you still have regular thread in your bobbin, stitch the topline down. It's from here that we're going to start shirring and it makes it a hell of a lot easier to finish the raw edge first.

Step 2:
Take an empty bobbin and wind the shirring elastic on by hand, being careful not to stretch it as you wind.

Step 3:
Before you start shirring your top, it's a really great idea to practice first! Get a scrap of the same fabric you're using and stitch a few practice rows to get a feel for it and make sure your tension is nice and even. Make sure you stitch with the right side facing you, as the elastic will be coming from the bobbin underneath, and be sure to pull a decent length of the elastic out when you come to the end of a row to avoid it pinging back into the bobbin!
TIP - to make sure the rows of shirring are perfectly even, align the previous line of stitching with the right hand edge of the machine's foot.

After three lines of stitching, it should look a little something like this from the right side...

...and from the wrong side:

Step 4:
Now we can start shirring the top! Stitch your first line ever so slightly to the left of where you hemmed the topline. Remember to backstitch at the beginning and end of each line of stitching.
Gently stretch out the shirring as you stitch subsequent rows:

TIP - check the bobbin after every three-four rows as the elastic runs out fast and you don't want to be running out mid-row!
Keep going until your panel of shirring is deep enough to cover your bust - ours is about 5" deep, with 18 lines of shirring.

Step 5:
Now it's time to close the side seam (or centre back seam if you prefer) with a neat French seam that will securely ensconce the raw edges and all those pesky ends of elastic.
Pin the seam with wrong sides together, making sure that the first and last lines of shirring are aligned, and stitch with 3/8" or 10mm seam allowance - and remember to replace the bobbin with regular thread!!

Trim the excess seam allowance and press the seam.
Now turn the top out and pin that same seam, now with right sides together, and stitch 1/4" or 6mm from the edge. Press.
Step 6:
Before attaching your straps, try your top on so you can mark with pins where you want the straps to be placed. Take the top off and pin each length of tape in place on the wrong side and stitch to secure.

Step 7:
Last thing to do now is to hem your top! Try it on first so you can be sure to get the length you want, then just as you did before, press the hemline in by 1/2" and again by 1/2" and stitch into place.
Meet you by the ice cream van...
-
Elisalex de Castro Peake

Comments on this post (3)
Made a maxi dress based on the Book 3 pattern hack – was considering putting in French seams but thought the elastic might go walk abouts! Having seen what you did, I might just redo the edges to tidy things up. Fab top – thanks for sharing your ideas!
— OldSpice
This is lovely! I have a shirred dress I bought years ago in Spitalfields market which I still wear and I was thinking a top would be nice for the summer so thank you for the tutorial. I love the idea of using embroidery tape or ribbon for the straps!
— Kathryn
Definitely going to be trying this out! Maybe even make it dress length.
— NattyJane