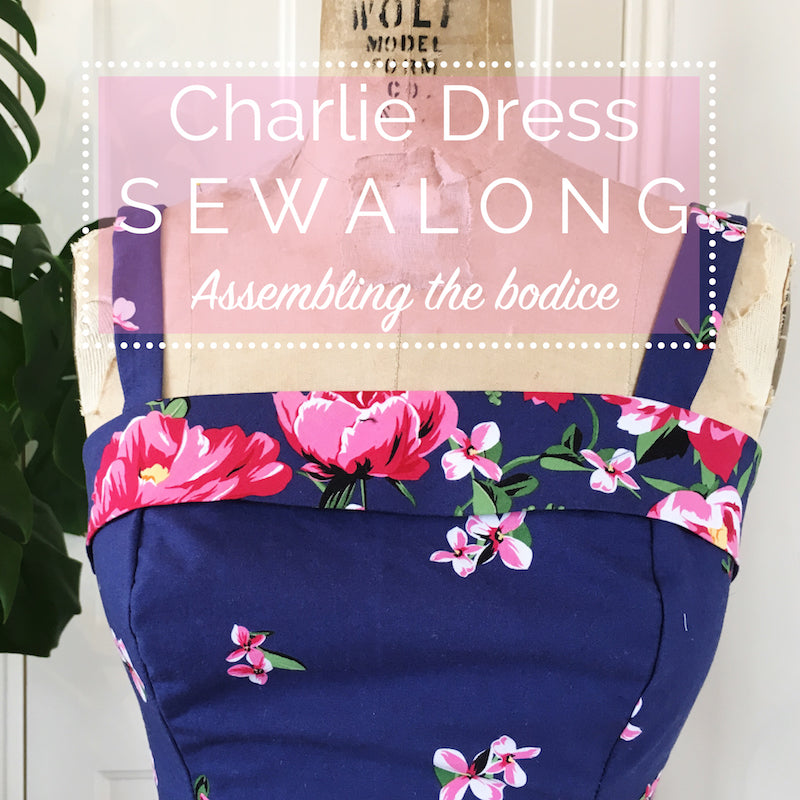
One of the best things about the Charlie Dress, is just how rapidly the bodice comes together! Because there's no lining, you can have yourself a Charlie bodice all sewn up in half the time it usually takes to sew a fully lined alternative. Or - and the way I like to see it - in the same time it would take to sew a regular bodice, you could have two Charlies..!
Today we will be:
- Sewing the princess seams
- Sewing the righthand side seam
- Assembling and joining the shoulder straps
- Assembling and joining the neckband
*Click here to be taken to all the posts in the Charlie Dress Sewalong!*
Princess seams
First of all, what exactly is a princess seam?
A princess seam is a long seam that contours a woman's curves at the bust and back, resulting in a snug and figure-flattering fit. Princess seams usually start at the neckline or armhole and end at the waistline.
Let's begin by closing the princess seams at the back - take one side back piece and it's corresponding centre back piece and pin them into place, right sides together, double notch matching.

Stitch with the usual 5/8" or 15mm seam allowance, press towards the centre back and finish the excess seam allowance. Repeat for the other side.
We're going to close the princess seams at the bodice front in pretty much the same way, the only difference being that in order to create that curve at the bust, you'll see that the raw edges at the bodice side front and centre front don't exactly match. We need to ease these curves into each other by gently manipulating the fabric to get a smooth seam.

Pin your bodice side front piece to the centre front, right sides together and matching the notches.

Go slow as you stitch around the curve, focusing on stitching a smooth line 5/8" or 15mm in from the raw edge, as opposed to concentrating on trying to match the raw edges themselves. Repeat for the princess seam on the other side.

Side seam
Place your bodice front and back pieces right sides together and stitch the righthand side seam (which appears to be on the left when seen from the wrong side...) - we need to leave the lefthand side seam open and ready to insert the invisible zipper after we've joined the skirt. Press open.

If you're using an overlocker/serger to finish your seams, go ahead and finish your side seams and the princess seams at the back and front now. You want to get nice and close to the seam lines at the front princess seams in order to trim away as much unwanted bulk as possible. Press all princess seams towards the side seams.

If you don't have an overlocker, don't panic! We're going to grade and notch our princess seams to reduce bulk: trim the seam allowance belonging to the side front and side back panels down to a scant 1/4" or 6mm. Next, cut little triangular notches into the curves at the front princess seams. Press back seams open and front seams towards the side seams.

Shoulder straps
Take one of your shoulder strap pieces and fold in half lengthways right sides together and pin into place. With a slightly smaller seam allowance of 3/8" or 10mm, stitch the long open length.
Use a loop turner/knitting needle/chopstick to turn your strap out to the right side and press so that your seam runs down the centre - this will be the strap's 'wrong side'.

Take your bodice, wrong side facing you. Pin the straps into place first at the princess seams at the front, right side of the strap facing the wrong side of the bodice, strap facing down... And if all this right side wrong side facing up down and sideways talk is starting to lose all meaning, use the image below as a guide!

Now bring the loose ends of your straps around the side seams and to the back of your bodice and pin into place - being careful not to twist them as you go! - at the princess seams at the back.


How you position your straps along the neckline of the bodice is largely up to you; I like to position mine so that the inside edge of the strap is aligned with the princess seam, for maximum bra-strap coverage.
Baste the ends of your straps into place 3/8" or 10mm from the raw edge.
Neckband
The final thing to do today to get our bodices all done and dusted, is to assemble and attach the neckband.
Take your neckband front and back pieces and, with right sides together, stitch the righthand end, taking care to pivot halfway as you approach the subtle V shaping. Snip a notch into that point to reduce bulk.

Press the seam open, then fold the entire neckband in half lengthways - wrong sides together - and press. At this point, and especially if your fabric is a bit shifty, you could baste the long open length of your neckband in order to keep the two layers secure.

Take your bodice, still with the wrong side facing you, and pin your neckband all long the neckline - thereby sandwiching the shoulder straps - matching all notches and the side seam.

Stitch with the usual 5/8" or 15mm seam allowance. If you're using an overlocker/serger to finish your seams, do that now.

Alternatively, grade the seam allowance of your neckline to reduce bulk.
To help keep our neckbands flat and in place once we press them out to the front of the bodice, we're going to understitch the seam allowance...
Press and pin the seam allowance at the neckline towards the bodice ie. away from the neckband. It's very important here to keep your shoulder straps up and out of the way as we do not want to catch them as we understitch!

Staying as close as possible to the seam line, no more than a few mm, sew a line of stitching parallel to the seam, essentially stitching the seam allowance to the bodice.


Now turn your neckband out to the front of your bodice and give it a gooooood press.

All done for today, and halfway to a finished Charlie Dress!
Up next: We'll be assembling our skirts and joining them to our bodices at the waistline - we'll be publishing two separate posts, one for each variation, so be sure to look out for the one relevant to you!
-
Elisalex de Castro Peake

Comments on this post (0)