
OK girls and boys (no judgement here), we've got your weekend sewing schedule, sorted. First up on our sewing table, we have the Flora Dress faux-wrap bodice (variation 1).
Today we will be:
- Stitching darts
- Closing the shoulder seams
- Assembling the bodice lining
- Joining the bodice to the lining
- Closing the side seams
- Basting the faux wrap
*To be taken to all the posts in the Flora Dress Sewalong, please click here*
Step 1
The first thing to do, to create the shaping on the bodice, is to stitch the darts at the bust and waistline on the bodice front, and the waistline darts on the bodice back.
Pinch a dart between your fingers, right sides of the fabric together, and pin the dart into place matching the notches and the dart legs that we marked out in the last post.

Start your line of machine stitching at the notches, remembering to back stitch to secure your line of stitching, and ending at the dart's vanishing point.

Press bust darts down, and waistline darts towards the side seams.
Step 2
We now need to join the front and back bodice pieces together at the shoulder seams.
Lay your bodice back pieces on top of your bodice front pieces, right sides together. Pin the shoulders into place.

TIP: Always pin your fabric as shown, with the pins pointing into to the fabric, so that they lie horizontally when the fabric is fed through your sewing machine. Like this, they will be easier to whip out as you stitch, and will be less likely to get crunched down into your machine if you forget to take one out than if they were inserted vertically.
With our usual 5/8" or 15mm seam allowance, stitch the shoulder seams. Press open.

If you have an overlocker/serger, now is the time to neatly finish off your excess seam allowance. "Finishing" your seam allowances, once a seam has been sewn, not only looks pretty and profesh, but results in a longer lasting garment that will be less prone to fraying. If you don't have an overlocker/serger, check out this post on alternative seam finishes.
Step 3
Repeat the last two steps for the bodice lining pieces - that is darts and shoulder seams.
Step 4
To join the lining to the bodice shell, take one side of your bodice shell and lay it out flat with the right side facing you. Lay the corresponding lining on top, so that right sides are together. Pin into place all along the neckline and open armhole.

Stitch with the usual 5/8" or 15mm seam allowance. Before turning it out to the right side, snip into the excess seam allowance at the curves along the back neckline and armhole. This releases the tension in the seam allowance, allowing you to turn the bodice out to the right side and press perfectly without leaving a bunchy, puckered seam.

If this is the first time you've sewn a bodice to it's lining like this, then this will be the awkward moment when it's near impossible to imagine how you're supposed to turn it out to the right side... But no fear! It works, we promise!
Feed your hand up through the bodice front, between the shell and lining fabrics, until you have a hold on the shoulder seam.
Peel the bodice front over, so you can now see the right side of the bodice front and the beginning of the shoulder seam (from the right side also). The bodice back will now be sandwiched between the shell and lining of the bodice front, looking - most unphotogenically - like this:

Continue feeding the bodice back out to the right side by gently pulling it through the shoulder. Give the neckline and armhole seams a good press. You should now be left with something that looks a little like this:

Repeat for the other side of the bodice front.

Step 5
We are now going to close the side seams of the shell and lining in one fell swoop - easier than it sounds and results in a flawless finish both inside and out.
Lay out your bodice. You'll see that you have four layers of unstitched fabric at the side seams: the two outer layers make up the bodice shell and the two inner layers making up the lining.
Start by pinning together the two inner lining side seams, matching the waistline and underarm. You'll see now that you can actually continue pinning, as once you've gotten to the underarm seam of the lining, it simply continues into the side seam of the bodice shell.

Once it's all pinned into place, stitch the side seams of the lining and shell in one continuous line.
Repeat for the other side, and press seams open.
Step 6
The last thing to do today to finish off our bodices, is basting the faux wrap. "Basting" just means to secure two or more layers of fabric together temporarily - but more securely than pinning - with a machine stitch.
Lay the right hand wrap over the left hand wrap and pin first, matching the centre front notch.

Now stitch 3/8" or 10mm from the raw waistline's edge to keep the wrap in place until we come to joining the skirt. The reason that we stitch closer to the raw edge when we're basting is so that when we come to joining the skirt with the usual 5/8" or 15mm seam allowance, the basting stitch won't show.
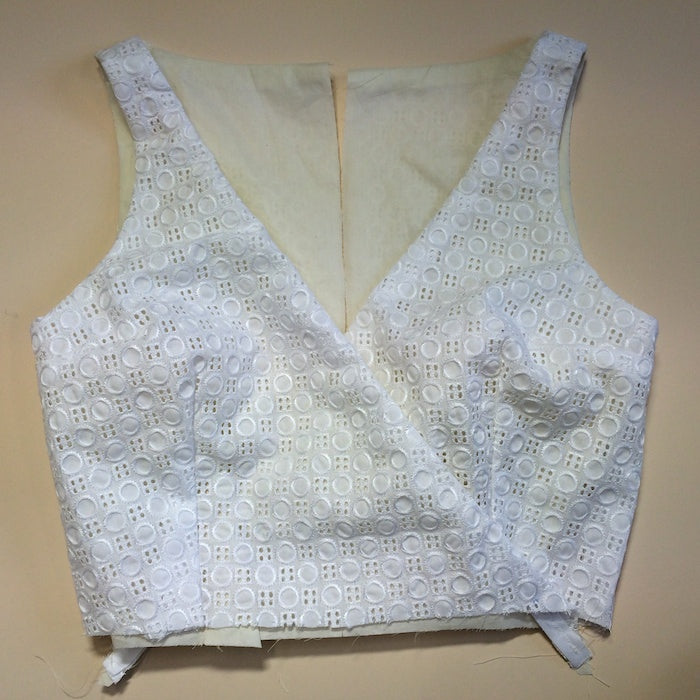
All done for today!
Variation 1ers - have a wonderful weekend and be sure to swing by again early next week when we'll be assembling and joining the Flora skirt.
Variation 2ers - hold tight, we'll be assembling your tank bodices before you know it!
-
Elisalex de Castro Peake

Comments on this post (2)
Thanks for the easy to follow instructions, this is great! :)
— Sammy
Just found your site.
You explain the steps clearly and; with the pics, I can’t go wrong.
Thank you for your profesional tips.
I will be back to this site often.
— Fran Perks