Whenever Fashion Revolution Week comes around, we are reminded just how proud we are to call ourselves sewists! And we know we're not alone in our pride as makers from all corners of the globe have adopted the battle cry #imademyclothes in response to the question posed by Fash Rev, #whomademyclothes?
We thought that a statement of this magnitude deserved to be committed to needle and thread, hung on our walls and splashed all over the interwebs, so we came up with this little stitch sampler embroidery project...
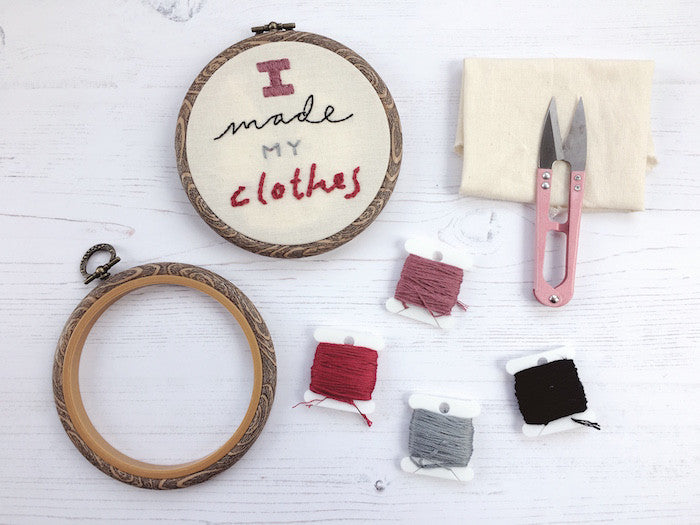
You will need:
- A 4" embroidery hoop
- Scrap fabric
- Embroidery floss (we love DMC!)
- Thread snips or scissors
- An embroidery needle
- A water erasable fabric pen or a pencil
Start by tracing the pattern onto your fabric. You can download the pattern by right clicking on the image at the very end of this post and saving it to your computer ready to print.

Take an arms length of embroidery floss and split the six strands into two lots of three. We're going to stitch with just three strands at a time for this piece.

Knot one end of your thread, and thread the other end onto your needle ready to start stitching!

Satin stitch
Satin stitch is a series of flat, straight stitches that are used for filling in areas, so it's ideal for the bold 'I'...
Start by inserting your needle from the wrong side of your fabric out to the right side at the top left corner. Re-insert your needle horizontally across to the corner on the other side:


Bring your needle back up directly below your first stitch, and re-insert on the other side directly below where your needle went in for the last stitch:


Continue in this way until the whole letter has been filled in.

To fasten off your thread, bring your needle to the wrong side of your work. Insert the needle into one of the nearby stitches, pulling the thread through most of the way but leaving a little loop through which to put your needle through, creating a little knot.
Snip your thread and get ready for the next stitch...

Backstitch
Insert your needle from the wrong side, and make a single straight stitch by re-inserting a short way along (just a couple of mm) your line. Bring your needle back out a space ahead and then insert your needle back into the end of the last stitch.


To stitch the 'MY', we just went over the straight lines in a single straight stitch, doubling it up on the vertical lines to make it stand out more:


Chain stitch
Chain stitch is such a lovely, textural stitch. Great for interesting outlines and dense colouring in. One of my faves for sure.
Bring your needle out at the top of the 'c'. Re-insert the needle right next to where you just came out, and then bring the tip of the needle out a few mm down the line:

Wrap the thread around the tip of the needle...

...and then pull the needle all the way through. First chain!

Continue by re-inserting your needle right next to where your needle just came out, staying inside that first chain. Again bring the tip of the needle out a few mm along the line and wrap your thread:

Pull your needle all the way through and continue with your chain.

To finish, we need to anchor that last chain with a tiny couching stitch. Simply re-insert the needle right outside that final chain to hold that last chain in place:


Carry on with your chain stitch and you should end up with something like this...!

Right click the image below to save the file to your computer and print it off.

-
Elisalex de Castro Peake

Comments on this post (1)
Hey, great article! I love this tutorial. I’m new to sewing, but it definitely helped me a lot to improve lately. Thanks!
— Debbie