Holly Variation 2ers, things are about to get real! You've had a nice long holiday while we saw to the bodice of Variation 1, but now the spotlight is on YOU! The good news is that there are far fewer steps in the creation of the cowl bodice, making it a speedier make than the button-down option. The bad news is that we're dealing with drapey fabrics and bias cut pattern pieces, making it a much meatier challenge than you might be used to. Don't worry though, we're here to hold your cyber hand every step of the way - to hell with comfort zones - onwards and upwards, sewists!
*To be taken to all the posts in the Holly Jumpsuit Sewalong, please click here!*
Today we will be:
- Stabilising the bodice front
- Basting the pleats
- Hemming the neckline
- Assembling the bodice back
- Joining the bodice front to back at the right hand side seam
Assembling the pleats & stabilising
Seeing as the bodice front of the cowl Variation 2 is cut on the bias, stay stitching the raw edges so that they don't stretch or distort is extra important. To make life that little bit easier, I like to quickly and carefully pin the underarm/bust pleats into place before stabilising - that way the stay stitches not only prevent the bodice from becoming misshaped; they baste the pleats and provide a guideline for when we come to hemming the neckline, all in one go. My kind of efficient sewing!
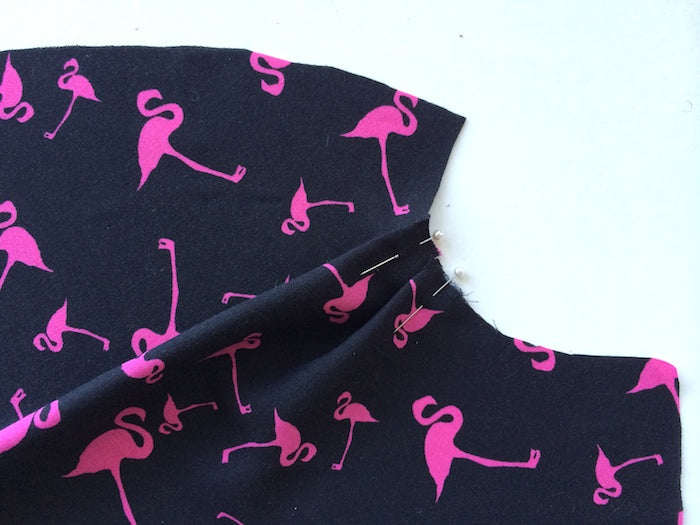
First things first, let's pin the pleats. Bring the bottom notch up to meet the one directly above, and pin.
Now bring the notch above up to meet the top notch, and pin. You'll have two little knife pleats like this:
Repeat for both sides.
Now, onto the stabilising/basting. As opposed to the usual 3/8" or 10mm we normally recommend for stay stitching and basting, this time we're going for a scant 1/4" or 6mm seam allowance - this is so that the stitches don't show when we come to applying the bias binding and sets us up perfectly for a 1/2" hem at the neckline.
In one slick manoeuvre you will have stay stitched, basted the pleats and prepped the curved neckline for hemming. Perfection!
Hemming the neckline
How you hem your neckline will depend largely on the type of fabric you've gone for, and how much patience you have! It's important to bear in mind that ideally you want some sort of continuity in your hem finishes throughout a garment - if you hem your neckline by hand, it would make sense to apply the same method when you come to hemming the trousers.
I'm using a sweet and casual printed viscose, and I won't even get to keep this beauty once she's all made up (Victoria called dibs!), so I'm going to go out on a limb and say Hell No! to hand stitching this time round! If it had been silk I was working with however, it would have been a blind slipstitch all the way.
Press the curved neckline in, using the stay stitches 1/4" or 6mm from the raw edge as your fold line.

Fold and press the neckline in again by another 1/4" or 6mm. Pin to secure.
Stitch into place.
Assembling the bodice back
Put your bodice front off to one side, and lay out your bodice centre back and two side back pieces. Be careful not confuse the top and bottom!
Pin the side backs to the centre back, right sides together and matching notches.
Stitch with the usual 5/8" or 15mm seam allowance, and press seams open.
Now take your bodice front, and lay it out right side facing you. Lay your bodice back on top, right sides together, and pin the side seam as seen on the left if you're looking at it laid flat (as shown below); this will be the right hand side seam when the jumpsuit is worn. We need to keep the other side seam open for now, ready for the zipper.
Stitch the one side seam and press open.
If this has been your first time working with a drapey fabric, or pattern pieces cut on the bias, time to congratulate yourself with a well deserved cup of tea/bottle of wine - well done! Go put your feet up and get some rest now - tomorrow we'll be back with the trickiest step of the whole sewalong... Applying bias binding in a drapey fabric. And there's no use sugar coating it, guys, it's not the easiest thing you'll ever do. But we'll get through it. And life will be great.


Comments on this post (0)