Hellooooo and welcome back to Alterations Week (or Alterations Fortnight as it's turning out to be!) for the Holly Jumpsuit Sewalong! During Alterations Week we will be going through as many pattern alteration tutorials as we can physically crush in, making this our most comprehensive Sewalong yet! The extra great news is that a lot of these tutorials will be applicable not only to the Holly Jumpsuit, but to a huge amount of other patterns too as we tackle most of the common issues surrounding pattern fitting.
*To be taken to all the posts in the Holly Jumpsuit Sewalong, please click here!*
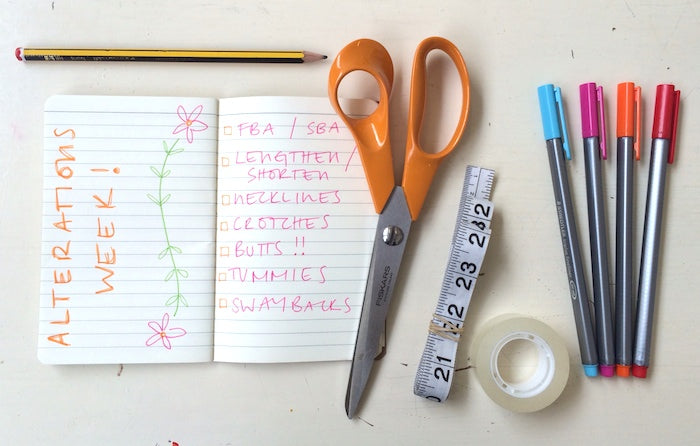
This week we continue with the trouser alterations - jumping right in at the deep end today with some full and flat butt adjustments...
What you'll need:
- Your traced and cut out trouser back piece of the Holly Jumpsuit. Make sure you trace the pattern pieces according to your waistline measurement
- Tape measure
- Pens
- Paper scissors (not the fabric shears!)
- Extra paper
- Tape
Please note: We are using itty bitty replica's of the pattern pieces to illustrate the alterations as simply and clearly as possible - please make sure that you alter your real-life pattern pieces, complete with notches, pattern info and grainlines!
How do I know if I need a full butt adjustment?
There are a number of tell-tale signs to let you know that a full butt adjustment is in order - firstly, and most obviously, if you already know that you have a full, muscular, or particularly juicy booty! Other indications might include:
- your hip measurement (around the fullest part of your butt, not around your hip bone! See this post for more on how to measure yourself accurately) falls into a larger size category than your waistline measurement
- you find that shop bought trousers that fit on your butt are too big at the waist
- you're no stranger to the dreaded camel toe! In other words, the crotch is too tight
How do I know if I need a flat butt adjustment?
Again, if you are aware that your derrière has little to no volume or curve, then chances are you'll be needing to alter for a flat butt. Other tell-tale signs are:
- your hip measurement (around the fullest part of your butt, not around your hip bone! See this post for more on how to measure yourself accurately) falls into a smaller size category than your waistline measurement
- shop bought trousers that fit your waist feel baggy in the butt, resulting in a looser fit, and even a saggy crotch
Ok! Let's dive right in!
Step 1
To adjust your trouser pattern to get the best fit, we need to add/remove volume to all the areas that are affected by a full/flat butt: namely, the hip measurement and the crotch length. So to begin with, we need to figure out two things - firstly, by how much we need to increase/decrease the hip measurement, and secondly, by how much we need to increase/decrease the crotch length.
In the same vein as a full bust adjustment, we can determine by how much we need to increase the hips by starting with your waistline measurement and the size category that falls into.
For example, your waistline measurement is 26" making you a size UK 8. However, your 38" hip measurement is 2" larger than what is dictated by the size UK 8. You'll need to increase your total hip measurement by 2", making that a 1" increase to the trouser back pattern piece (which then doubles as you cut two trouser back pieces).
To figure out by how much you'll need to increase/decrease the crotch length by, please see this post on lengthening & shortening the crotch. Bear in mind that you'll be applying the alteration to the trouser back piece only.

Step 2 - the Full Butt Adjustment
To do the adjustment, we're going to use the 'slash & spread' alteration method. Sounds a little creepy and murderous, I know, but slashing & spreading is basically just the technique of cutting along key lines through the pattern in order to open it up to allow more space for yo' ass.
Take your traced and cut trouser back piece and mark out the seam allowance (shown in light blue).
Draw a vertical line right through the dart and about an inch or two beyond (shown in red).
Draw a diagonal line coming down from the side seam/waistline corner, and across to the crotch, intersecting with the vertical dart line (red). Where these two meet, I have drawn a little circle indicating a pivot point.
Draw a diagonal line from the red crotch line, about 2" in from the crotch and down to the inseam (shown in royal blue). Add in a couple of little horizontal lines out to the crotch. These will help with the spreading.
Finally, draw little diagonal line from the innermost section of the crotch down to the inseam (shown in pink).

Step 3 - Slashing
Cut from the waistline down the vertical dart line, stopping at the little circle.
Cut the other red line from the crotch and up to the side seam/waistline corner, stopping at the seam allowance line. Make sure that you don't slice right across the vertical dart line; we want this to be a pivot point.

Now cut into the seam allowance at the waistline corner to create another pivot point.

Cut along the royal blue line down to the seam allowance at the inseam. Create another pivot point in the seam allowance as you did before. Snip the two little horizontal blue lines, again making the point where the lines meet the seam allowance pivot.

Finally, cut along the pink line, again creating a pivot point at the seam allowance of the inseam.

Step 4 - Spreading
Place your pattern piece carefully onto a spare piece of paper and tape down the side seam to keep it secure. Now we can open up the pattern piece and create more space in all the right places!
To increase the hip measurement, open up the blue line so that the top opens up by 1" (or however much you are increasing by). Tape it down.
To increase the crotch length, divide the amount you're increasing your crotch between the red line (where it meets the crotch, not the dart!) and the pink line.
Use your pivot points to allow you to keep the crotch curves as smooth as possible.

When you're happy, tape it all down, and re-draw the crotch line by filling in the gaps. Done!
***
Step 2 - Flat Butt Adjustment
To do the adjustment, we're going to use the 'slash & spread' alteration method. Sounds a little creepy and murderous, I know, but slashing & spreading is basically just the technique of cutting along key lines through the pattern in order to close it in on itself to reduce the amount of unwanted excess.
Take your traced and cut trouser back piece and mark out the seam allowance (shown in light blue).
Draw a vertical line right through the dart and about an inch or two beyond (shown in red).
Draw a diagonal line coming down from the side seam/waistline corner, and across through the crotch, intersecting with the vertical dart line (red). Where these two meet, I have drawn a little circle indicating a pivot point.
Draw a diagonal line from the red crotch line, about 2" in from the crotch and down to the inseam (shown in royal blue).
Finally, draw little diagonal line from the innermost section of the crotch down to the inseam (shown in pink).

Step 3 - Slashing
Cut from the waistline down the vertical dart line, stopping at the little circle.
Cut the other red line from the crotch and up to the side seam/waistline corner, stopping at the seam allowance line. Make sure that you don't slice right across the vertical dart line; we want this to be a pivot point.

Now cut into the seam allowance at the waistline corner to create another pivot point.

Cut along the royal blue line down to the seam allowance at the inseam. Create another pivot point in the seam allowance as you did before.

Finally, cut along the pink line, again creating a pivot point at the seam allowance of the inseam.

Step 4 - Spreading
Place your pattern piece carefully onto a spare piece of paper and tape down the side seam to keep it secure. Now we can close up the pattern piece and reduce the excess in all the right places!
To decrease the hip measurement, close up the blue line so that the top overlaps up by 1" (or however much you are decreasing by). Tape it down.
To decrease the crotch length, divide the amount you're decreasing your crotch between the red line (where it meets the crotch, not the dart!) and the pink line.
Use your pivot points to allow you to keep the crotch curves as smooth as possible.

When you're happy, tape it all down, and re-draw the crotch line by smoothing out the overlaps. Done!
Tip from the top: Always check your adjustment by making another toile to check the fit. Once you're happy with your newly adjusted pattern, copy it out onto some card for extra safe-keeping! Although this is an easy adjustment to make, no one wants to have to do it twice...
-
Elisalex de Castro Peake

Comments on this post (1)
This may be just the ticket to flat butt adjustments I always need. Can’t wait to try this out tomorrow.
— Elizabeth Lewis