
It's early February as I write this post, and I can see snowflakes dancing around aimlessly from the window of my studio. Winter is holding on for dear life, and all my dreams of Spring are patiently on hold as I try not to wish the weeks away... As many a wise Scandinavian hath said, "there's no such thing as bad weather, only bad clothes"; which loosely translates into maker speak as, "the changing seasons are simply opportunities to make clothes that complement them".
Not that I'm bragging, but with my new crochet poncho I think I have perfectly captured the essence of Winter's final crescendo as it stubbornly surrenders to Spring. Or, it's just a super toasty wearable blanket that will add an extra layer of much needed warmth on frosty days, but that will transition into Spring beautifully layered over lighter dresses, offsetting the chill of first-time bare legs!
As with all our crochet patterns, it is designed to be an easy and approachable project suitable for confident beginners, and one that shouldn't take up more than a handful of evenings to make. Having said that, I do feel like I should also mention that it is a yarn guzzler, but a worthy investment :)

70s style Crochet Granny Poncho
You will need:
- Yarn - I used the MillaMia Naturally Soft Super Chunky from Love Crafts (gifted for this tutorial) but you could really use anything you want - anything from a DK weight up to super chunky will work, and I will explain in the instructions how to change up the stitch count if your yarn has a different gauge. I used the following colours and quantities:
- Seagull (403) x5 - this is my contrast and fringe colour (off white)
- Heirloom (414) x3 - this is my first block of colour (lilac)
- Berry (421) x3 - this is my second block of colour (purple)
- Butternut (423) x5 - this is my last block of colour (orange)
- 9mm crochet hook
- Yarn needle for weaving in the ends
- Snips
NB: This pattern is written using UK crochet terminology, so in US terminology a double crochet (dc) would be a single crochet (sc), and a treble (tr) would be a double (dc) etc.
Abbreviations:
ch - chain
st(s) - stitch(es)
htr - half treble
tr - treble
sl st - slip stitch
How to:
Please forgive the different tones/lighting in the pictures - I photographed the steps as I went in natural light which varied enormously from day to day! I have tried to edit them to get them looking a bit more uniform, albeit not very successfully.....!
This poncho is crocheted from the neckline down to the fringed hem.
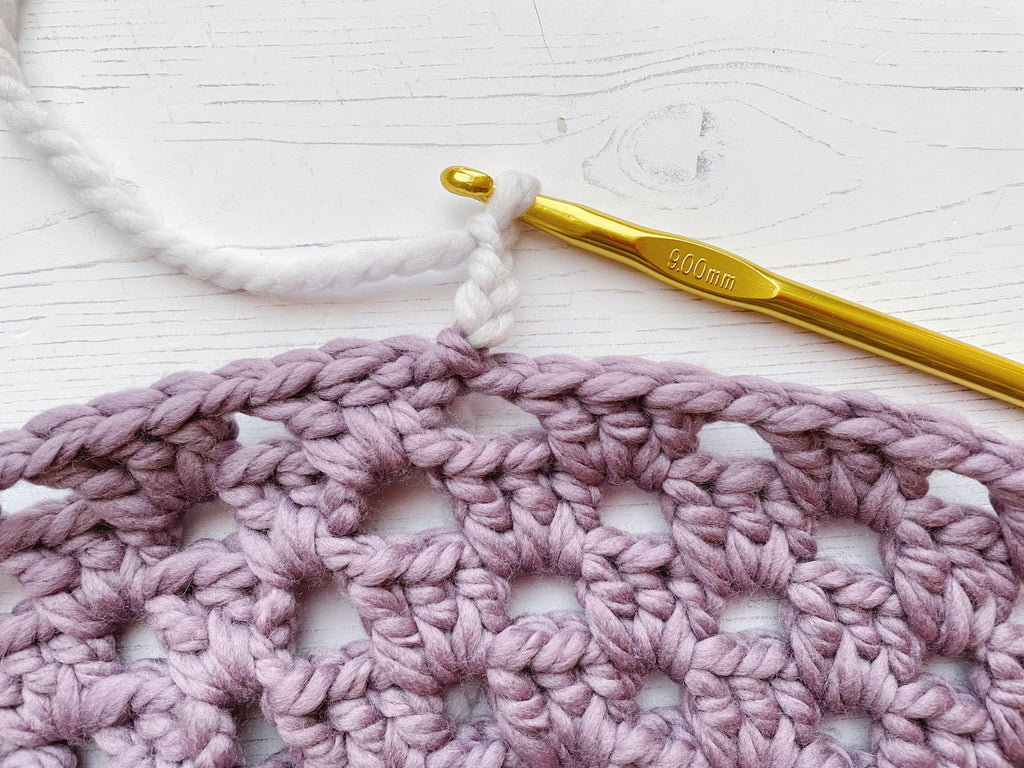
Take your contrast colour to begin, and chain 60 (multiple of 2 and 3). This needs to be long enough to go over your head and sit comfortably on your neckline, so if you're working with a finer yarn than the super chunky I have, you will need to make a longer chain. Just make sure that whatever yarn you're working with, your chain is a multiple of 2 and 3.

Join your chain to form a circle with a sl st, being careful not to twist it.
Round 1: Ch 2, then make a htr in the 1st st available on the left.


Continue like this working a htr in each stitch all the way around. When you get to the end of the round, join your yarn with a sl st at the top of the 1st ch 2. Cut your yarn and pull the tail through the loop to fasten it.
Switch yarns to your first block of colour, joining your new yarn where your old one left off.
Round 2: Ch 3 (acts as your first tr), then work 2 tr in the same space. This forms your first tr cluster.

*Skip 2 sts, then 3 tr in following st to make another tr cluster. Repeat from *until you have 6 tr clusters (image below only shows 3 tr clusters!).

To work the shoulder - after you have made your 6 tr clusters, ch 3 and work 3 tr in that same space to make a corner. Then continue as before: skip 2 sts, work 3 tr in next st etc...

...now that we've established one shoulder/corner, we need to continue making the tr clusters until we get to the exact other side where we will work the second shoulder/corner. If you're working with the same super chunky yarn as me, that will be 9 tr clusters until you then make the second shoulder/corner (3tr, ch 3, 3tr). If you're working with a different weight yarn, or making your poncho larger/smaller, just work out where your second shoulder will go by folding your circle in half with the shoulder you just made at one end - the second shoulder will need to go at the exact other end, and you could put a stitch marker there so you know when you get to it.
After you have worked the second shoulder/corner, keep going with your tr clusters until you get back to the beginning. Close the round by joining your yarn to the top of your 1st ch 3 with a sl st.
Your poncho will be looking a bit like this! More of a granny eye than a granny square as we only have the two corners.

Sticking with this colour, continue working the tr clusters as per round 2, working the shoulder/corners when you arrive at the ch 3 space at the tip of the shoulder/corner from the previous round.
I did 7 rounds of the lilac colour.
Switch back to your contrast colour (white) and work 2 rounds.


Switch to your second block colour (purple) and work 5 rounds.
Switch back to your contrast colour and work 2 rounds.
Switch to your third block colour (orange) and work 6 rounds.
Finish with a final round of htr - 1 in every stitch and 1 in both ch 3 corner spaces - in your contrast colour.
Adding the fringe
Cut a length of your contrast colour yarn about 10" or 25cm long. Fold it in half and use your crochet hook to slip the loop through one of the htr stitches at the poncho's border.

Feed the tail through the loop and pull to secure the fringe.


Continue adding lengths of fringe to every single stitch all the way around, and then give them a little trim if you have any longer stragglers, or if you want to neaten the ends.

Finally, take your yarn needle and weave in all those loose ends to finish.
Your poncho is done! Now to have fun styling it! I went for a classic white shirt & black jeans as my base, then ranched it up with a pair of vintage tan boots (complete with tassel at the back!). A fedora would have been a great addition to the look, but I'm not a hat person... As the frost eases off and the days start to get warmer I'm imagining this worn over a floaty floral dress with chunky socks and clogs. And for the time being - with London still in its third Covid lockdown - it still looks great and is cosier than anything worn over PJs!

I hope you enjoy crocheting this poncho as much as I did! If you want to share what you've made on Instagram, please tag us @byhandlondon and use the hashtags #bhlCrochetPoncho and #ByHandLondon so we can find you!
-
Elisalex de Castro Peake

Comments on this post (2)
Hi Donna, please do! xxx
— Elisalex - By Hand London
Terrific! Would you mind if I posted it to the group I moderate on Facebook? It’s called Crochet.
— Donna