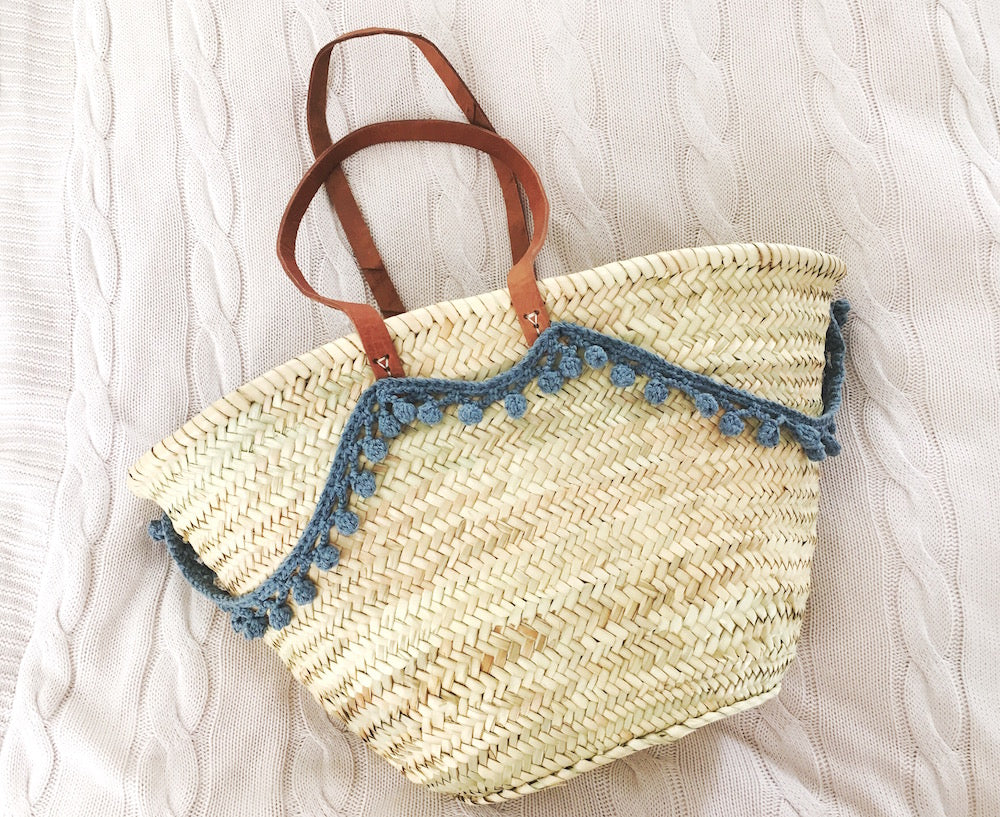
If you read this blog often, or follow us on Instagram, you'll probably already know of Elisalex's (that's me!) love of pompom trim. So whimsical, yet so versatile... Oh, how I love a good sprinkling of pompom trim! It was only a matter of time then, before I decided to make my own pompom trim with my trusty crochet hook and some yarn. I had originally planned to use the trim I made to finish off yet another off the shoulder top, but I realised halfway through that actually the Wool & the Gang denim cotton yarn I was working with would be waaaay too heavy and would only weigh my top down (not such a good look on a top with no straps or bra underneath...). Luckily, a few pompoms later I had a brainwave, and I used the trim to embellish a simple straw shopping bag I had instead. Possibly even more of the moment than off the shoulder tops, so extra points there. Here's how I did it...
How to crochet your own pompom trim
You will need:
- Your yarn & corresponding hook - I used Wool & the Gang's Billie Jean, a drapey cotton yarn made using upcycled pre-consumer denim waste, which worked up great. I wouldn't recommend anything chunkier than that - basically avoid yarn requiring a hook that is more than 4.5mm, unless you want some seriously mega pompoms (would look so cool as bunting...)!
- Yarn needle and scissors
- Something to attach your trim to!
***We will be working in rows as opposed to rounds, and all terminology is UK***
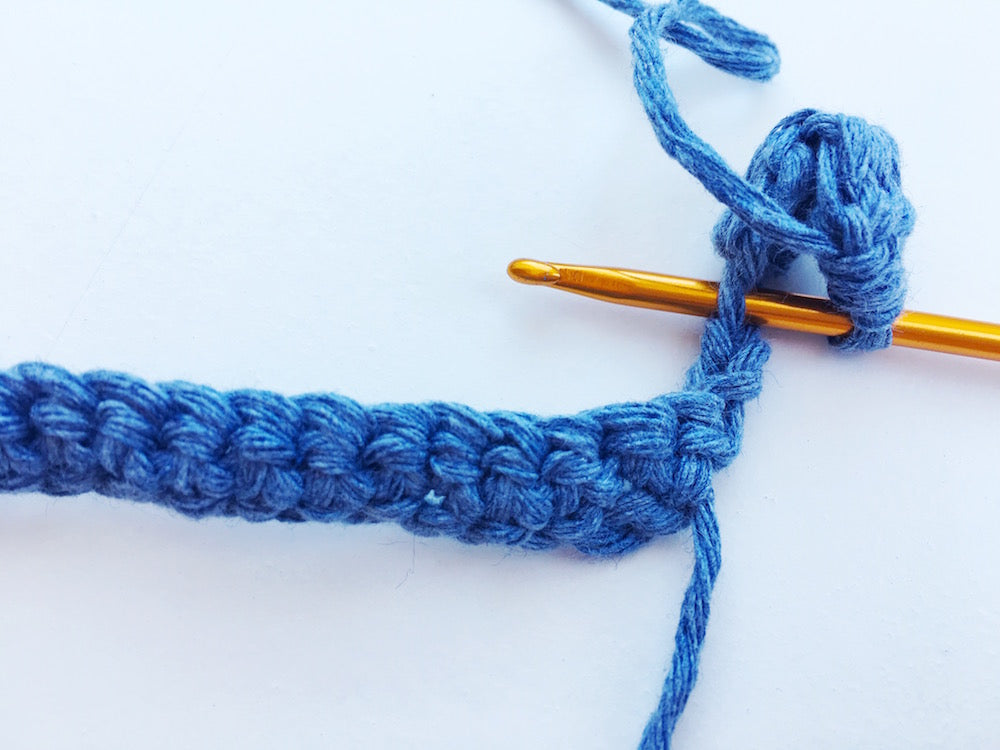
Start by working a chain that is as long as you need your trim to be - it will need to be a multiple of 4 stitches, plus 1 at the end.

Double crochet in the 2nd chain from your hook...

...and in every following chain to the end of your row.

Turn your work and chain 6.

Work a treble cluster into the 3rd chain from your hook. To do this, work three trebles in that 3rd chain, but hold back the last stitch of each treble until you have 4 loops on your hook:


Yarn over and draw through all 4 loops to close your cluster.

Chain 3.

Work another treble cluster just as you did before, but this time into the stitch that closed your last cluster.


Think of this part like closing a clam - insert you hook at the base of your first cluster and join the two with a slip stitch. One pom down!
Chain 3, and finish your first pompom with a double crochet in the 4th stitch along the row.


Continue in this way until you've completed your row, tie off your work and you're done!

All that's left to do now is put your pompom trim to good use! I draped mine around the opening of a straw shopping bag and used my yarn needle to anchor the trim into place at key points.

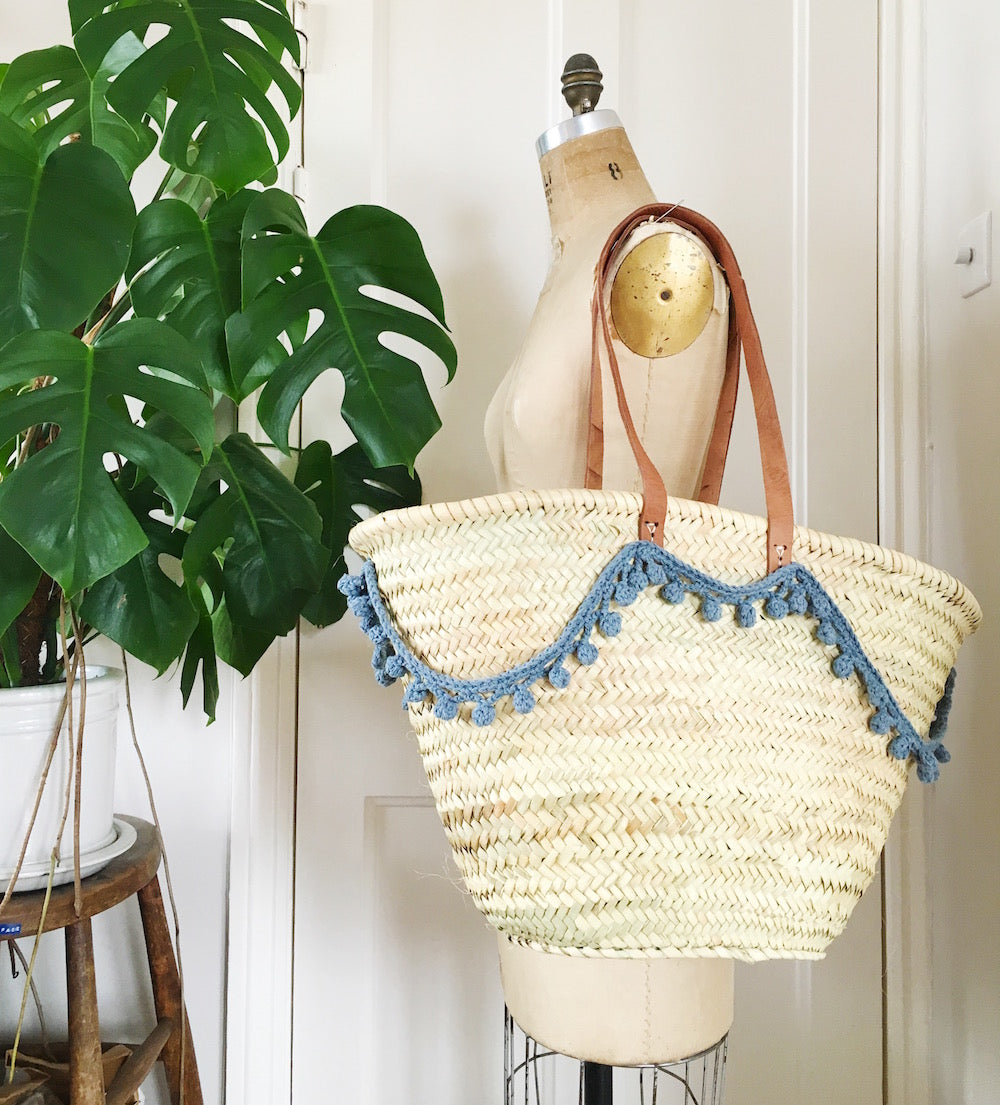
If you wanted to attach your trim to a garment's hem for example, simply stitch into place on your sewing machine with a wide zigzag stitch. Alternatively, and this would look especially cool if you've opted to make some mega pompom trim, just treat it like bunting and hang it up on the wall!
-
Elisalex de Castro Peake

Comments on this post (1)
This is the cutest thing ever! Thanks for sharing how to make ♥
— Camilla