After recklessly compiling all my holiday into the months of June and July I’ve been out of the DIY game a little bit lately but, to ease myself back into normality (and remind myself I’m not nocturnal), I’ve come up with a quick and easy draft-it-yourself kimono-style robe that requires minimal brain power for maximum gratification. Ideal really.
If there’s one thing I learnt having spent half of the down time rolling around festival fields in the English countryside is that no one will notice that you have been wearing the same clothes for the past 5 days if you chuck something big and gaudy over the top. It tricks people into believing you’ve made an effort (i.e. washed your body) whilst the drapey fabric helps to waft away any undesirable aromas in the local area (or from your person - I’m not judging). If, however, your summer adventures are just a little more sophisticated than mine though, robes are an excellent way to brighten up an LBD, channel the boho vibes at a summer wedding or take it on your LOLidays and pop it over your cossie and pass it off as getting ‘dressed’, then pat yourself on the back for having such a productive day. Whichever way you choose to wear it there is no denying the kimono is the perfectly practical and endlessly versatile summer staple.
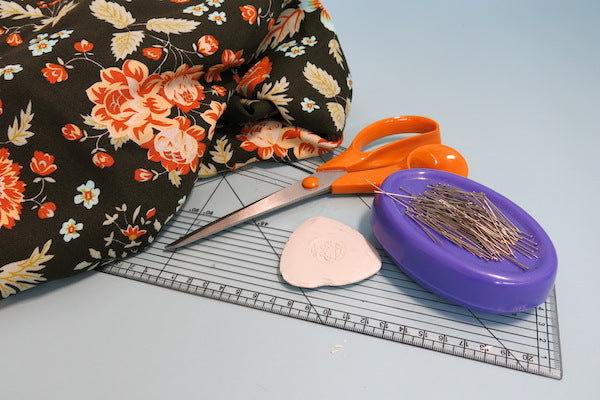
What you’ll need :
- Tailor’s chalk
- A ruler
- Your fabric - something drapey like viscose works best, and you’ll need a piece double the length of how long you want your robe to be plus 4cm for seam allowance. For example, I want my robe to be 78cm long when finished so I’ll need 160cm of fabric.
- The usual sewing supplies - sewing machine, pins, shears and matching thread.
First things first is to take your fabric and fold it in half lengthways, so that the selvedges match up and the fold runs across the full width of the fabric.

As this is the lazy sewists guide to self drafting we’ll be drawing directly onto your fabric with tailor’s chalk so here’s the sort of shape your robe should be taking. The measurements shown are what I’ve used for an oversized and forgiving shape (generally speaking I am our size 12) but you can easily alter them to fit you if needs be!

So, starting slightly away from the selvedge, the first line we are going to draw on is the sleeve opening (in my case 32cm / 12 ⅝”), followed by the underarm seam (25cm / 9 ¾”) as can be seen marked in pink on the diagram below. From where your sleeve opening line starts (on the fold) - we are then going to mark the full length of your sleeve to the neckline (45cm/17 ¾”).
Then, from this marker, measure half of your neckline opening, for example, this neckline opening is 16cm / 6 ¼” wide so I will mark 8cm / 3 ⅛”. From this point mark out the same distance again (i.e. 8cm / 3 ⅛”). Now, from the point marking half the width of your neckline, draw a straight line (parallel to the selvedge) all the way to the raw edge - this is the line marked in grey on the diagram below. Take your ruler and draw the diagonal line from where that straight line ends at the raw edge, all the way back up to the mark representing either edge of your neckline opening (as shown in blue). Still with me? Phew. Okay here’s the diagram…

Next thing we’re going to draw on is the side seam. From the central marker on the raw edge measure the half hem width (so 35cm / 13 ¾” for me) and from this point, draw a diagonal line up to where your underarm seam finishes. This line is marked in purple below:

All the fiddly measuring done, we need to cut this bad boy out! Start by cutting out all the outside edges so you’re left with something like this…
Now it’s easier to cut out that neckline opening, making sure you only cut through the one layer.


Turn your robe inside out, match up and pin the underarm and side seams then stitch with your usual 1.5cm / ⅝” seam allowance.

Snip the underarm curves (no more than 1cm / ⅜” so as not to snip your stitches!) then press the seam open and finish the raw edges.

All that’s left now is the hem! Just as before, press up the raw edge at the hem by approximately 1cm / ⅜” and then again by 1cm/ ⅜”, stitch as close as you can to the fold and press.

Done! Who needs showers anyway...

-
Victoria Elliott

Comments on this post (32)
Thank you for a brilliant free sewing pattern, like yourself I prefer diy grading, those printed patterns boggle my brain!
Can’t wait to try this one out to make one as a gift for family.
— Bellini
Great pattern. My living room has become a Glastonbury sequin kimono factory for my campsite this year. Its such a quick pattern to follow. I sadly ruined another fabric following a less shapely pattern. Wish I had found this first. I am not being too prissy about being exact with the finish and each kimono takes 15 minutes for a simple pin, cut, sew and then glueing the hems. Quick zigzag stitch and doubling back over the underarms. For one weekend of sparkly fun and 40 people all looking amazing, THANK YOU!!!
— Lucy Robinson
What a great tutorial! I have some tencel chambray I’m going to try it out on! Thank you for putting this together!
— Nancy
Hey! Very good tutorial and great fabric. Just a small tip. You can curve the pattern underarm insted of snipping. It will lay beautifully. :)
— Livia
Hi Ellen, you can finish the raw edges at the underarm any way you normally would finish a seam – pinking shears, zigzag stitch, overlocking, bias binding…. I hope this helps! Elisalex
— Elisalex - By Hand London
Hi Helen, the neckline opening measurement is approx half of your total neck circumference. Hope this helps!
Elisalex
— Elisalex - By Hand London
Hi Ree!
All you need to do it substitute the measurements in the first diagram for your own. For example, the neckline opening should be about half the circumference of your neck, the sleeve depth is half of the total sleeve cuff circumference you want, your chosen sleeve length, and the hem measurement shown is a quarter of the total hem which is basically your hip measurement plus a bit more for ease and swishability.
I hope this helps!
Elisalex
— Elisalex - By Hand London
Great pattern. Definitely going to give this a go. Nice and clear instructions.
Can I just clarify, when you say ‘finish raw edges’ for the underarm seam, how does one do this? I’m guessing there might be a number of options??
— Ellen
That was a great DIY stitching. Now, I can create my own kimono maybe I’ll get some designs and print ideas from https://www.limelush.com/kimonos/ and well, for those who don’t have the time for stitching, the price is very affordable.
— Elizabeth Dy
Sooo cute on you!
— lynn
Great tutorial. I have a question. Please how do you take the measurement for your neckline?
— Helen
That’s not a kimono. Thanks for wasting my time
— juliet106
Melhor tutorial que já vi
— Regina
I’ve noticed that raglan does it very often. For my coat pattern I moved the shoulder seam forward to compensate for this. It seemsto work
— Rick
Merci pour ce Tuto.
Pourrais je l avoir en français s il vous plait.
Michele
— Lafargue
Hi, I’m fairly new to sewing and would like to give this a go, but I’m definitely not a size 12. What measurements of myself do I need to take to make a larger size? Thanks
— Ree
Very cute out come. Size 12? For us in Canada you look more like a petit 8 at most .
Very well done tutorial.
— Caroline
I have made two using rayon sarongs. They are fabulous, if a bit slippery. I don’t mind the rearranging when I get inside a coffee shop etc.
— Jen pickard
Hi Kirsty, if you’re having trouble hemming the neckline, you could try finishing it with bias binding which would prevent the puckering. Hope this helps!
— Elisalex - By Hand London
Arghh help me, I am a novice! The neckline by the shoulders all puckered so I’ve unpicked it. Do you have any more tips on how to to sew this bit? Thank you.
— Kirsty
Hi Sarah, yes you’ll be fine with fabric 112cm wide. And a drapey knit would work nicely! Just as long as your fabric has some body, but isn’t too stretchy, you’ll have yourself a lovely kimono. Hope this helps!
— Elisalex
I love this tutorial! So easy to follow. I’ve been given a sewing machine for Christmas and I’m looking for easy projects to get me into the swing of sewing (haven’t sewn since GCSE textiles some 15 years ago!)
I’m going to give this gorgeous kimono a try, the moment my fabric arrives. xx
— Tinuke
Great tutorial, thank you! I have two questions though – how wide does the fabric need to be (selvedge to selvedge), would 112cm work? And, can you use knit or woven, as long as it is drapey? Or does it have to be one? Thank you so much! Happy New Year.
— Sarah
Hi Tessa, we used a drapey viscose rayon, but a soft cotton lawn would also work very well. Don’t be afraid to try new fabrics, and as long as it’s not too lightweight and slippery, rayon makes an excellent transition away from stable cottons. Hope this helps!
— Elisalex - By Hand London
i love it. It would make a brilliant Christmas present. What material are you using? I’m new to sewing and I find choosing material for a project really difficult. I haven’t ventured away from cotton yet. Tutorial looks brilliant, even I might be able to follow it!
— Tessa