Things are really coming together, Sewalongers! Today we'll be sewing up our bodices done, and getting that lovely halfway-there feeling...
*To be taken to all the posts in the Kim Dress Sewalong, please click here!*
Today we will be:
- Sewing the princess seams
- Closing the shoulder seams
- Joining the bodice shell to the bodice lining
- Closing the side seams

Princess seams
First of all, what exactly is a princess seam?
A princess seam is a long seam that contours a woman's curves at the bust and back, resulting in a snug and figure-flattering fit. Princess seams usually start at the neckline or armhole and end at the waistline.
Let's begin by closing the princess seams at the back - take one side back piece and it's corresponding centre back piece and pin them into place, right sides together, double notch matching.


Stitch with the usual 5/8" or 15mm seam allowance, press towards the centre back and finish the excess seam allowance. Repeat for the other side.


If you're not using a serger/overlocker to finish your seams, check out this tutorial for alternative techniques.
We're going to close the princess seams at the bodice front in pretty much the same way, the only difference being that in order to create that curve at the bust, you'll see that the raw edges at the bodice side front and centre front don't exactly match. We need to ease these curves into each other by gently manipulating the fabric to get a smooth seam.

Pin your bodice side front piece to the centre front, right sides together and matching the notch.
Go slow as you stitch around the curve, focusing on stitching a smooth line 5/8" or 15mm in from the raw edge, as opposed to concentrating on trying to match the raw edges themselves.
Press towards the side seam, finish the excess and repeat for the other side.

Shoulder seams
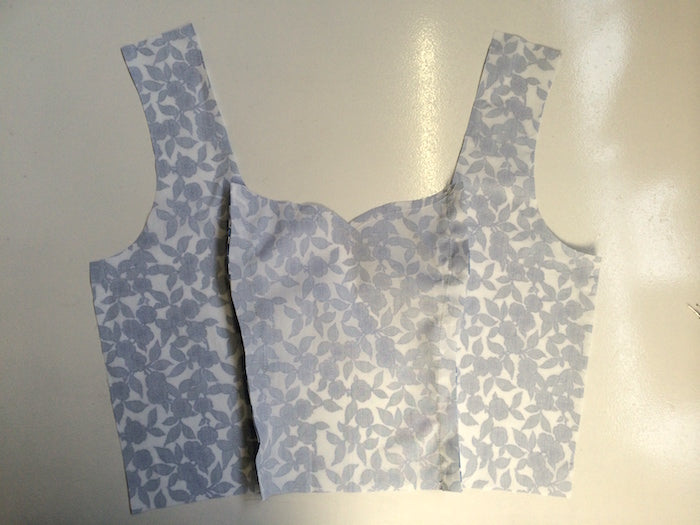
Lay out your bodice front with the right side facing you. Now lay over your bodice back pieces so that the right sides are facing each other, and pin at the shoulder seams.
Stitch, press open, and finish the excess.

*Repeat the last two steps for the bodice lining pieces*

Joining the bodice shell to the bodice lining
Lay out your bodice lining, right side facing you. Lay your bodice shell (the one made up from your main fabric) on top, right sides together, and pin them together all along the neckline. Be careful to match the shoulder seams, centre front and each open side of the centre back.

For the sweetheart neckline start your stitching at the centre front, and stitch each side one at a time to ensure you get the crispiest possible V.
For the scoop neckline start your stitching at the centre back and continue all along the neckline until you finish at the other side.

Snip into the V (if you're making the sweetheart variation) and the curves at the seam allowance - not too close to your stitches! - and press the seam allowance towards the lining. At this point, to prevent your lining from peeping out to the front, we recommend that you understitch the seam allowance. If you're not sure how to understitch, check out our tutorial for all you need to know!
Once we've joined the bodice shell to the lining along the neckline and understitched, we now need to close the armholes. Just as you pinned and stitched along the neckline, pin and stitch along both armholes and clip the curves at the seam allowance when you're done. You could even trim away some of the excess seam allowance with pinking shears, to reduce bulk.

At this point, don't worry if it's looking as though you've stitched your bodice shut, right sides never to be revealed again... Things are going to get a little fiddly, for sure, but with a little patience (and maybe the help of a long pokey thing) simply pass your bodice back pieces through the shoulder seams and out to the front.
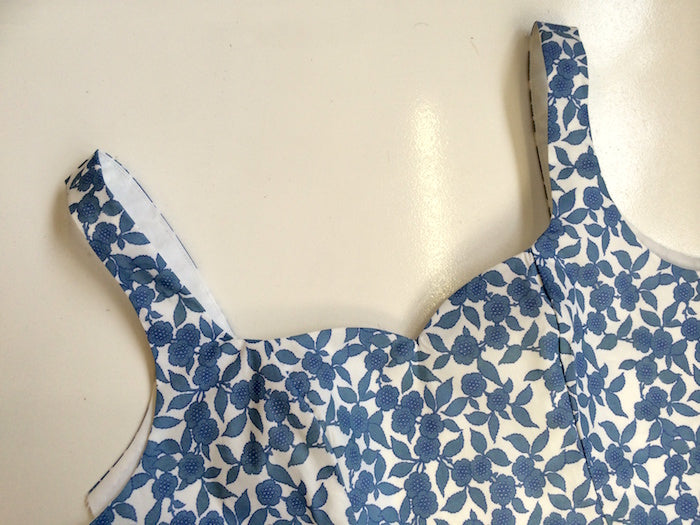
Give the neckline and armholes a gooooood press.

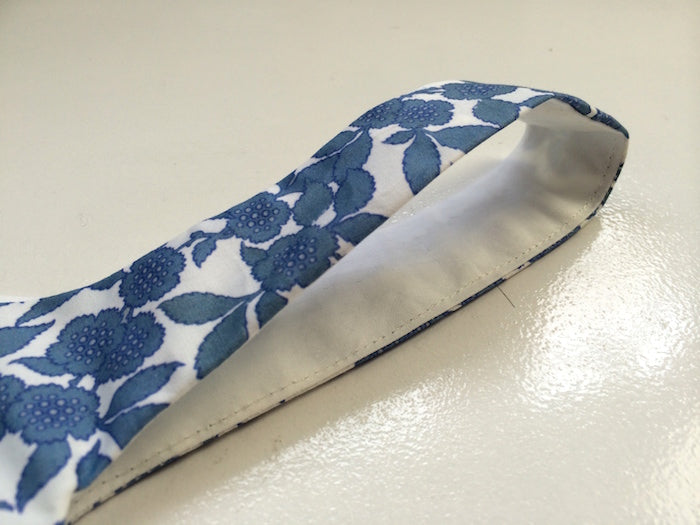
Here's a little close up of the shoulder strap, all pressed nice and with the understitching showing on the lining:
Closing the side seams
Last thing on the agenda for today!
For a truly flawless finish both outside and in, we're going to close the side seams of the bodice shell and lining in one fell swoop.
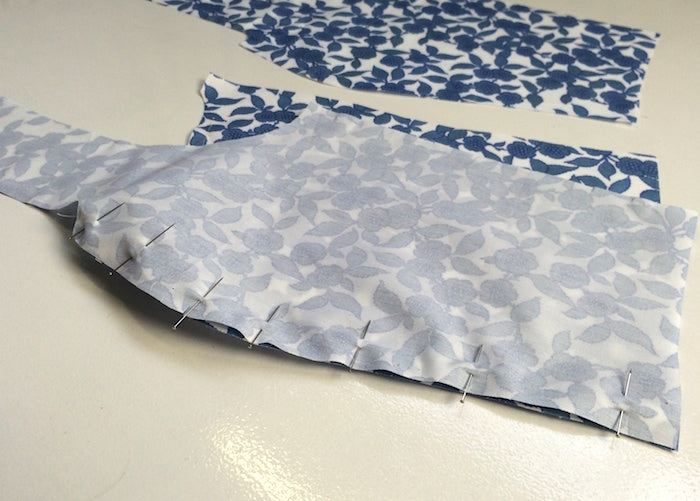
Lay out your bodice with the right side facing you, using the image below as a guide. You'll have four layers of fabric at the sides - the two outer layers should be your main fabric, and the two inner layers should be your lining.
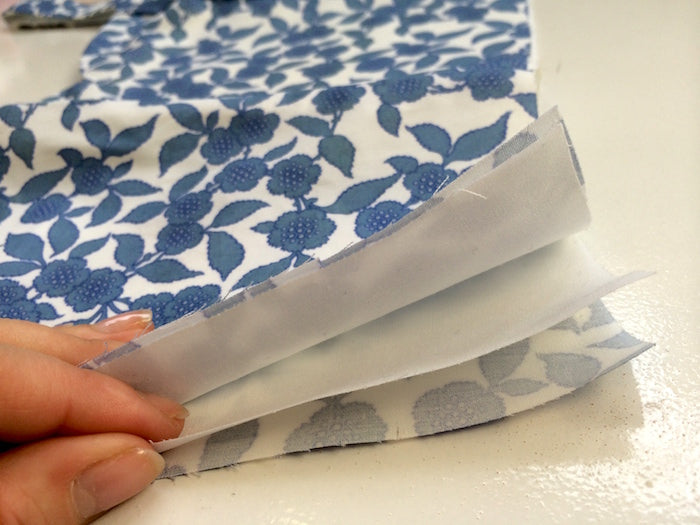
Peel away your top layer of main fabric, revealing the lining. Pinch these two lining layers together and start pinning them together from the waistline up to the armhole.
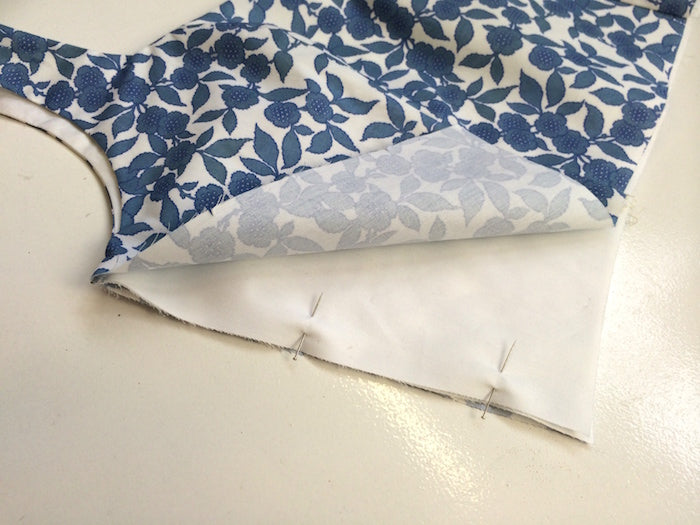
You'll see now that you can continue your pinning beyond the armhole and into the side seam of your bodice shell:

Stitch this as one continuous line, from lining waistline to shell waistline, being careful to match the armhole seam.
Press open, finish the excess and repeat for the other side seam.


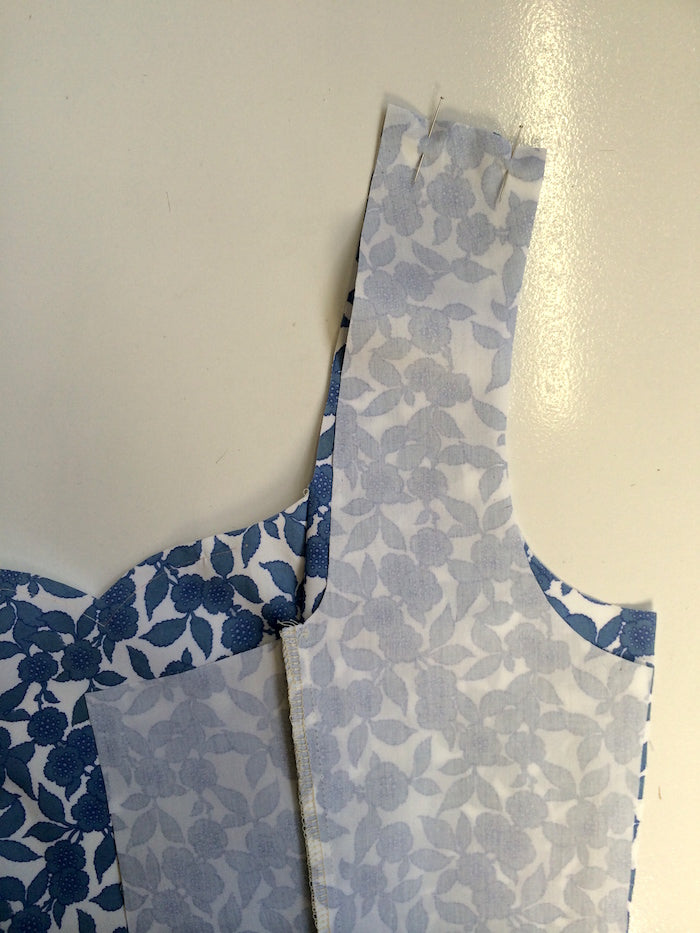
Juuuust one more little close up of the side seam from the armhole...

And our bodices are done! Now wipe that bead of sweat from your brow and go run yourself a well deserved bubble bath. We'll be tackling the skirts very soon...x
-
Elisalex de Castro Peake

Comments on this post (0)