This is it sewalongers - the home stretch!! We can practically smell the finish line, and you can bet that we've already planned some big nights out to christen our new Georgia Dresses! Today girls, in our final post of what has been a super fun sewalong (for us at least, and hopefully for you guys too), we will be:
- Inserting the invisible zipper and closing the open side seam
- Blind stitching the bodice lining (not applicable to those of you who've fully lined your dresses)
- Hemming
Inserting the invisible zipper
Let’s get straight down to business – the invisible zipper. Let us reassure the nervous among you, inserting zippers is actually very easy and straightforward once you’ve done it a few times (promise!).
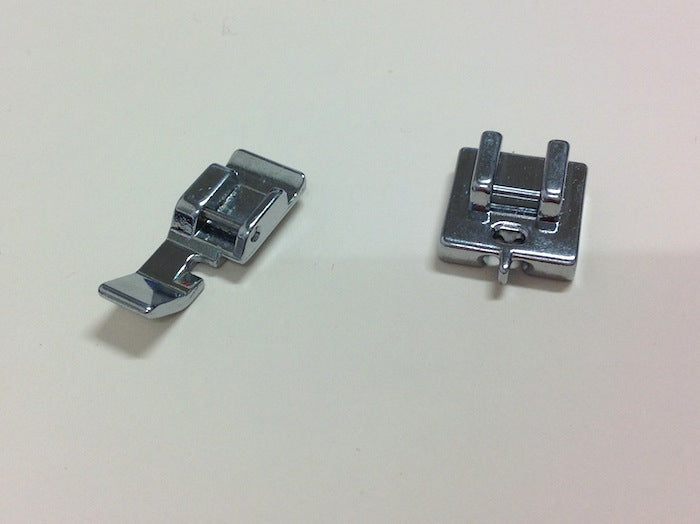
Before you begin, you’ll need to change the foot on your machine to the invisible zipper foot. The invisible zipper foot is unique in that it has two grooves along either side of where the needle goes up and down and in and out of the fabric. These grooves, or tunnels, are what we need to feed the zipper teeth through in order to get our stitching as close to the teeth and as straight as possible.
If you are using an overlocker/serger to finish your seams, it’s a good idea to apply that to your open side seam now, as overlocking a seam once the zipper has been inserted is a nightmare. Just make sure you don’t trim away any excess as you go as this will mess around with your 5/8” or 15mm seam allowance for your zipper and back seam.
Open the zipper as far as it will go, lay it face down and press the teeth away from the tape. Do this on a low heat, as the zippers are largely plastic after all and have been known to melt.
Place the right side of your zipper facing down and the right side of your fabric facing you. Then, place the righthand side of the tape down the lefthand opening of your dress and pin into place (remember to leave the lining free!). Bear in mind that zipper tape is not 5/8” or 15mm wide, so you will have to come a little further in from the raw edge in order to achieve the right amount of seam allowance. Double check this with a measuring tape if you’re unsure.

Starting from the top, position the raised teeth in the lefthand tunnel of the foot, so that you are stitching to the right of the teeth.
Stitch until the foot meets the zipper pull (which should still be all the way down).
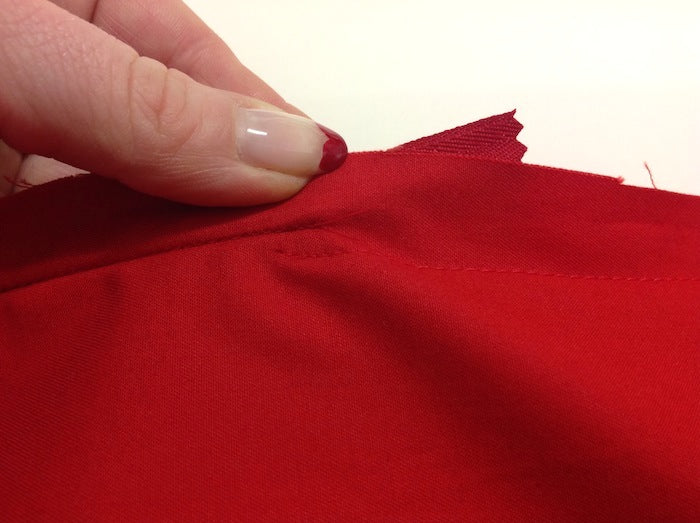
Gently press the fabric to reveal the side you have just stitched. Halfway there!
Now in order to be sure that the waistline seam meets perfectly either side of the zipper, zip up your zipper and place a pin on the unstitched side of the zipper tape to mark the waistline.

Unzip your zipper and flip it over so it is lying face down onto the right-hand side open centre back of your dress, right sides together. Just as you did before, position and pin the loose zipper tape in place down the right-hand edge of your dress, starting with the pin you used to mark the waistline.

Position the teeth in the righthand tunnel of your zipper foot and stitch down the length of the zip.
Close the zipper and gently press. All done! If you find that the zipper pull does not reach the top of the side seam exactly, you can always hand sew a hook & eye at the top for extra security.

Closing the remainder of the open side seam
To close the rest of the side seam, we need to swap to your regular zipper foot:
With right sides together pin the remainder of the side seam from the bottom of the invisible zipper.
Start your line of stitching as close as possible to where the stitching finished on your zip, and continue to the hem. It may not align perfectly at first, and will certainly be a bit fiddly as the bulk of the zipper gets in the way – so don’t worry!
If you’ve fully lined your dress, you’ll also need to close the side seam of the lining. Mark with a notch the point which reflects where the invisible zipper ends on your lining's open side seam. Simply stitch with right sides together from this notch down to the hem and press open. Then fold in and pin the remainder of the lining’s open side seam to the inside of the zipper tape, ready to be hand stitched when we get to the finishing touches.
Finishing the bodice lining
As you're nearing the end of a make, things can start to feel a little frantic in anticipation of finishing. We find that it's in that got-to-finish-now-so-I-can-wear-the-hell-outta-this-dress frenzy that silly mistakes are often made. It's nice to have something then, that forces us to slow down the pace and enjoy the last of the creative process. The only way to neatly finish off the lining is by hand - the perfect opportunity to fix yourself a cup of tea/stiff drink and
- Press the raw edges at the open side seam and waistline of the lining in by 5/8" or 15mm.
- Pin into place so that the raw waistline seam and zipper tape are ensconced. Take care not to pin the lining too close to the zipper teeth however, so as not to get the zipper pull stuck.

- Thread up a hand sewing needle and stitch by hand using a blind slipstitch.

Hemming
The Georgia Dress, for all intents and purposes, is a party dress! When you've spent long hours dedicated to fitting and stitching, and good money on the perfect fabrics, it's only fair that you should apply the appropriate hemming technique as you add the finishing touches. I don't know about you guys, but I can't help but think that hems categorise my homemade garments - and just as one would apply a certain hem to a particular fabric (rolled hem for slippery silks for example), I rank my garments according to how special a hem it has. From everyday jersey basics with their overlocked and fold-over-once-and-machine-stitched hems, to Oscar-worthy silken gowns and their blind-hand-stitched-tape-hems-with-teeny-tiny-weights-hidden-inside-for-extra-schwing hems! Catch my drift??
Which is why, we recommend that you apply a fairly high-ranking hem to this distinguished dress. No sewing machine needed here, only a hand stitch will do. Without going overboard (like the Oscars dress!), we reckon that a flawless yet understated hand stitched hem is perfectly suited to the Georgia Dress.
*Remember try your dress on before hemming to make sure you're getting the perfect length!*
Fold your hemline in by 1/2" and press.
Fold in again by 1/2" (or by however much to achieve your desired length) and press again. Pin into place.

Thread up a hand sewing needle in a thread that matches your fabric as closely as possible and stitch your hem by hand using either a blind slipstitch or a blind catchstitch - please see this post for a more detailed tutorial on these hand stitches (and more).

Sooooo, that's it guys! Done and dusted. As always, we've loved every minute of the Georgia Dress Sewalong, not least because we've all ended up with a hawt new frock as a result:


But now we want to see yours! True to tradition, we'll be posting a round-up of our favourite Georgia Dresses made by you, so show us what you've made! Post your pictures on our Facebook page, share your creations in our Flickr pool, or Instagram and tweet us @byhandlondon using the hashtags #georgiasewalong and #byhandlondon. We'll be posting the round-up in a week or so, so you still have plenty of time to finish and photograph.
All of the lovely fabrics we used come courtesy of the generous gang at Mood Fabrics.
-
Elisalex de Castro Peake

Comments on this post (7)
Oh yes, should’ve mentioned that. The wide strap. I will try that and see if it helps a bit. Thanks.
— Toni
Hi Toni – are you making the wide strap variation? If so, maybe try releasing some of the pull by reducing the seam allowance where you baste it to the underbust? Hope this helps! x
— Elisalex - By Hand London
Back again – My zipper is installed and must say, my best yet on the invisible zipper!!
However, I have a new issue. I’m not sure if I made the straps too short, since I didn’t notice this with my test dress, but the bottom front of the bodice where the straps start is really pulling up and squishing what little bit of the bodice fabric there is. Any tips for an easy fix? Or is it just lack of boob-age causing the issue?
— Toni
Catherine – sorry you’ve been having trouble with the skirt panels – I sent you a reply yesterday so hopefully that will clear things up :)
— Elisalex - By Hand London
Toni – when inserting your zipper, be sure to leave the lining free – we then stitch that by hand to secure it when we get to the finishing touches :)
— Elisalex - By Hand London
I am having real problems getting the centre front to match the front sides. I emailed yesterday but noone has replied. I am just wondering if you received that? Many thanks
— Catherine Millar
What happens to the bodice lining at the zipper when you insert the zipper?
— Toni