If you’re anything like me, in September you will have put together an extensive list of all the thoughtful handmade gifts you would be making in the run up to Christmas. Hand knits, homemade jams and infused spirits, fimo ornaments made with the kids (although that still might happen…), even an entire handmade dress or two. While it’s good to be ambitious, it’s also ok to admit a defeat of sorts when time starts to run out and you haven't made a damn thing. So when December starts poking it’s head around the door, and you really don’t want to end up in a mad and thoughtless gift buying frenzy, the key is to think quick. Wintry gifts made from old/shrunken/moth-eaten woolly jumpers take hardly any time at all and in my experience are always very well received...
You will need:
- an old chunky knit jumper - preferably 100% wool
- pins & an air erasable pen
- a sewing machine
- any other embellishments you might want to add - think pompoms, embroidery thread, beads, appliqué etc
Christmas stocking
Start by making a paper pattern of your stocking.
Place the paper stocking onto your inside-out jumper and mark the outline either with pins, sandwiching the two layer of the jumper together. You could highlight the outline more clearly with tailor’s chalk or an air erasable fabric pen.


Discard the paper pattern and stitch around the shape of the stocking. You’ll get a much better finish if you stitch first and then cut around it, as opposed to cutting first and then sewing. Use a wide, shallow zig zag stitch, and for extra security stitch twice.

Now cut around your stitching leaving a couple of centimetres or so seam allowance.

Turn your stocking out to the right side, and you’re nearly done!

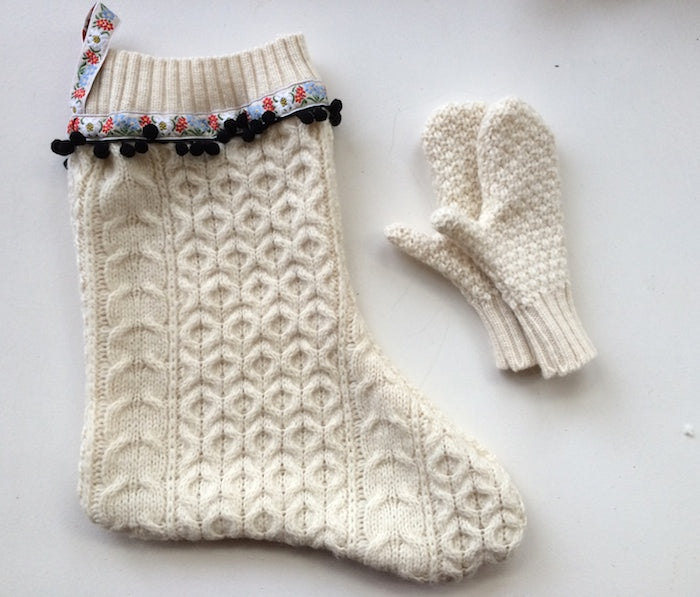
You can now embellish your Christmas stocking however you like - I ummed and ahhed between the embroidered tape and the pompom trim and in the end decided that when it comes to Christmas more is definitely more so I settled for both!

After I had stitched the pompom trim and the bottom length of the tape in place, I made a little hanging loop before stitching the top length of the tape to seal it all.

Let's get one thing straight - while a Christmas stocking like this makes an excellent gift - especially a matching trio for a new family - I have zero intention of giving this one away. It's miiiiiiine!
***
Mittens
Basically the same process as the stocking, but using your hand as a template!
Draw around your hand and pin the two layers of jumper into place.


Stitch, then cut your mittens out.

Mittens like this make great gifts regardless of age or gender, and even better if you can squeeze out a matching hat! Just use an exiting beanie as a template, stitch and cut, then make a little pompom to go on top.
Other things to try
Hot water bottle covers made from shrunken old sweaters always go down a treat, leg warmers, headbands, even a cute woolly miniskirt, pair of slippers or baby leggings from shrunken cashmere for the more ambitious among you. Now run to your local charity shop before all the good stuff gets snapped up!
-
Elisalex de Castro Peake

Comments on this post (4)
I love this! What’s the best thread and needle to use? Thanks!!
— Caitlin
Love the stocking! Off to look for an old sweater.
— Teri
These are both such great ideas! Thanks for sharing!
— Ginger
Thank you so much for this post! The first paragraph sums me up 100%!
— Emily